

Germplasm Manger Functionality
- Search and browse germplasm and germplasm lists.
- Build new germplasm lists.
- Review, reserve, and withdraw seed inventory (see Manage Inventory)
Search & Browse
Germplasm
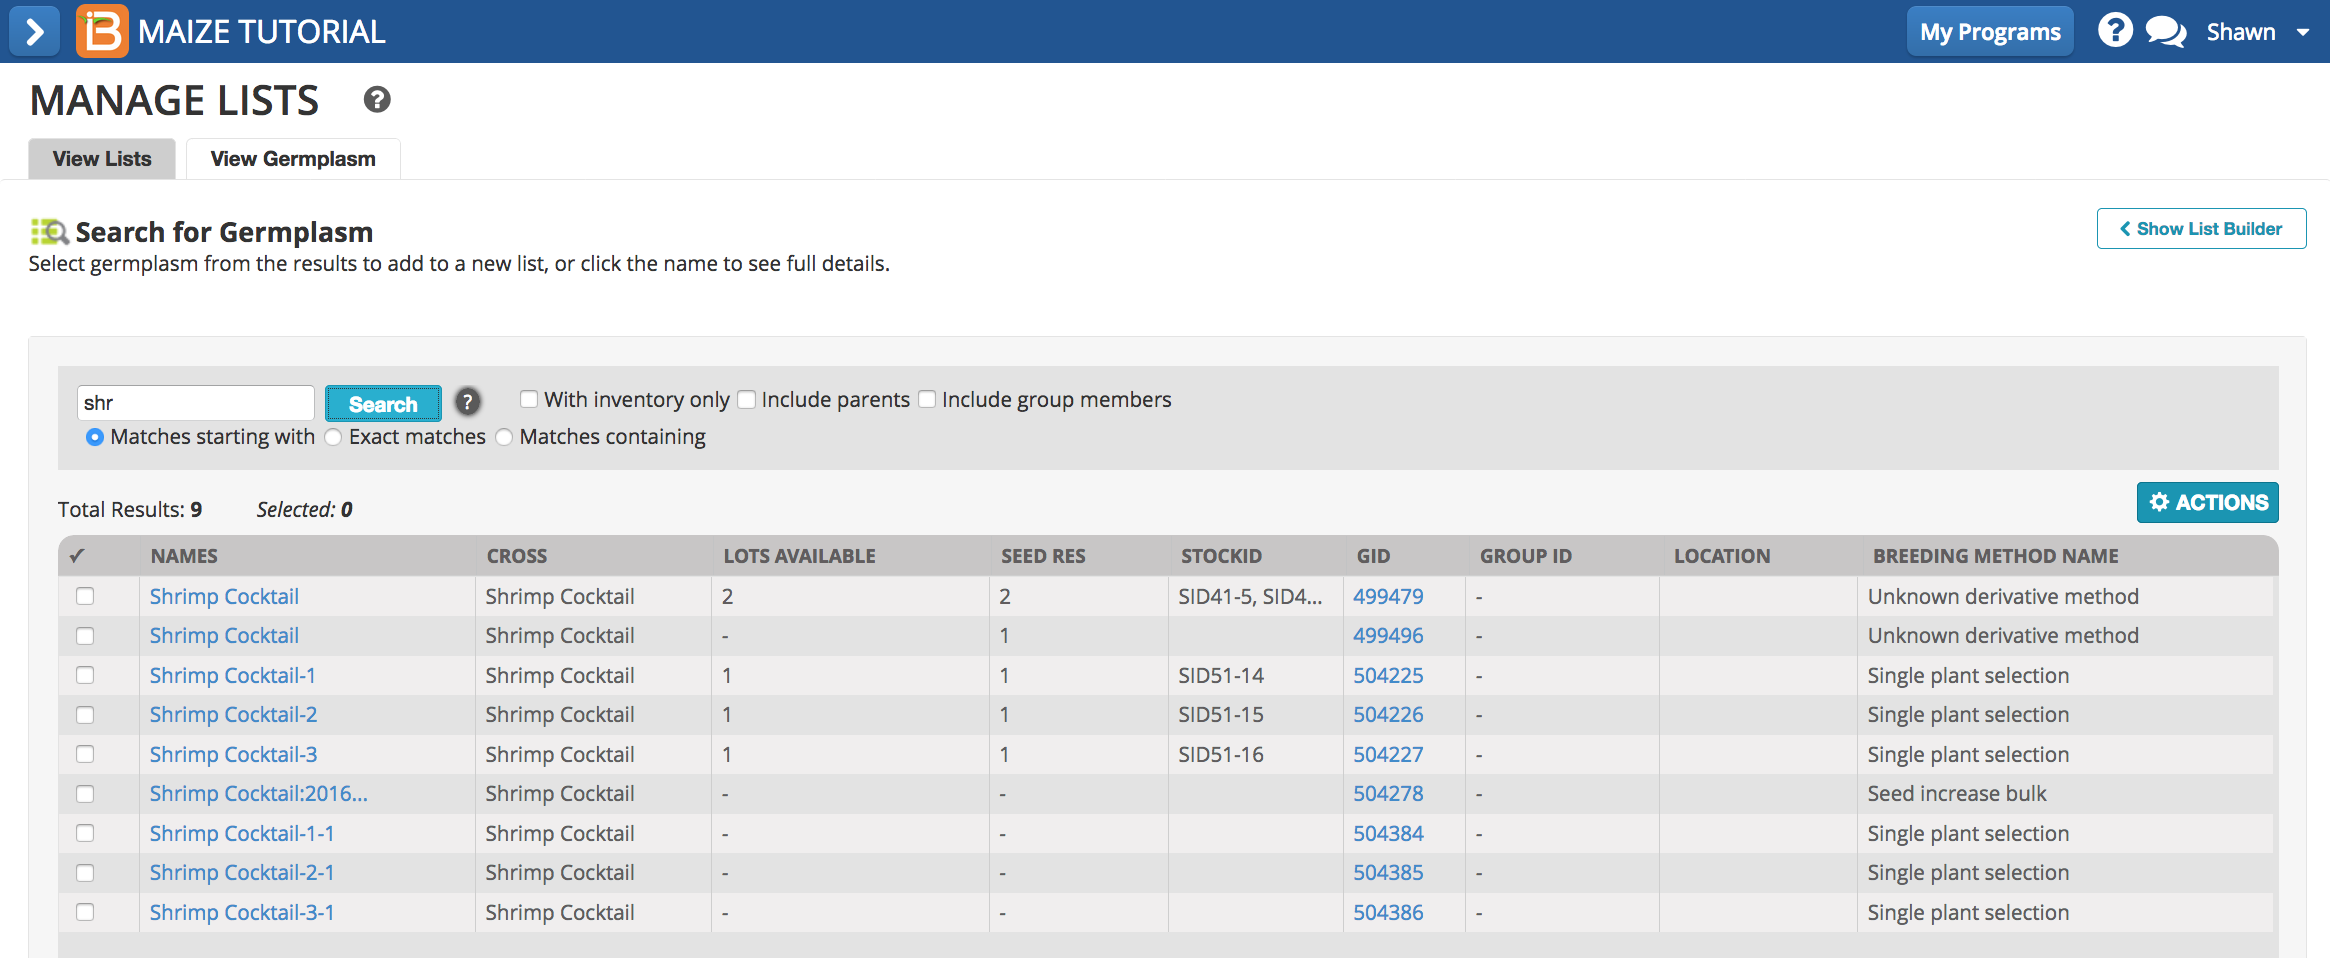
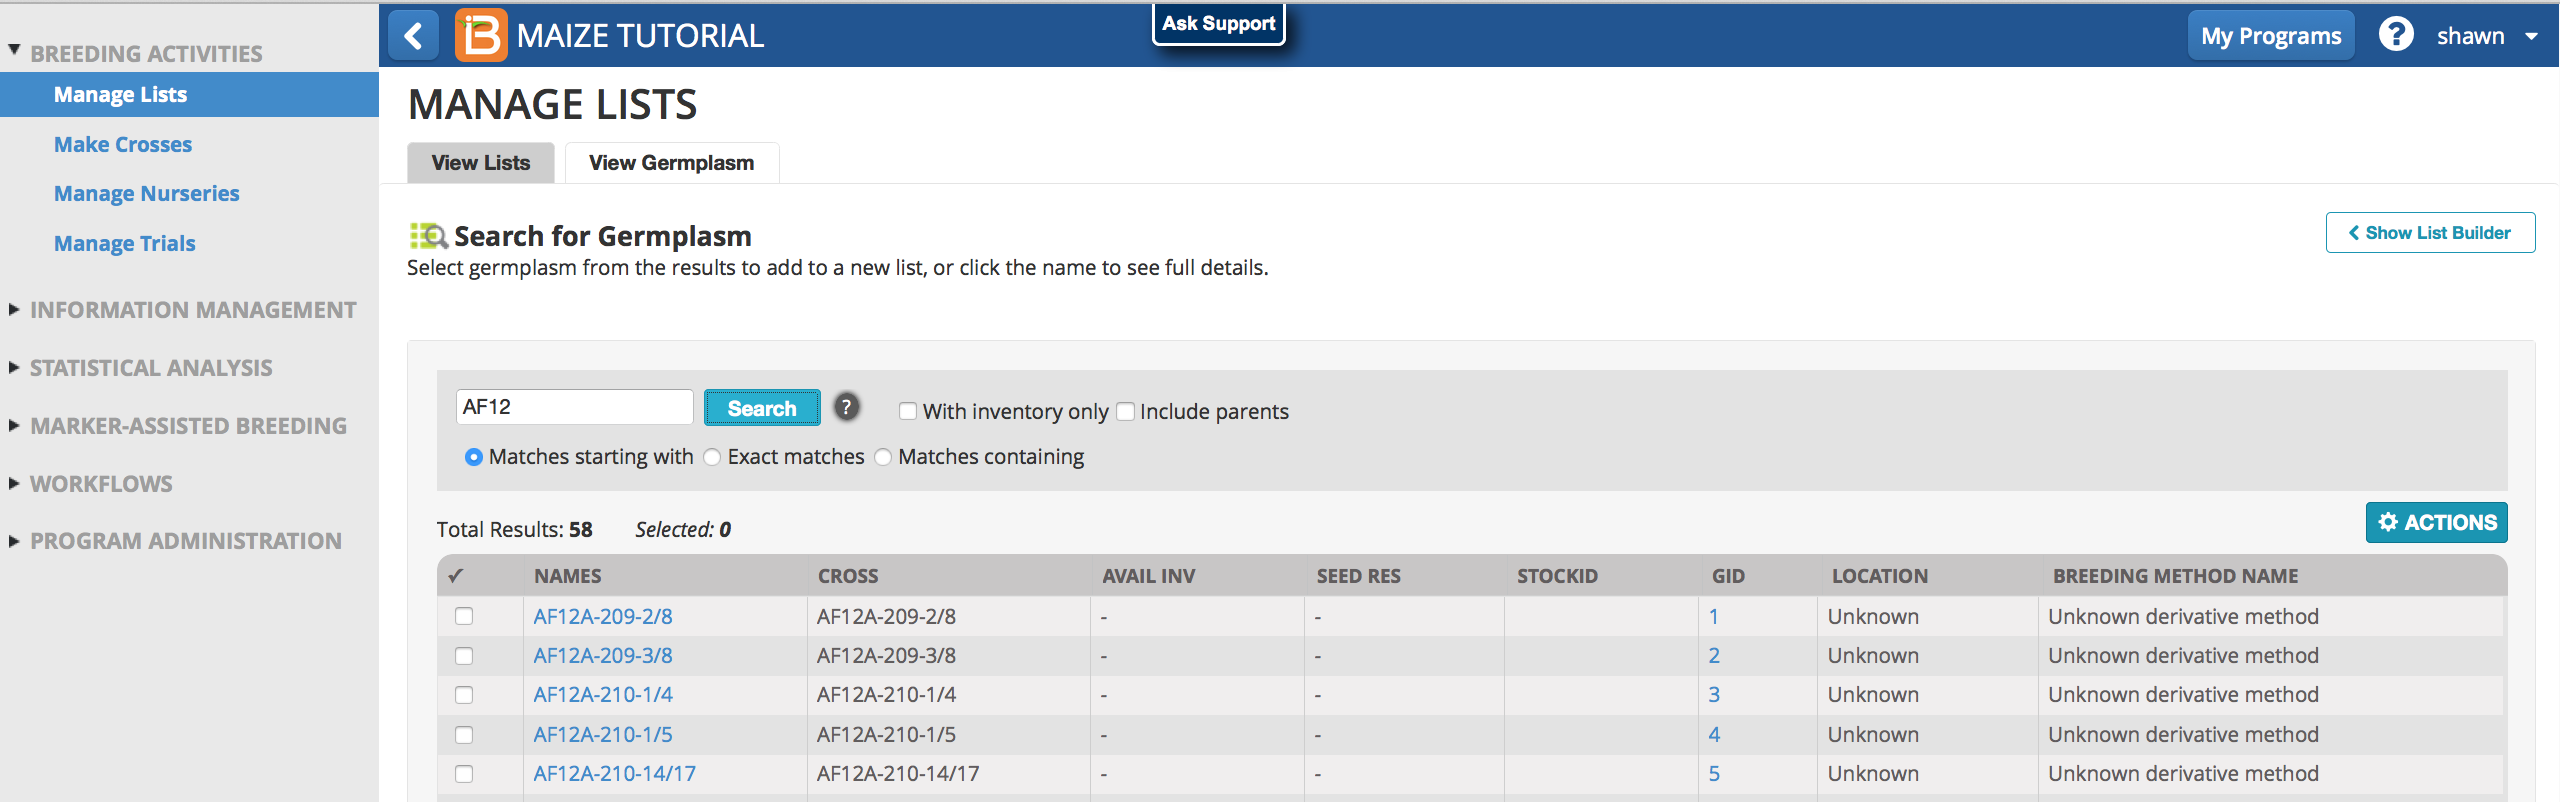
- Search germplasm by partial name, GID, or StockID.
Expand or narrow the search by selecting options.
- With inventory only
- Include parents
- Include group members
- Matches starting with
- Exact matches
- Matches containing
Germplasm Details
- Select individual Designations or GIDs (germplasm identifiers) to reveal germplasm details.
Pedigree
- Expand Pedigree Tree and select View Pedigree Graph.

The BMS database keeps a record of pedigree connections throughout the process of crossing and nursery advancement.
Germplasm Lists
Germplasm lists are the basis for nursery and trial design, as well as seed inventory management. Browse and search existing lists from the program and public databases with the Germplasm Manager. See more on Importing a New List under Manage Inventory.
- View lists allows you to browse, search, or import germplasm lists.
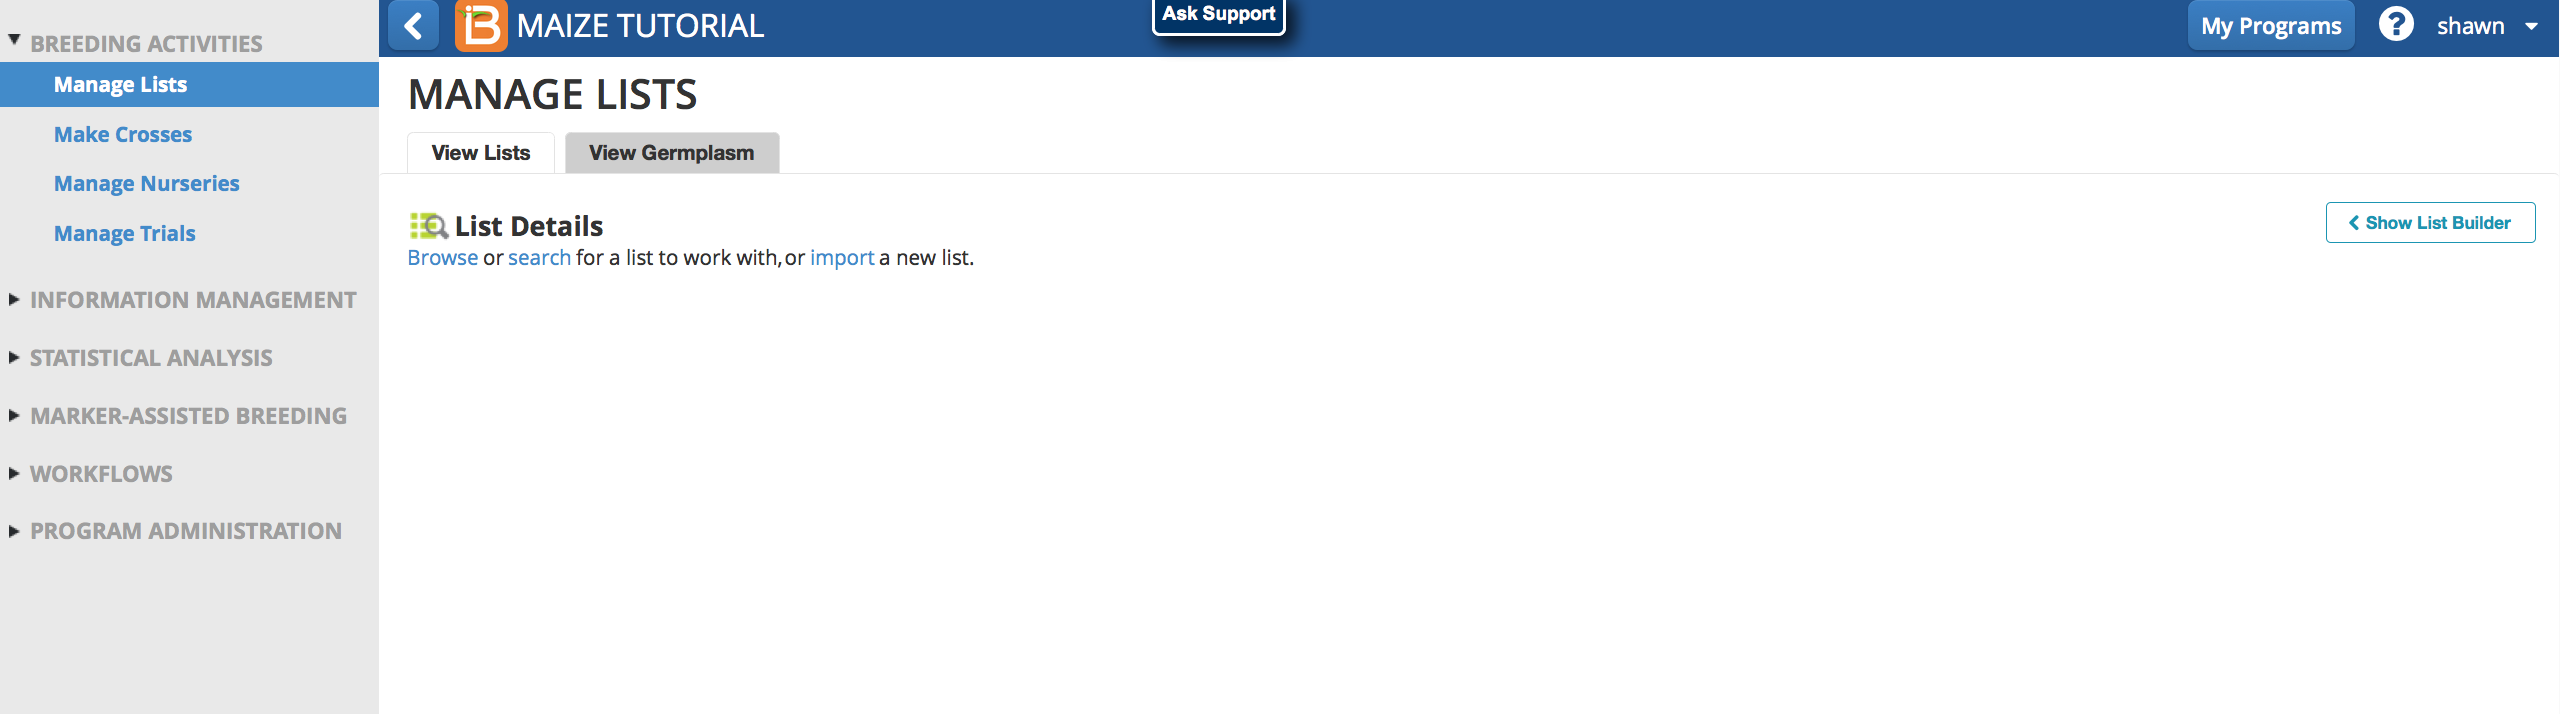
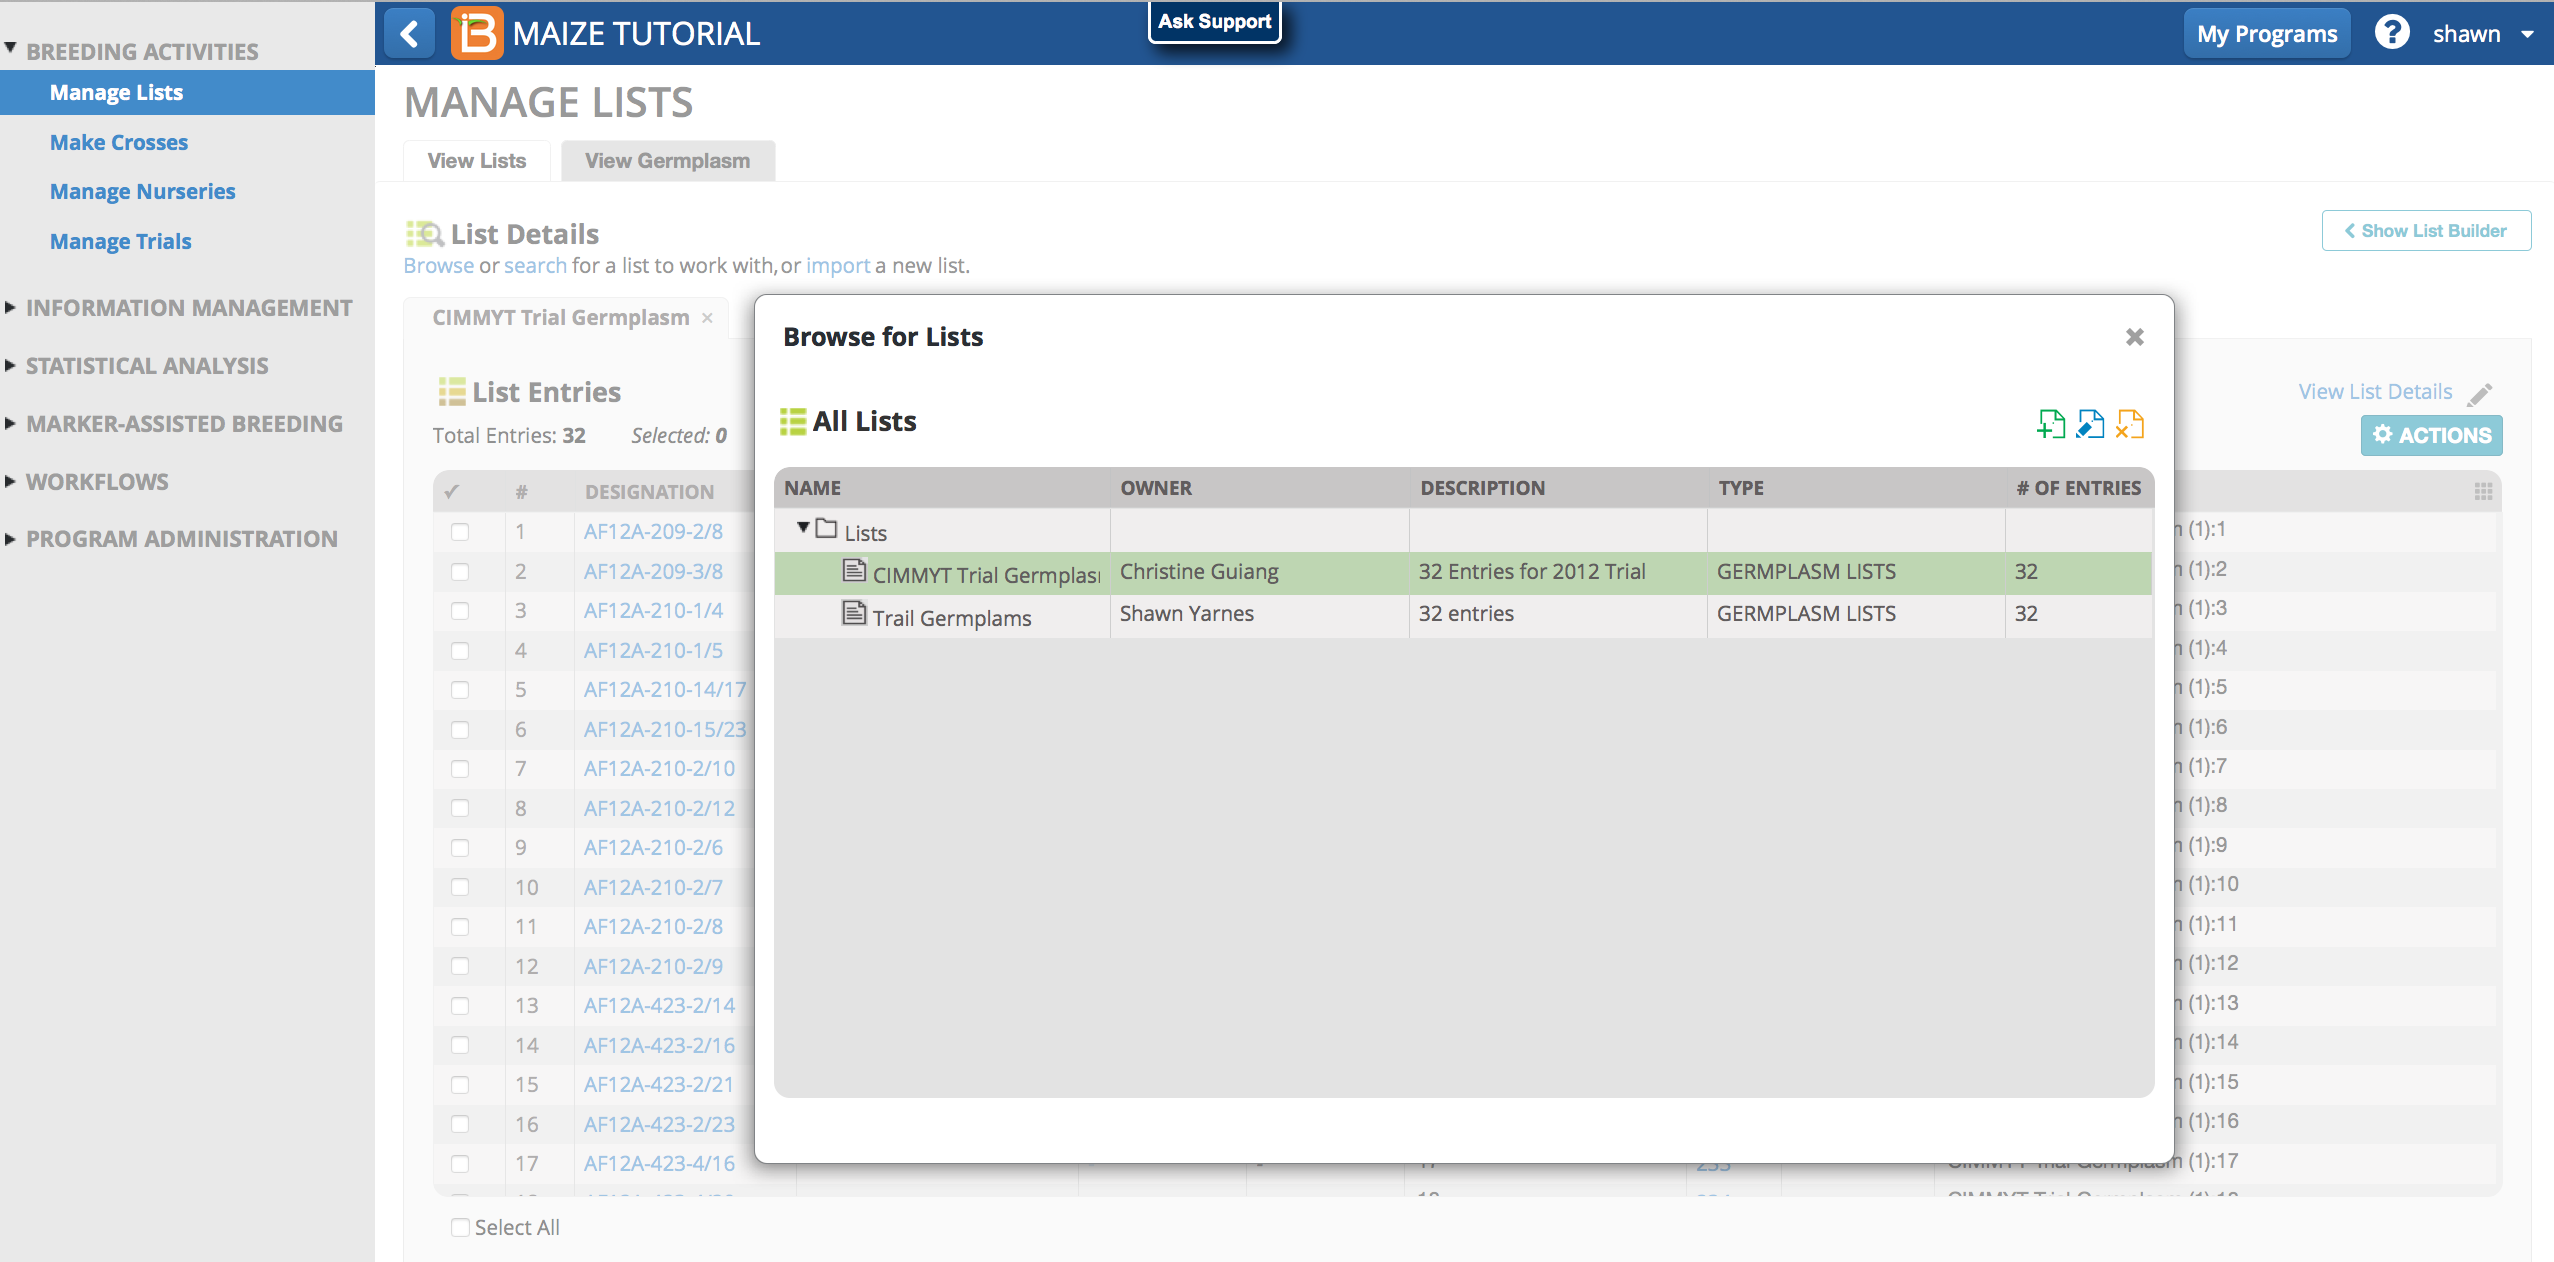
Browse Lists
- Select browse to see all germplasm lists in the BMS list directory. Select the list of interest in the directory popup window. Close the popup window to review List details.
Search Lists
- Search for germplasm lists by partial or exact matches to list name or Stock list ID.
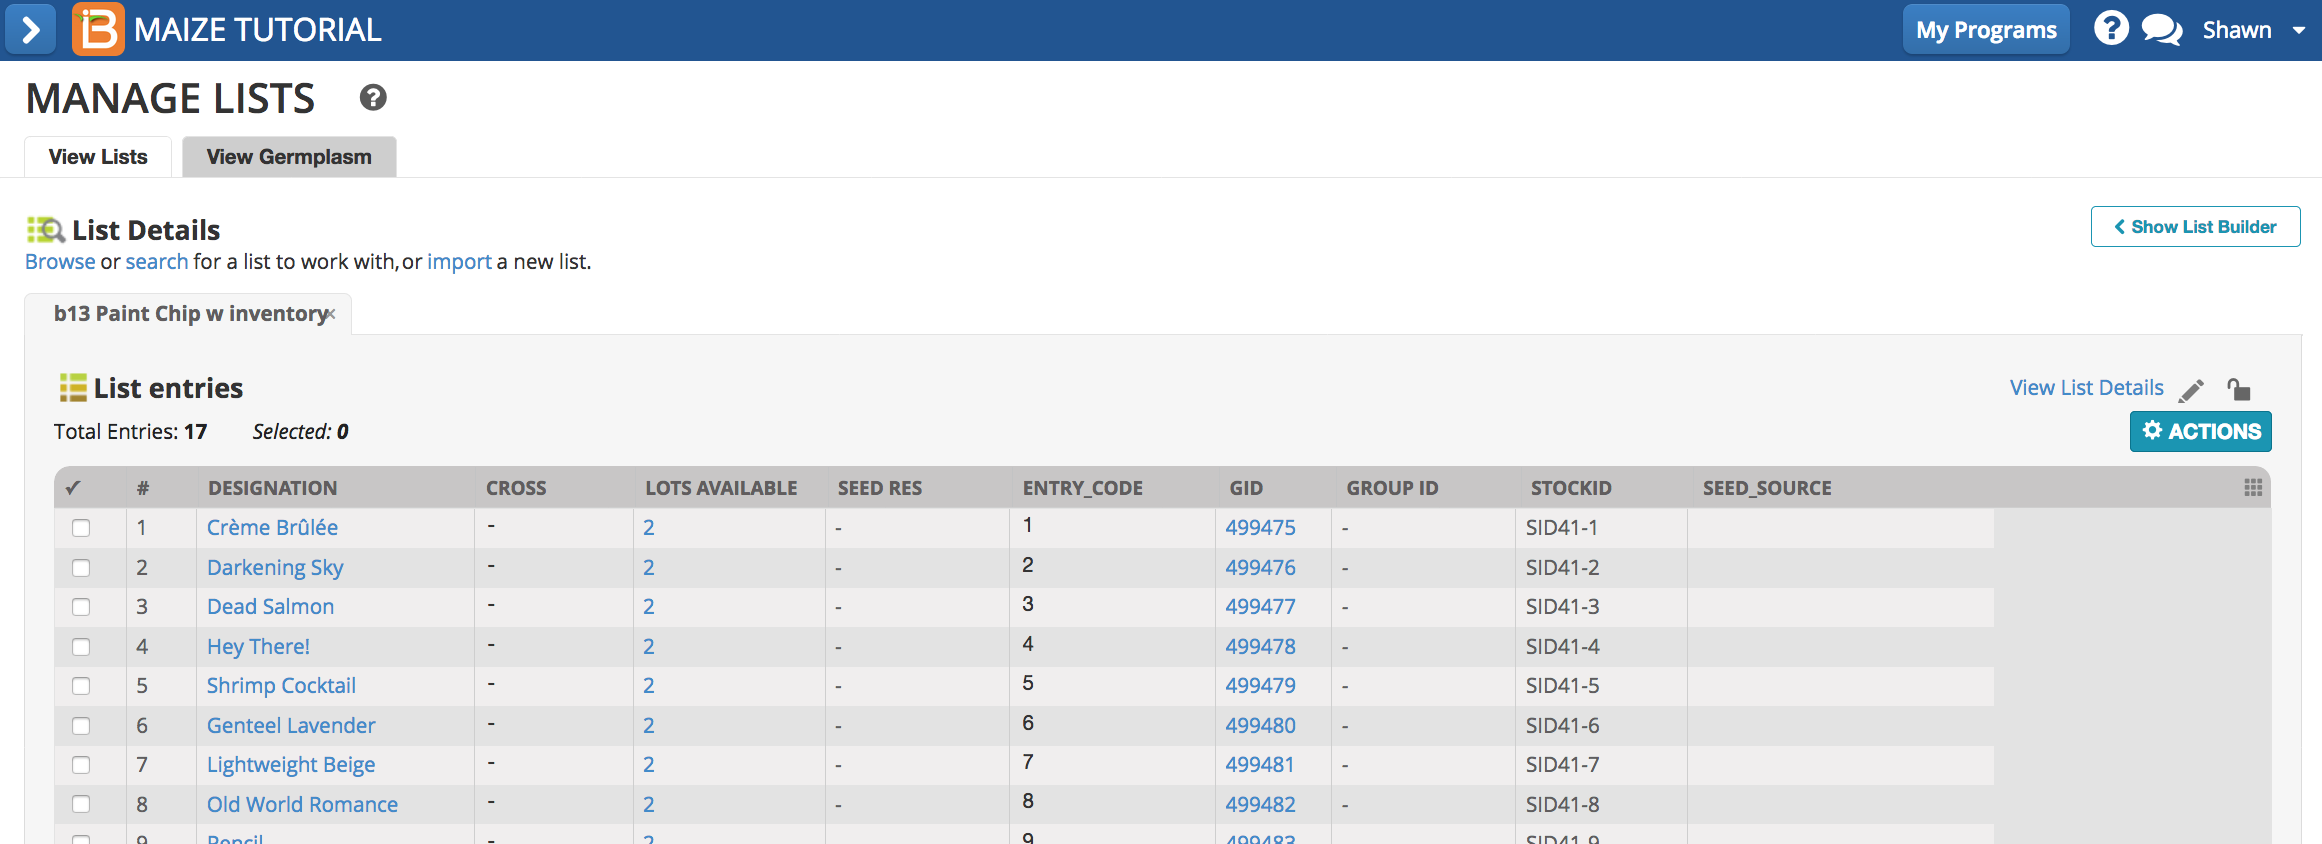
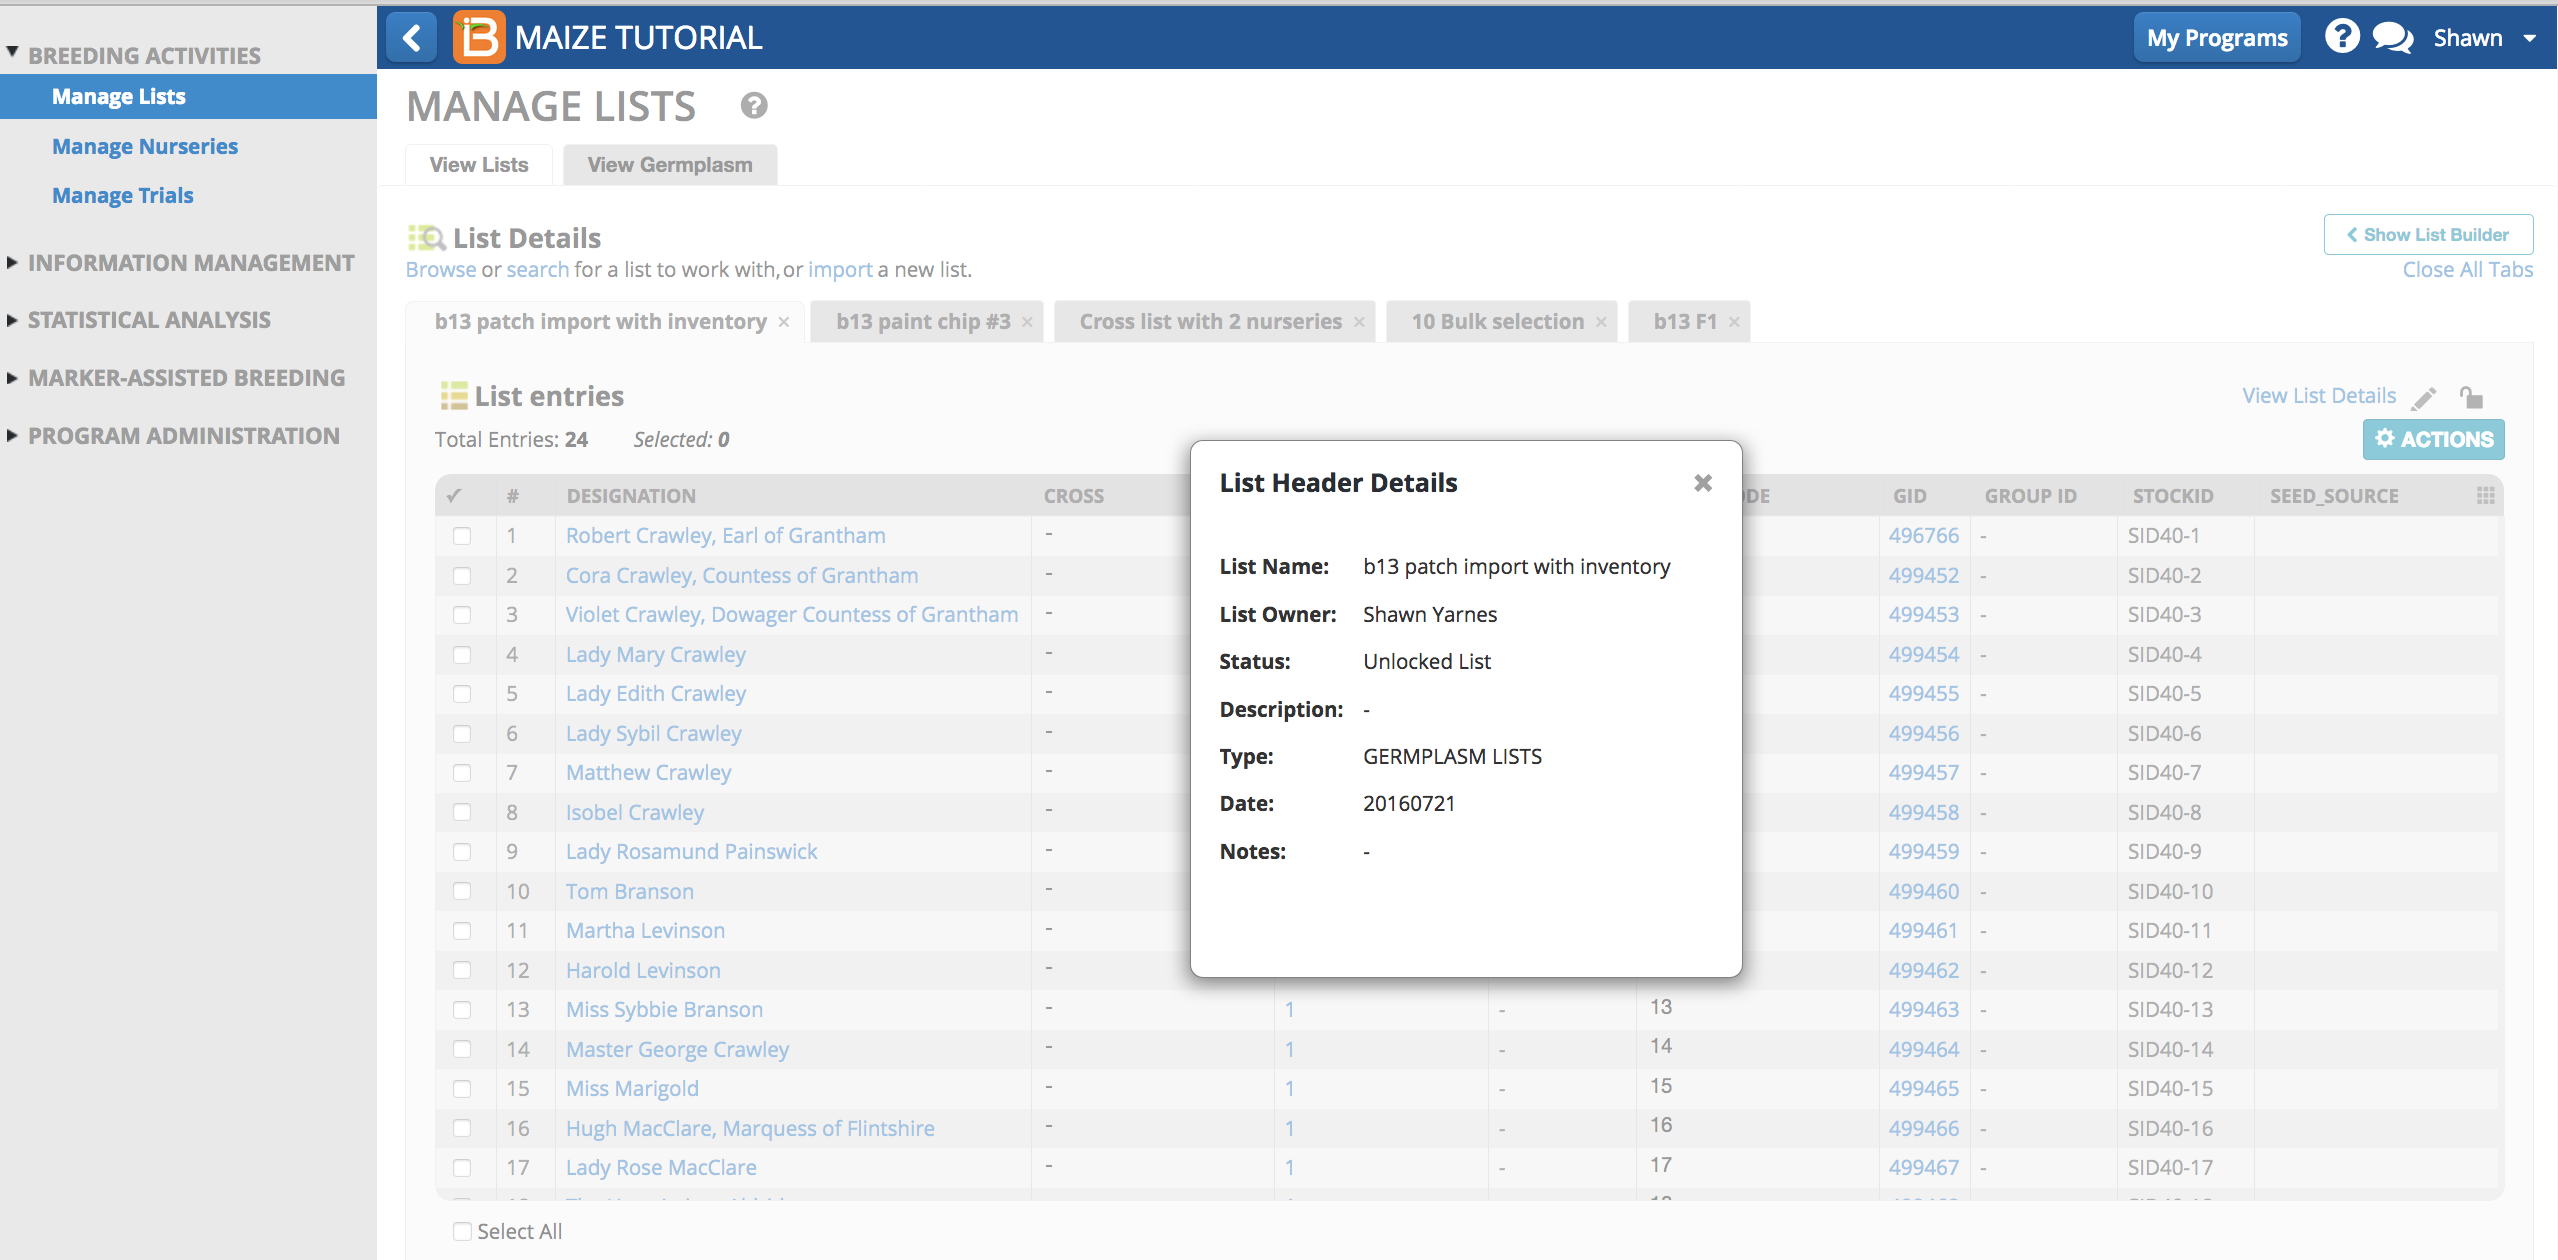
List Details
Each germplasm in the list is identified by GID (germplasm identifier), designation, and list entry number. Additional information, like cross, seed lots, and StockIDs, is also available. Values in the LOTS AVAILABLE and STOCKID indicate associated inventory (See more Manage Inventory).
-
Select View List Details to review list details.
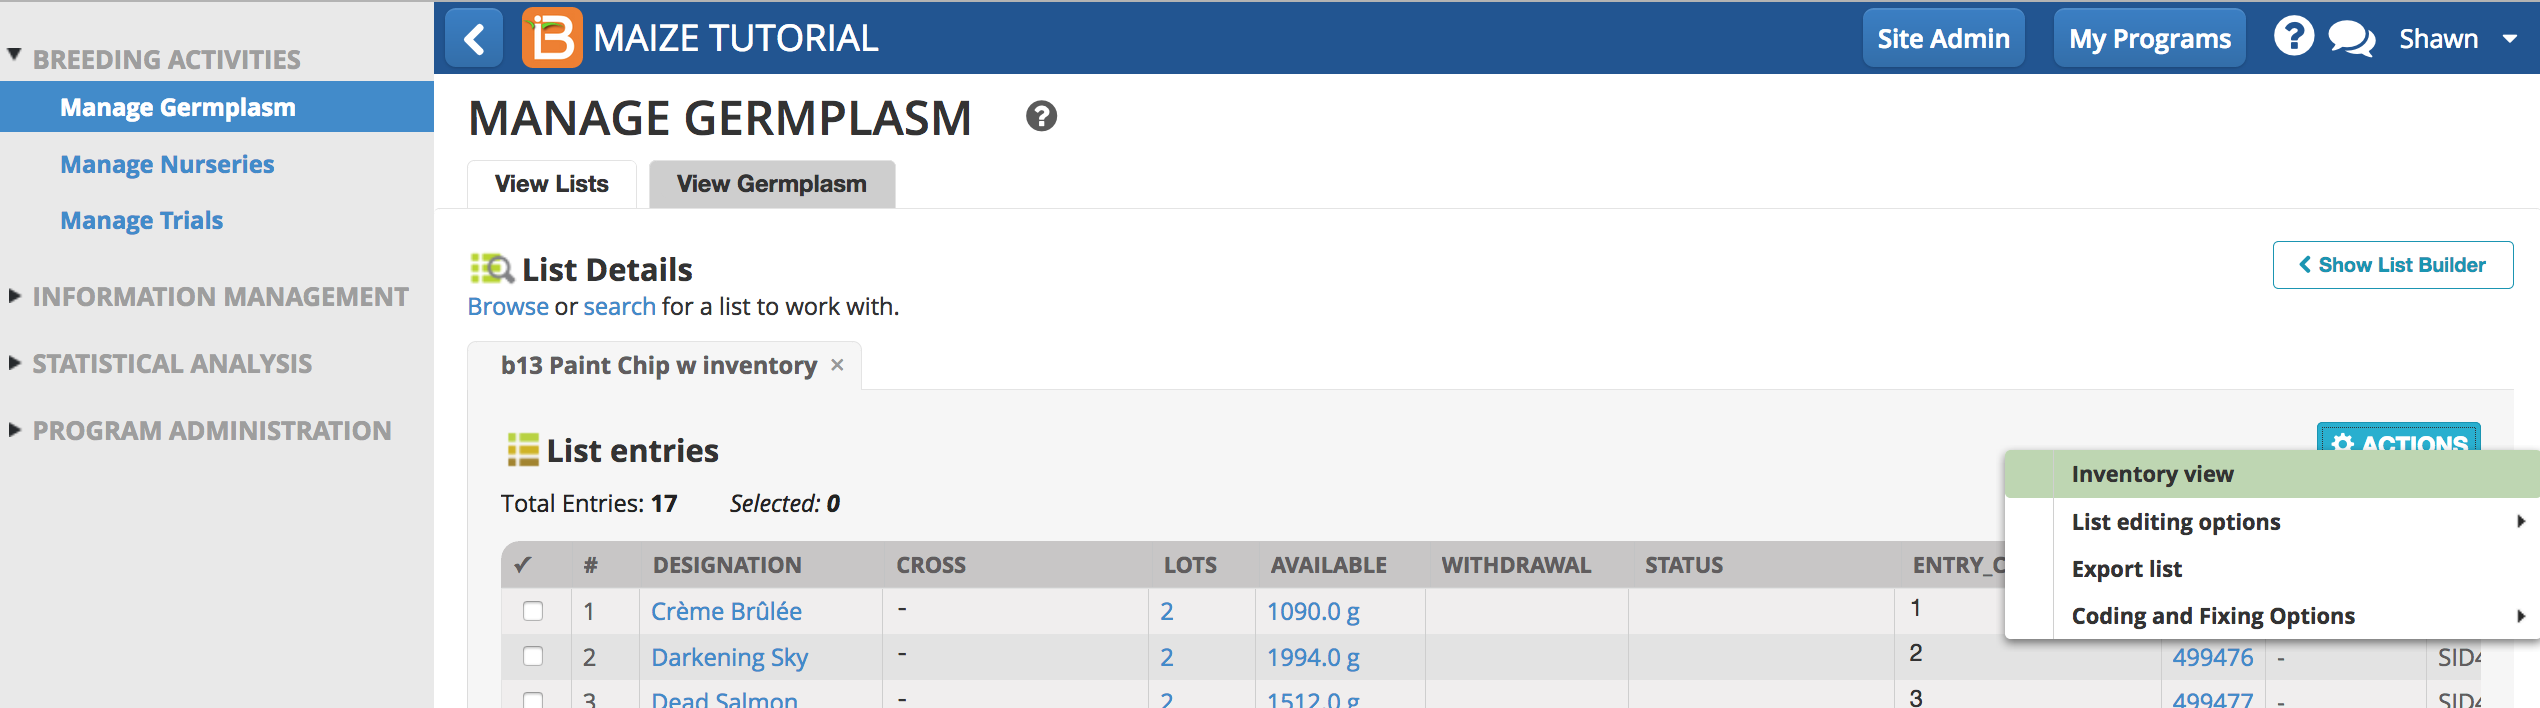
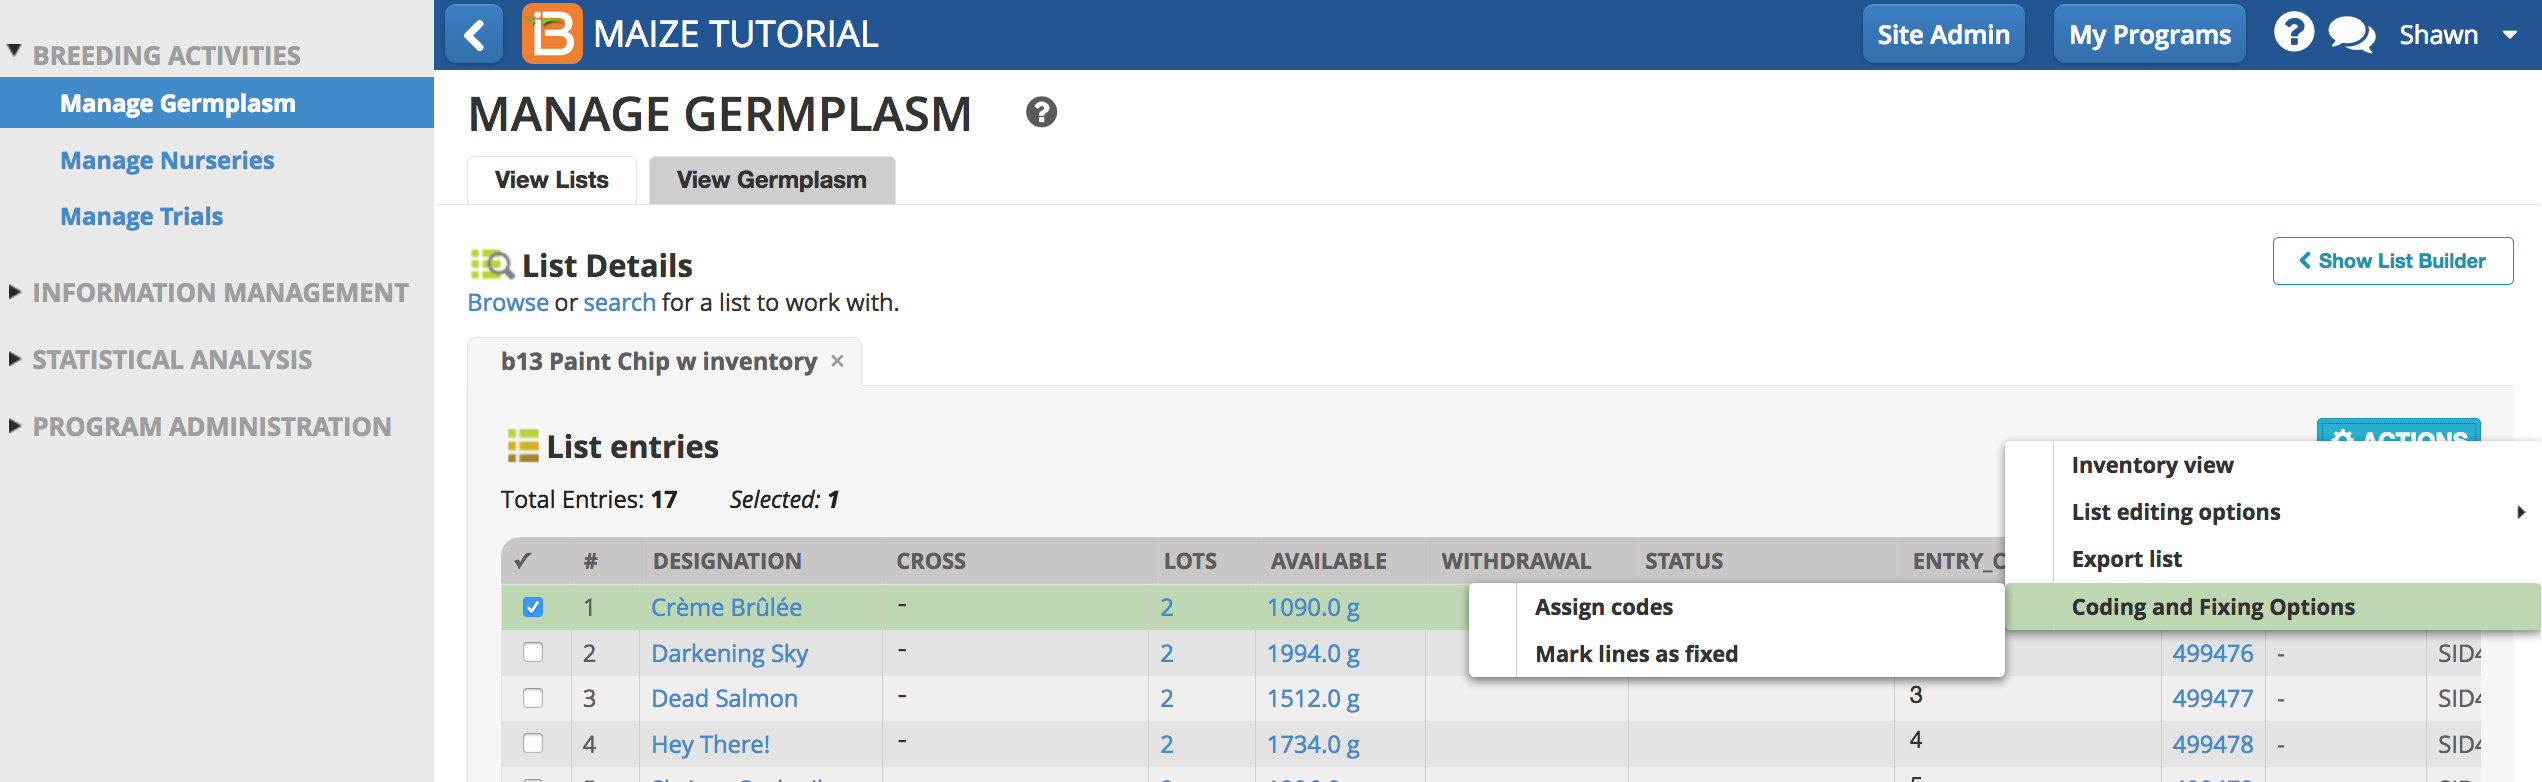
List Actions
Inventory View
- Select Inventory View to see all inventory entries for germplasm within a list. (see Manage Inventory)
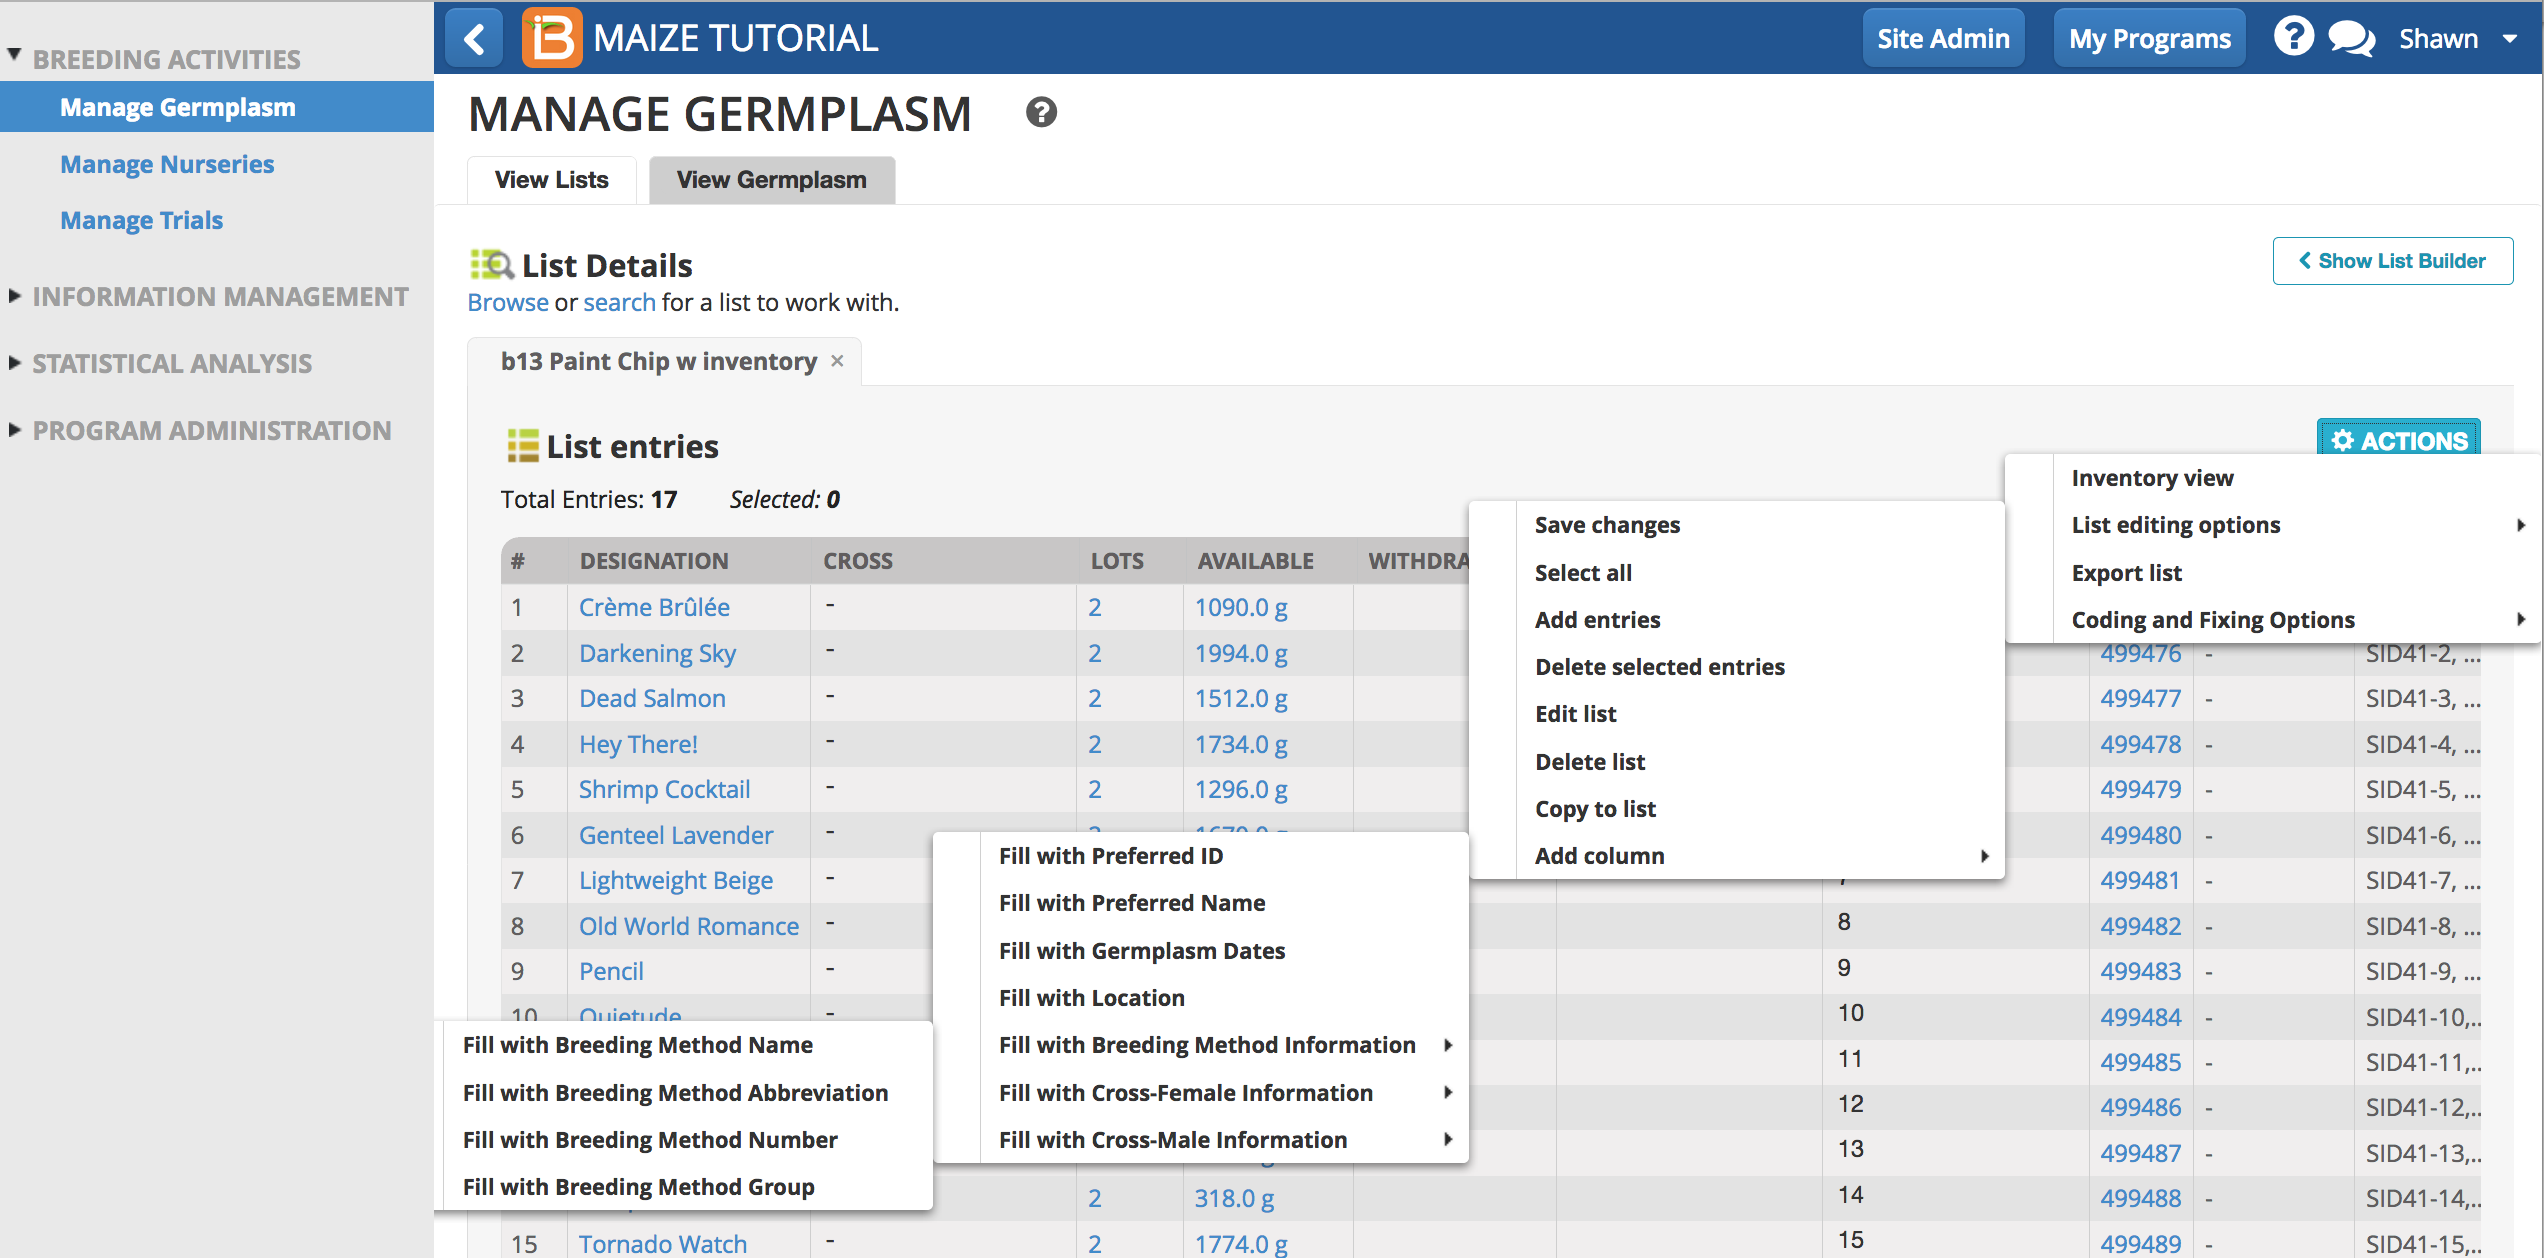
List Editing Options
- Select List Editing Option to reveal options for list editing, including the inclusion of additional columns of data.
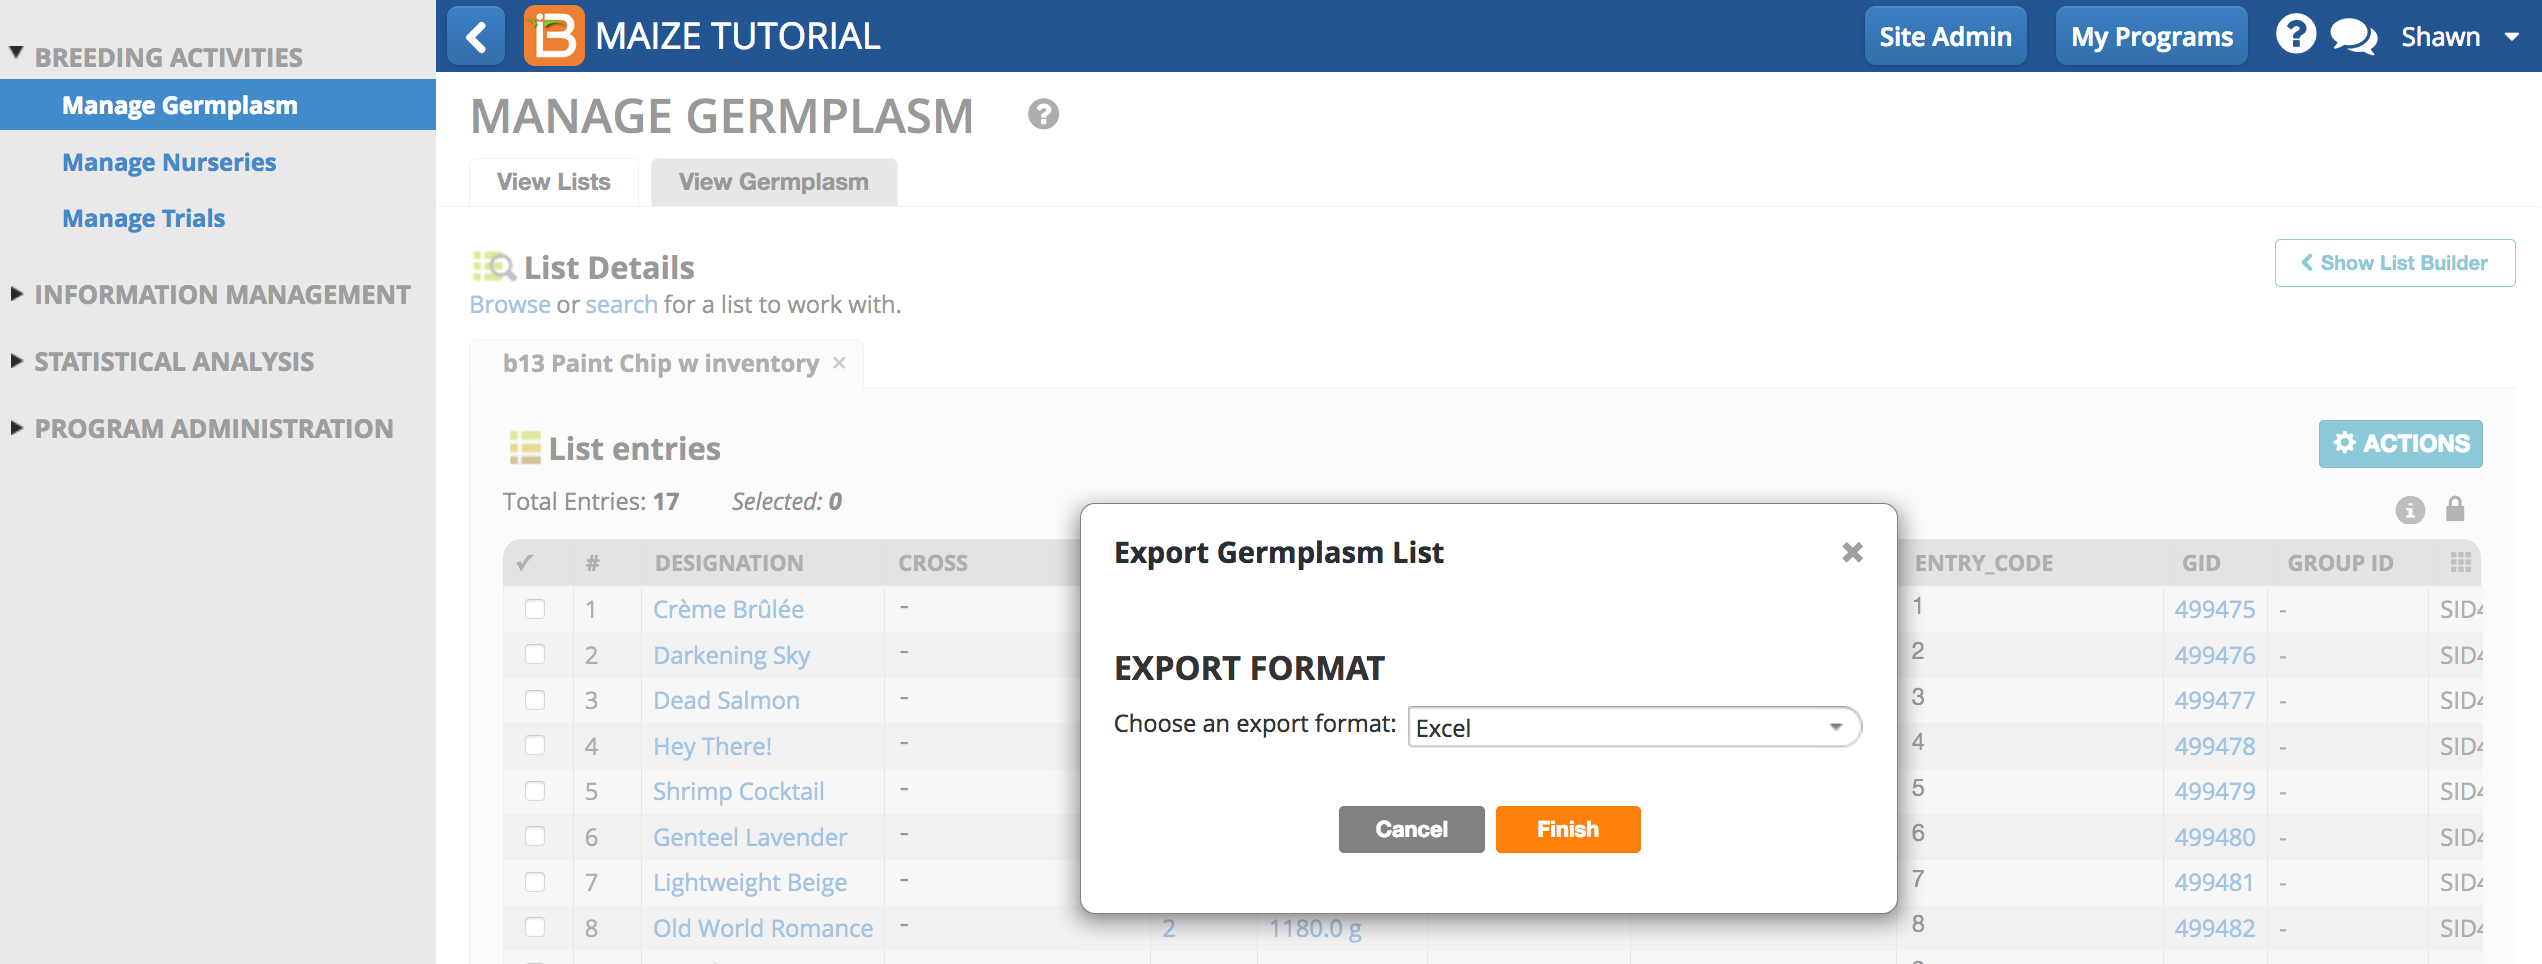
Export List
- Lock the list by selecting the padlock icon. Select the Actions button. Notice that locked lists offer fewer Actions options. Select Export List and select the appropriate output file type.
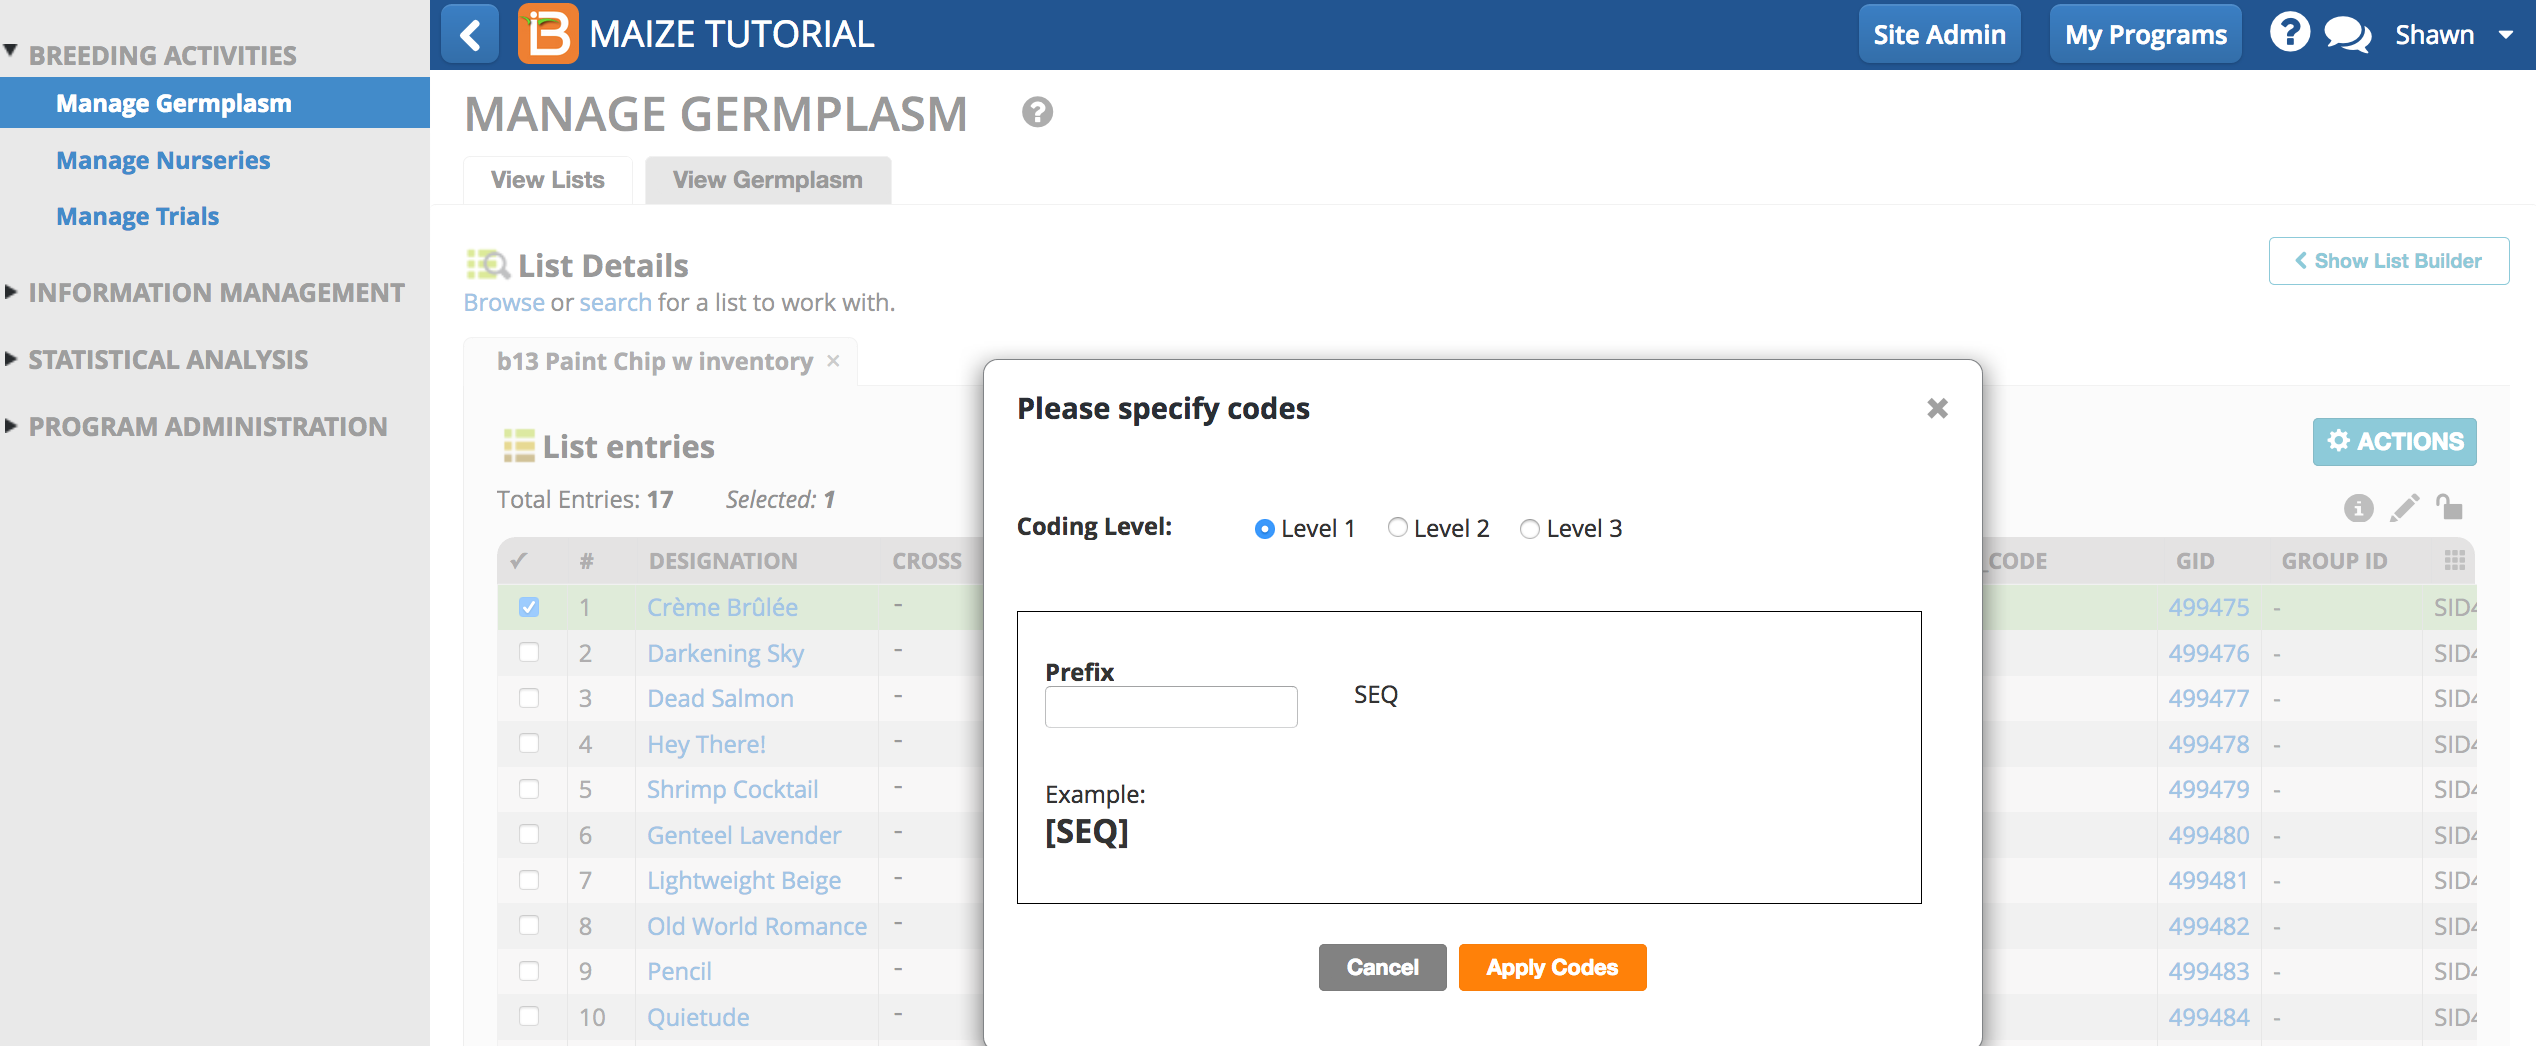
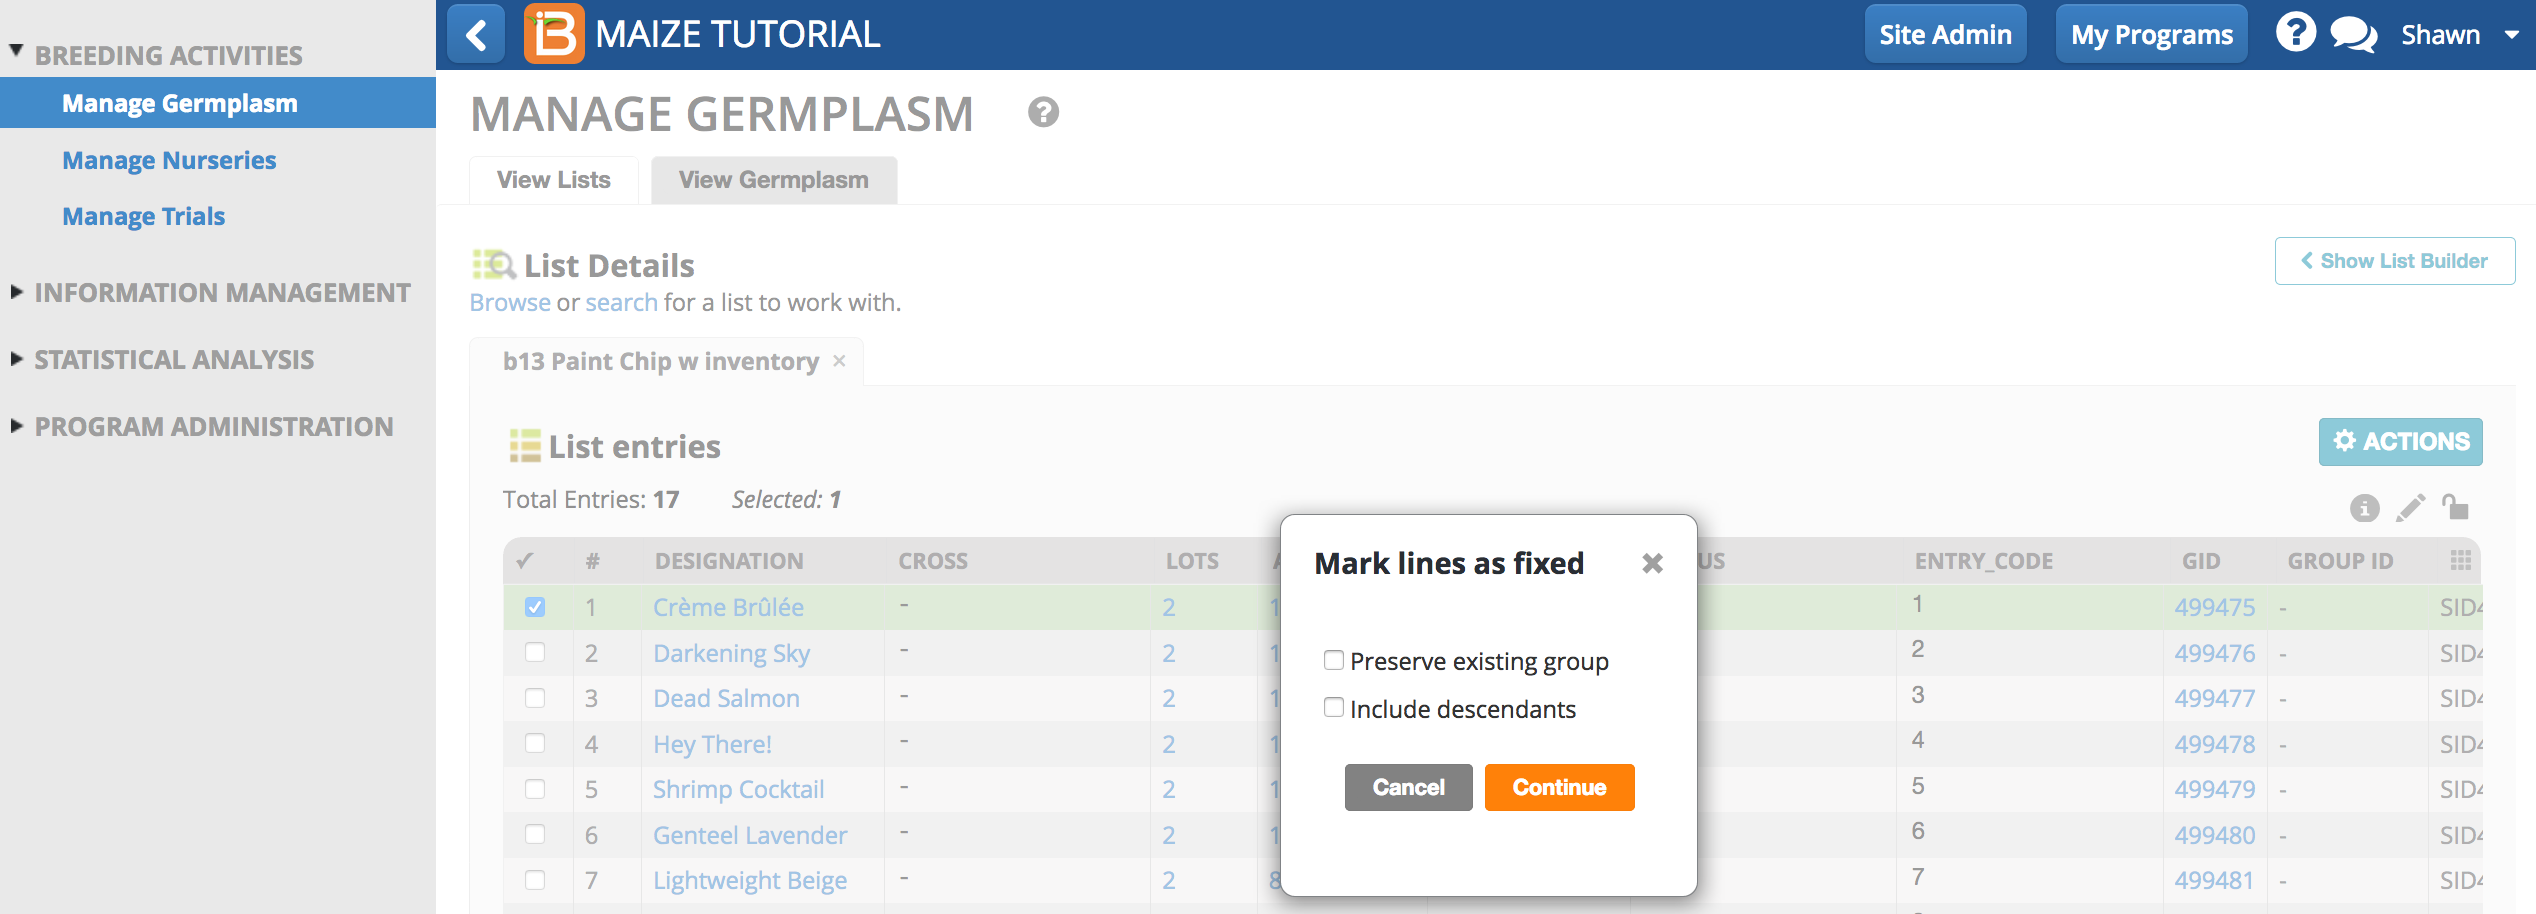
Coding and Fixing Options
Nominate lines considered advanced enough to form a genotype group, or fixed lines. Descendant lines are linked into the group formed by this founding line -allowing easy query of inventory and data of grouped lines. In addition, users can elect to code grouped lines by adding a code name to a member of a group. This code name is then inherited by each new member of the group so that group members can be easily identified. Three coding levels are provided so, for example, users could elect to code lines entering multi-location trials, at level 1, then those entering regional trials at level 2 and finally release candidates as level three 3. In hybrid breeding programs, test hybrids first produced between grouped parents are founders of new groups and subsequent hybrids made from parents in the same parental groups are added to the hybrid group.
Build a New List
- Search by exact matches or partial matches to list names, germplasm designations, or GIDs (germplasm IDs). The search feature can also provide parental information. Searches are not case-sensitive.
- Select germplasm of interest in and drag and drop the selections into the build a new list window.
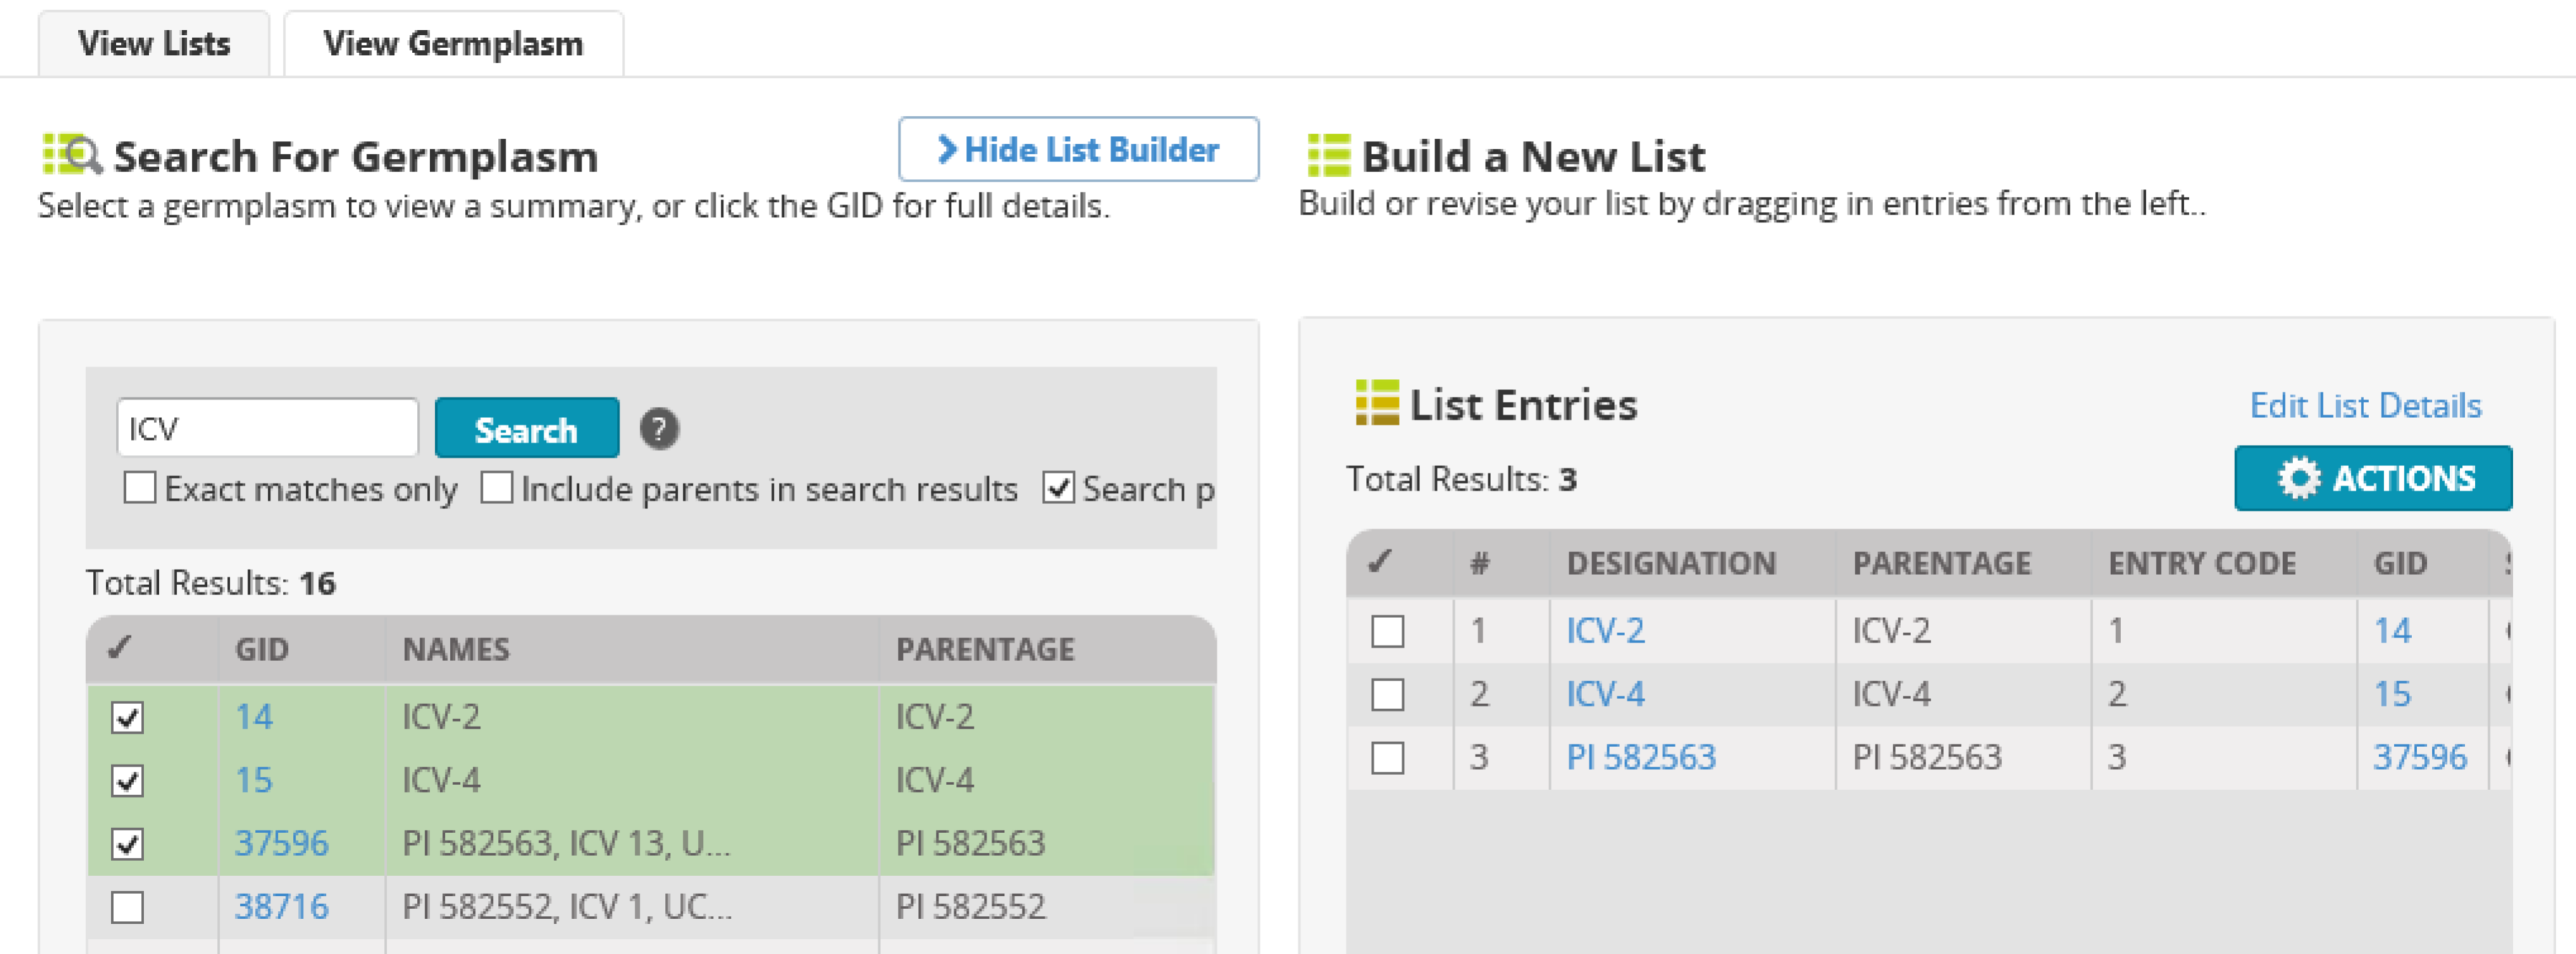
- Enter the list details. The list name must be unique to the program database. Select Save.
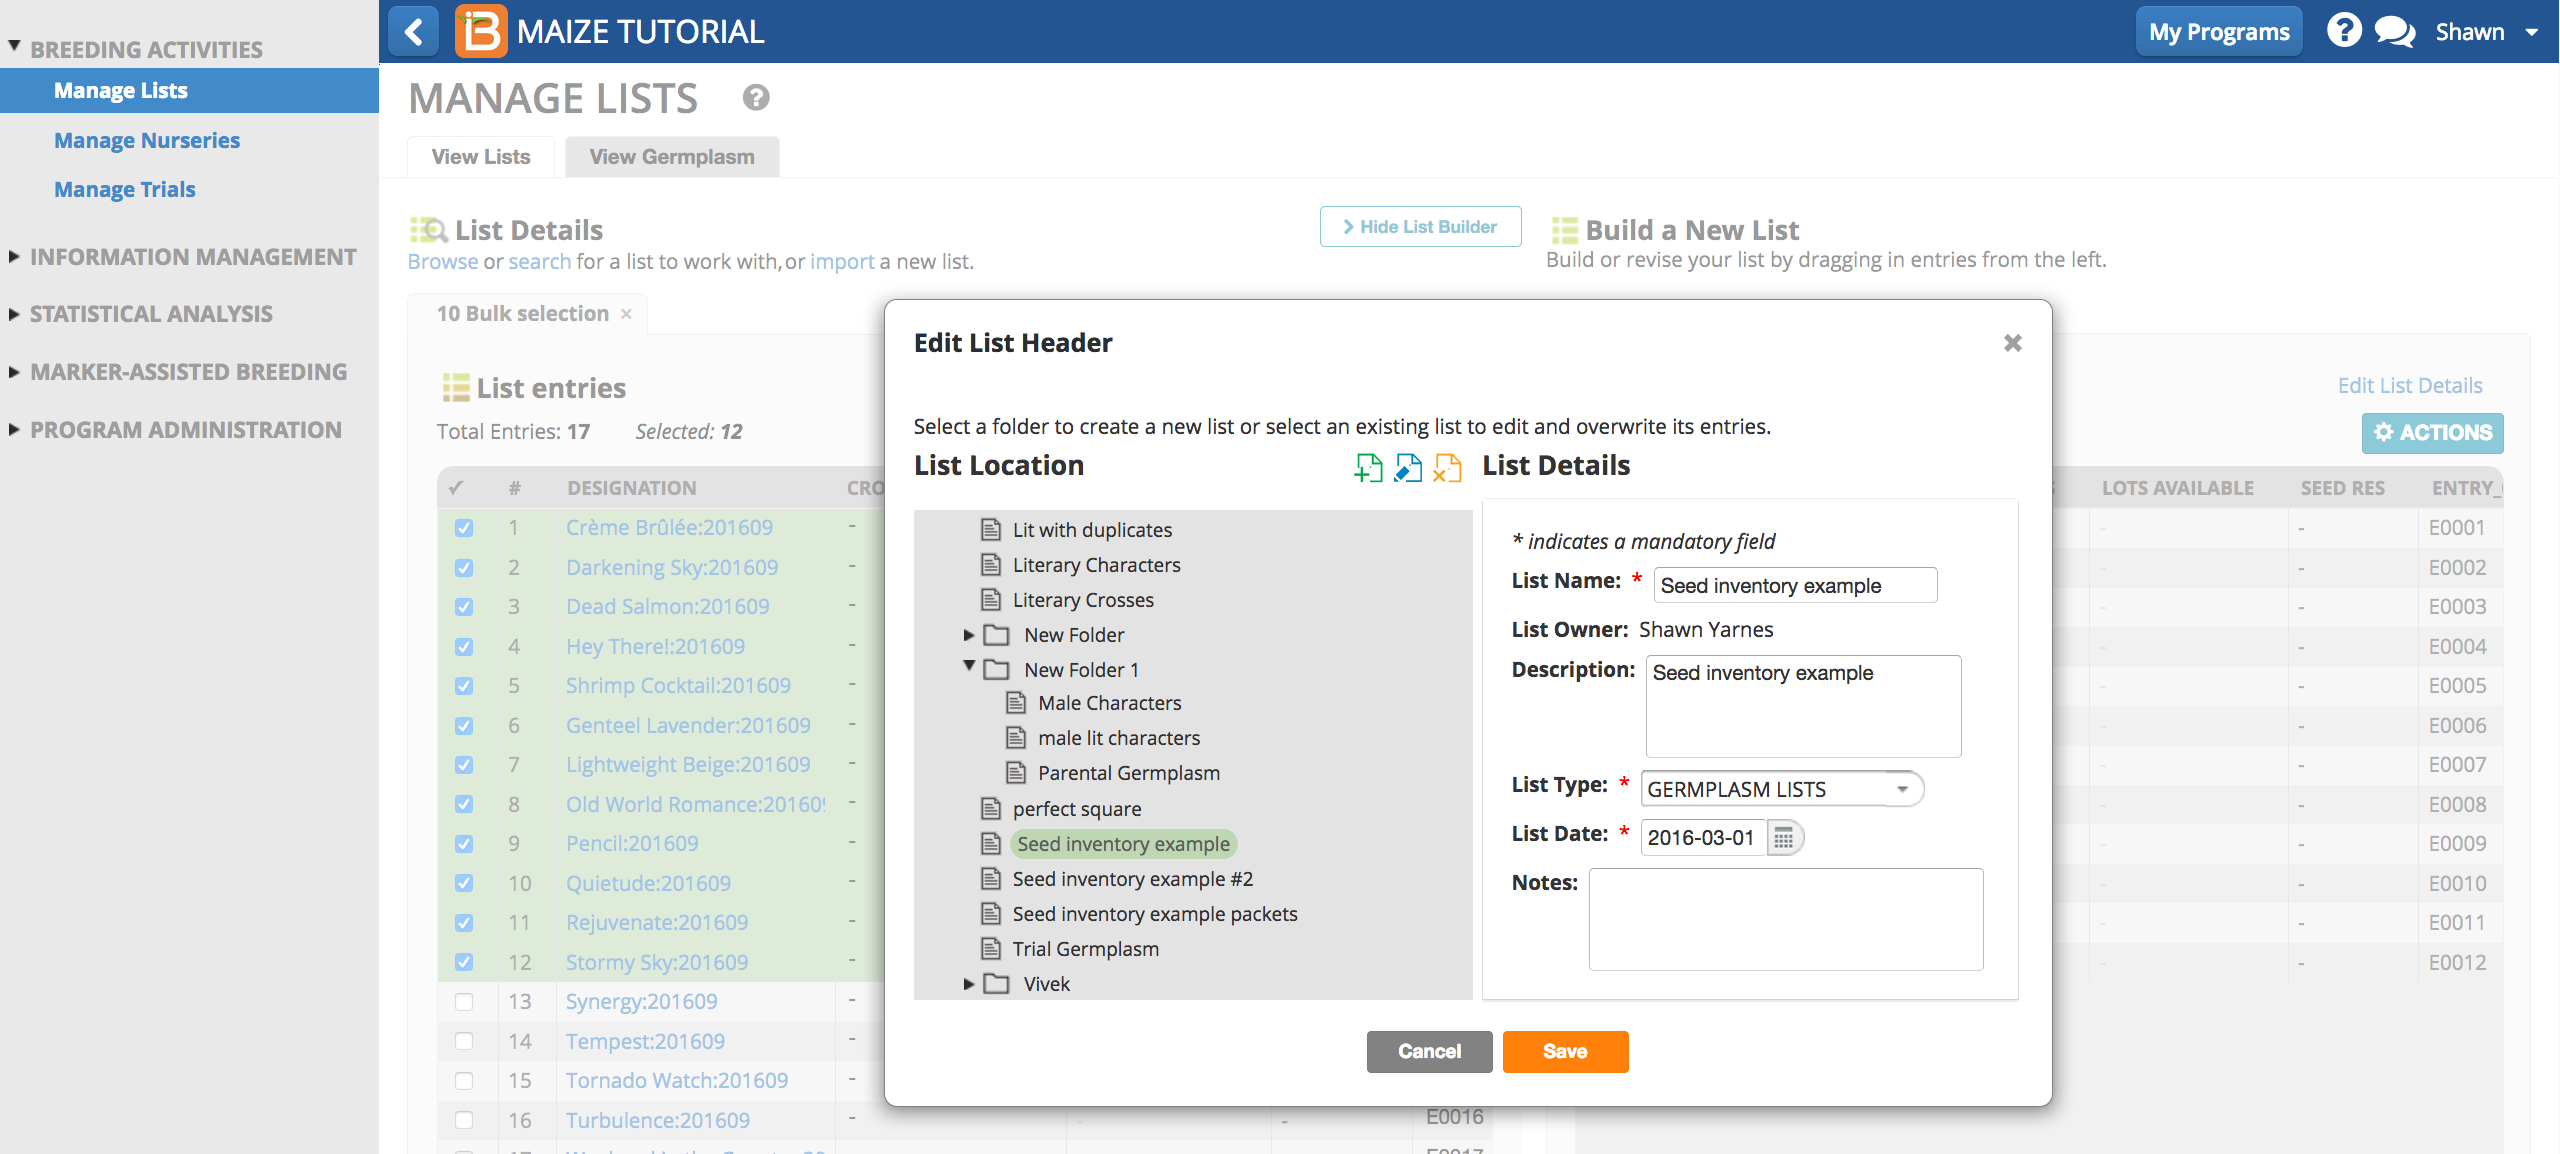
The newly created list now appears in the Program Lists file folder. The list can be renamed by selecting the pen icon and locked against further editing by selecting the lock icon. The Build a New List pane opened while browsing will remain open when you move to the Search tab.
