

About
Once you have your observation datasets in place you can start collecting data for your study. You can do this in several ways:
- Inline editing
- Study Book file export and import
v12 Beta
Observation and sub-observation tabs are under active development. V12 has expanded functionality under sub-observations that will be migrated to the observation tab in upcoming releases.
Observations Tab
The following data collection instructions apply to the observations tab. You will find expanded functionality
Inline Edits
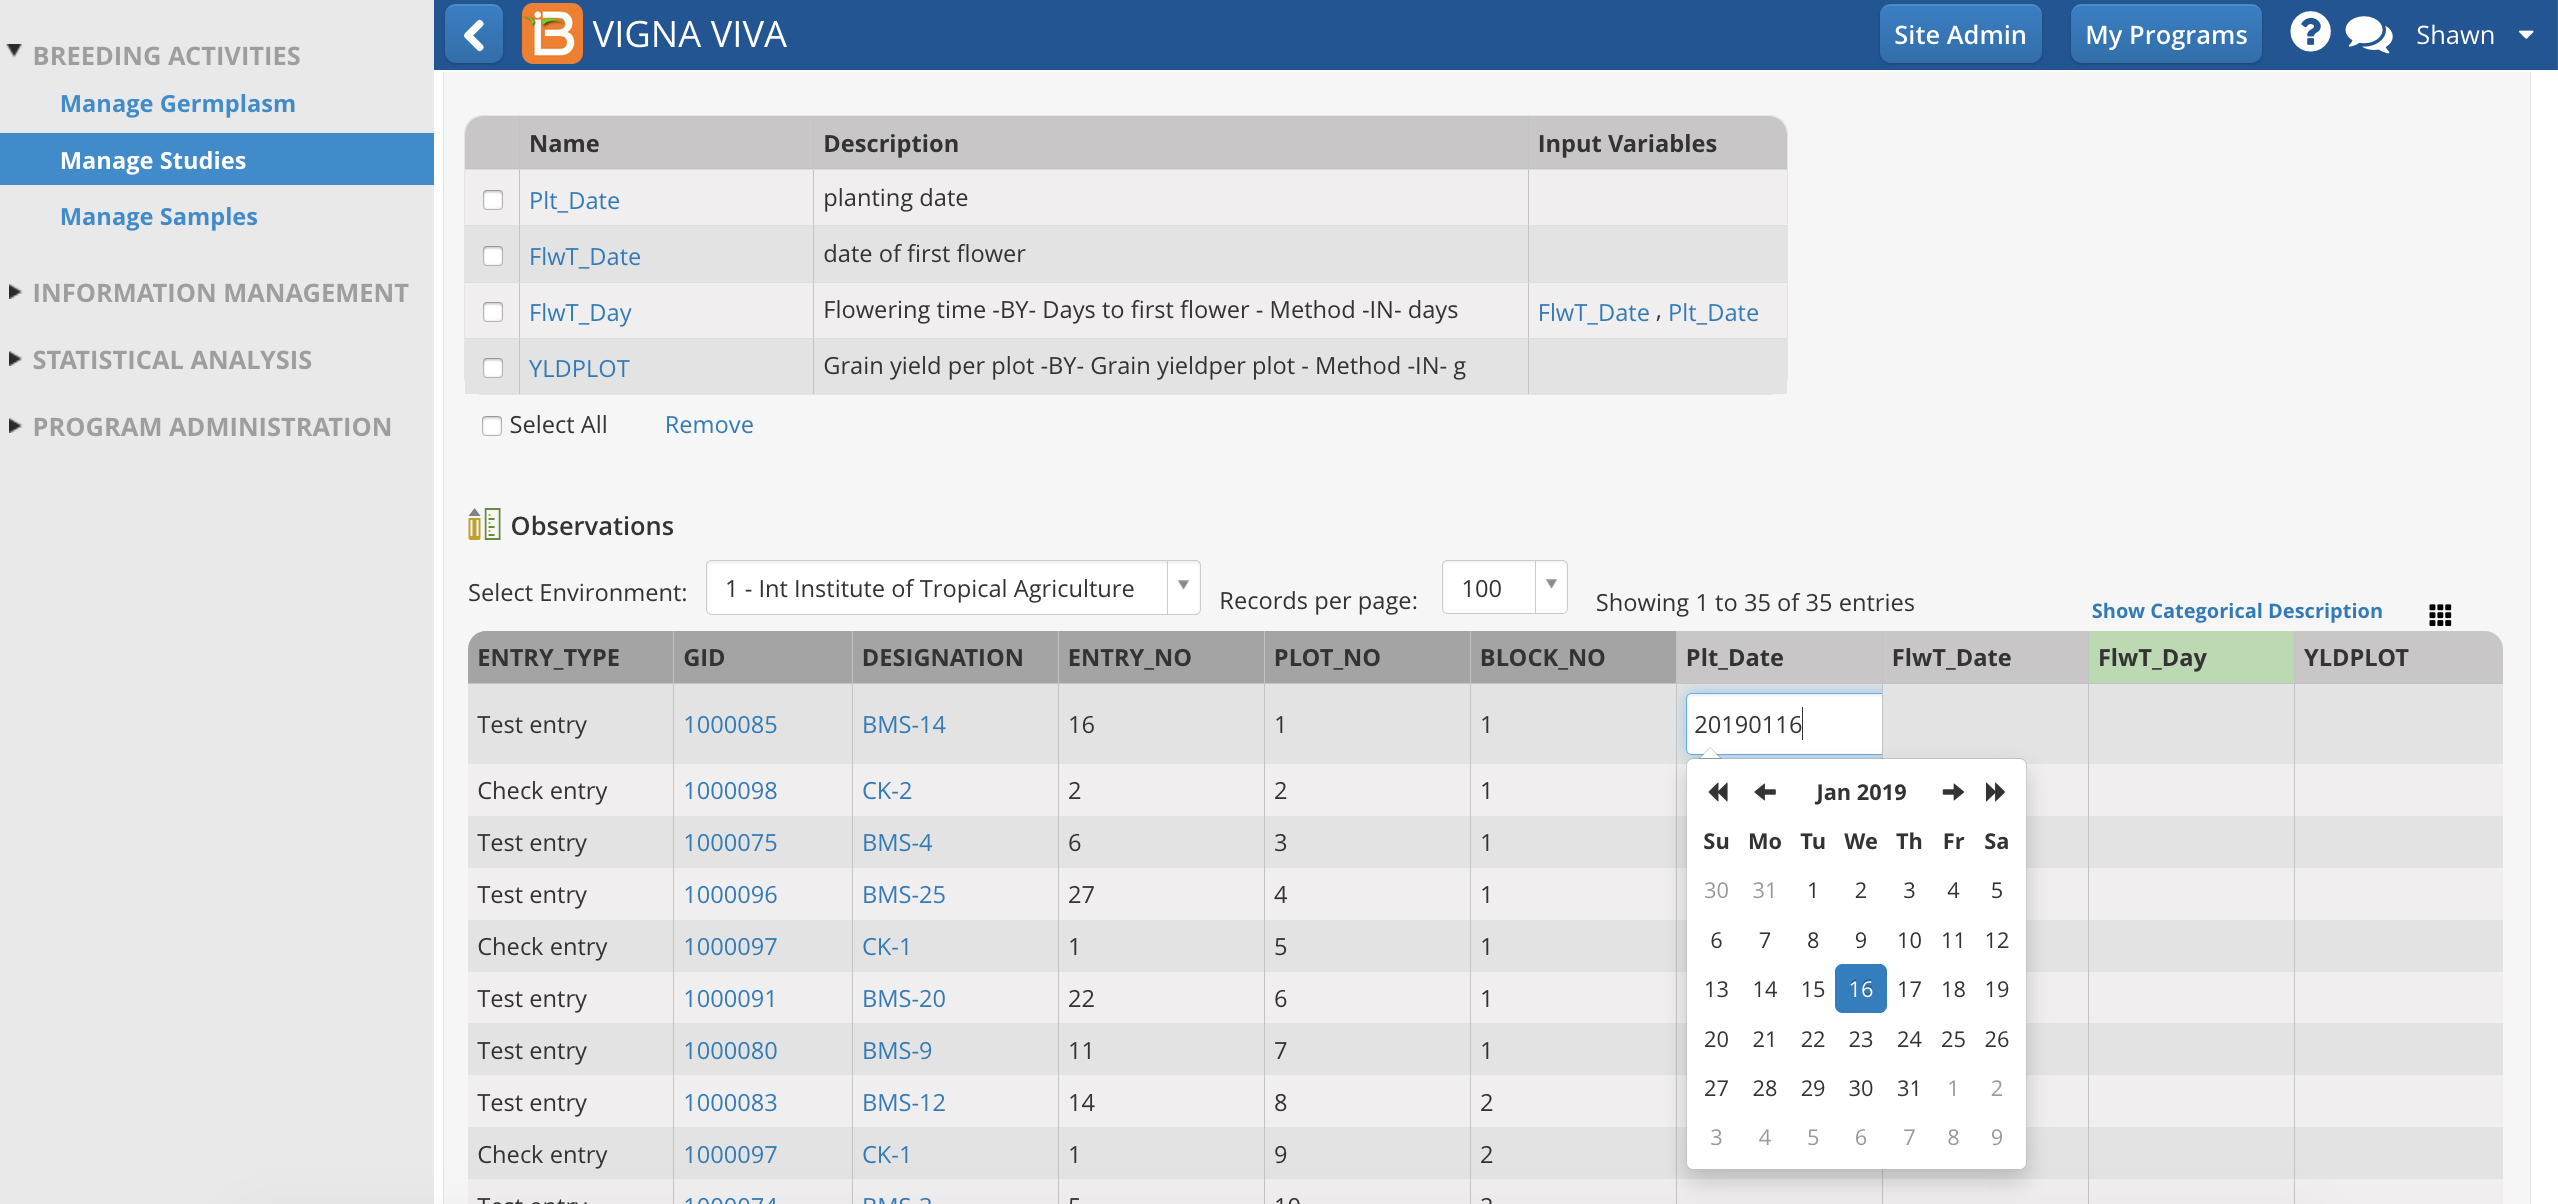
You can modify trait observations by directly clicking on them and typing.
-
Click on a cell that you want to modify. The cell should now become editable. Once you've described the desired value you can click outside of the cell to save the input value. In this case you don't need to click on the Save button, the value is automatically saved for you.
Export
Exporting a study book from Manage Studies allows you to export the Study Book in Excel format (one instance per .xls), where measurements can entered offline and then imported back. If you would like to export the entire study in a single .xls file see Browse Studies.
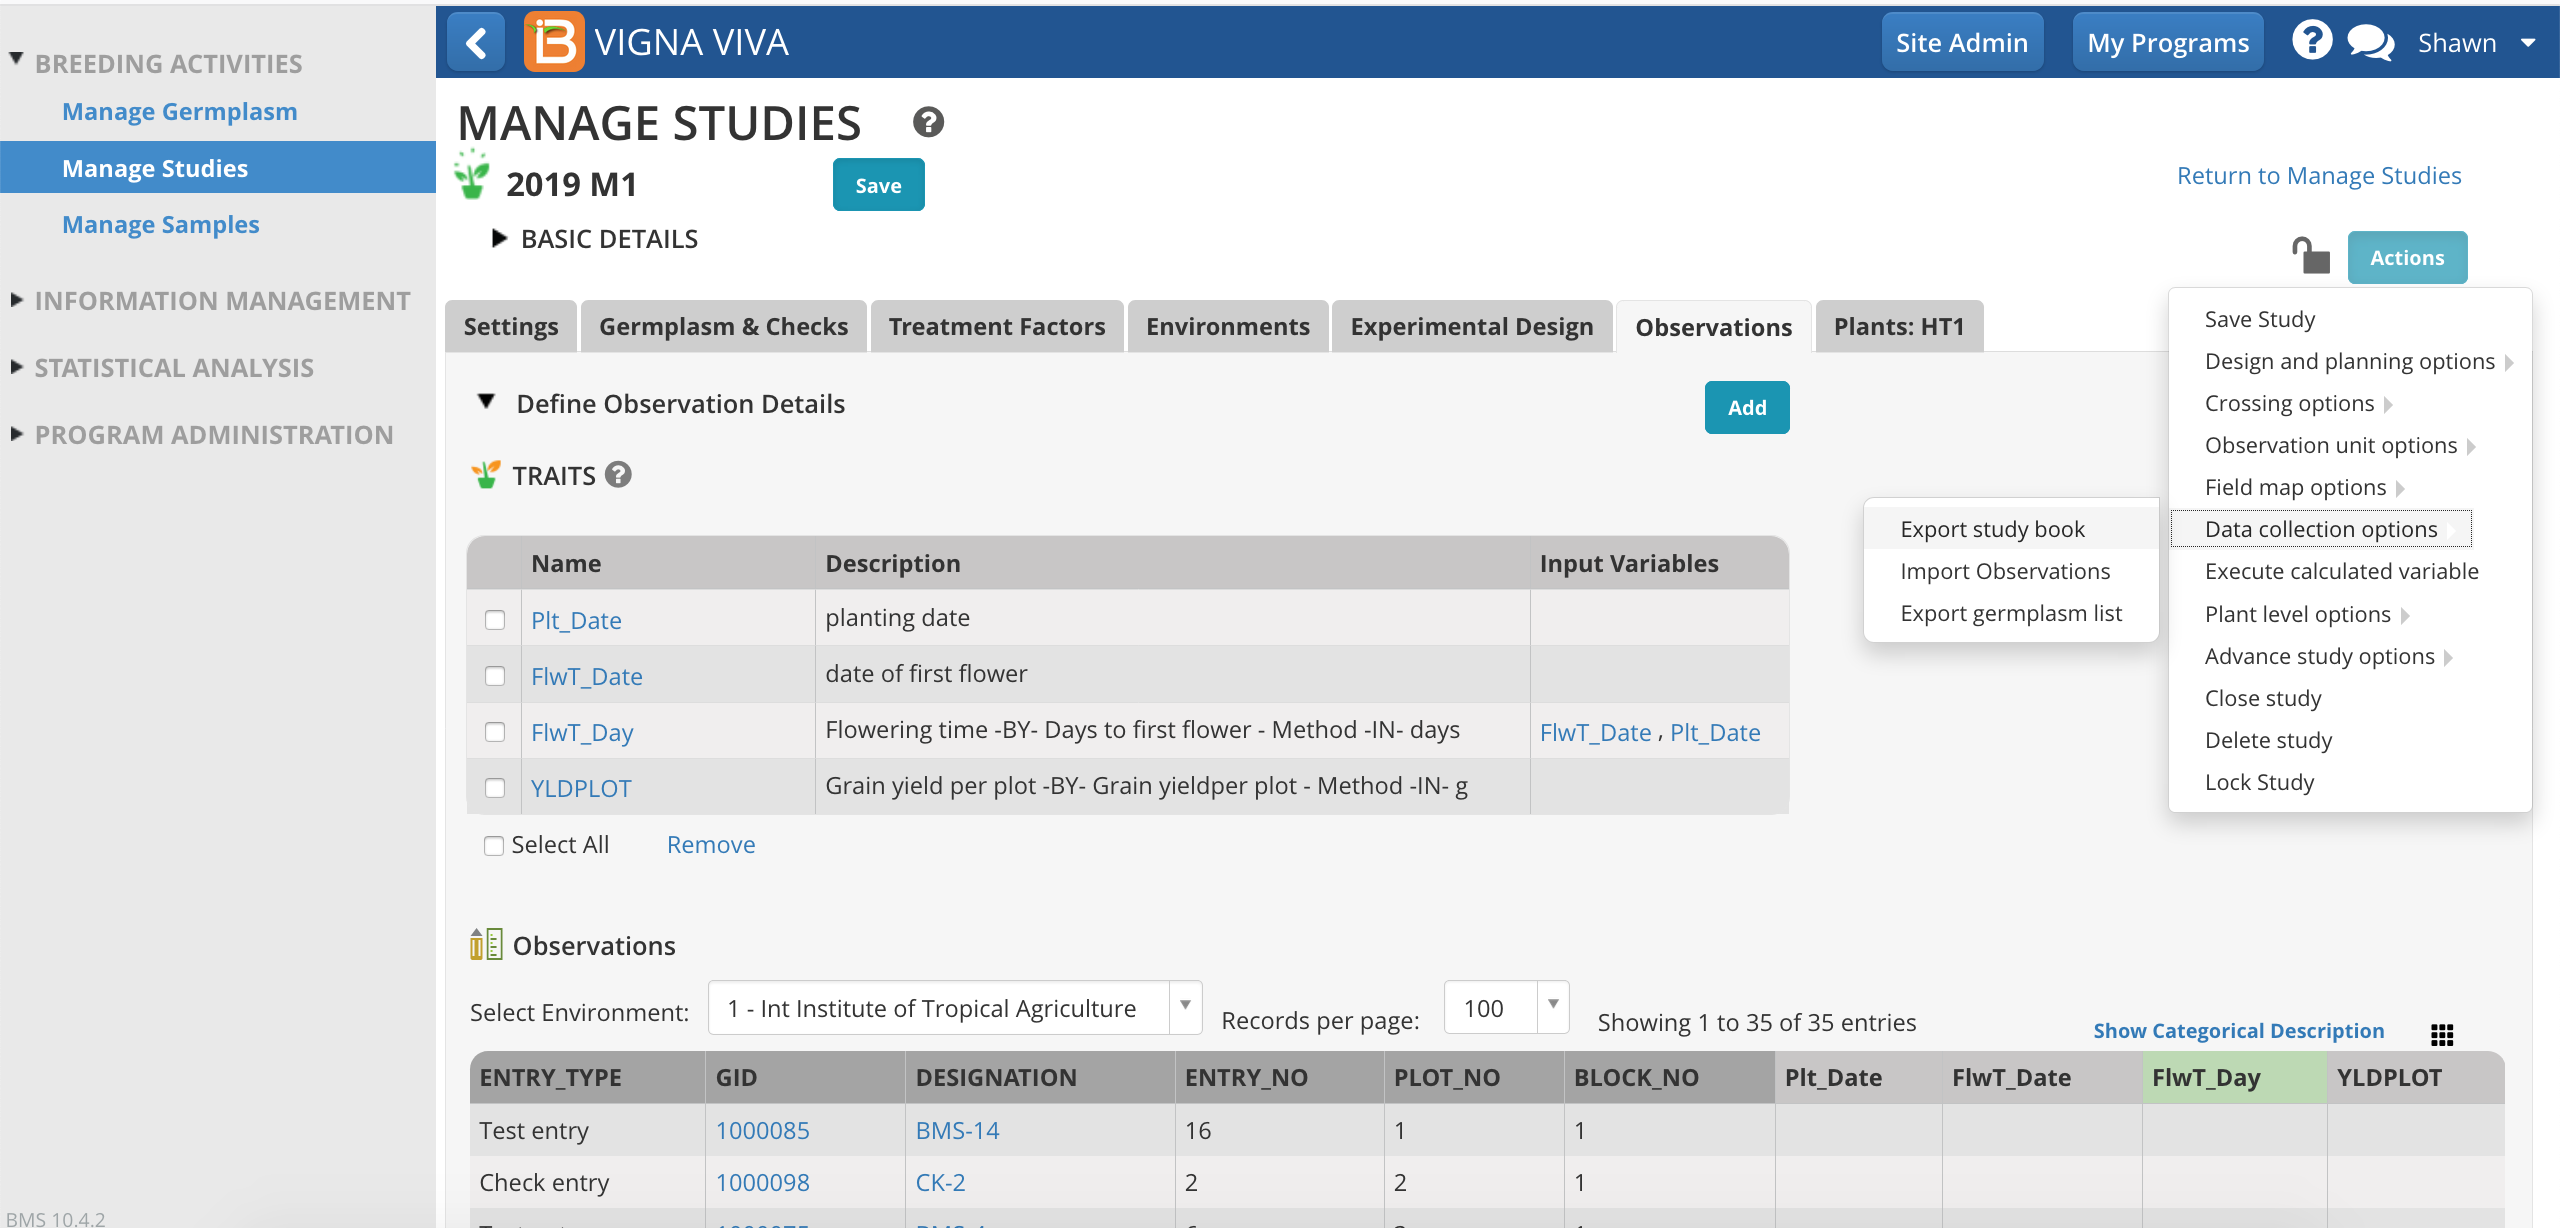
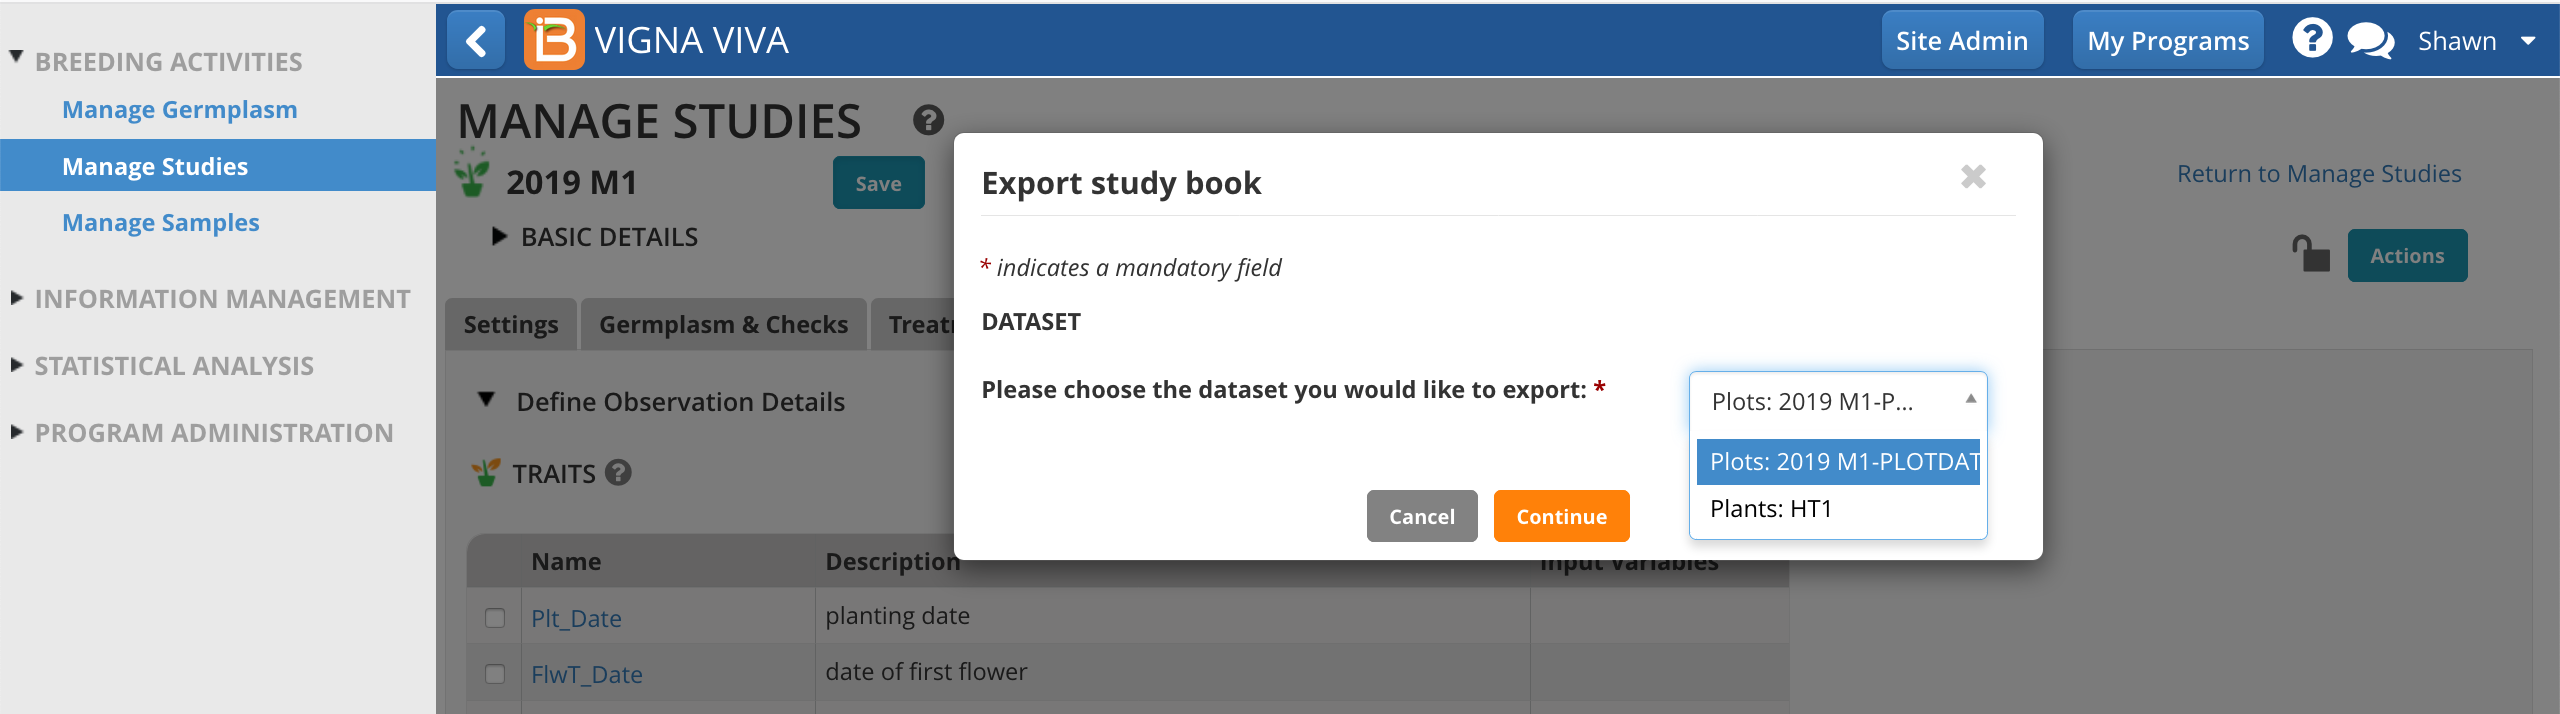
- Click on Actions>Data Collection Options>Export study book to download the study book file. Then select the study instances that you want to consider for download.
- If your study has more than one dataset, choose the appropriate one and Continue.
File Format
Observation, or plot-level, datasets have several export format options. Sub-observation data sets only offer .csv format - expect expanded options for sub-observations datasets in upcoming releases. Note: If you export more than one instance at a time you'll get a .zip file containing on excel/csv per instance.
- CSV
- Excel: Format for manual offline measurements taking. This format is compatible with the DIB handheld data capture application.
- Fieldbook KSU: Format compatible with the KSU fieldbook data capture application (.csv & .xls)
- Select the export format and the data collection order. Serpentine data collection order is available after a field map has been created (see more Make Field Map).
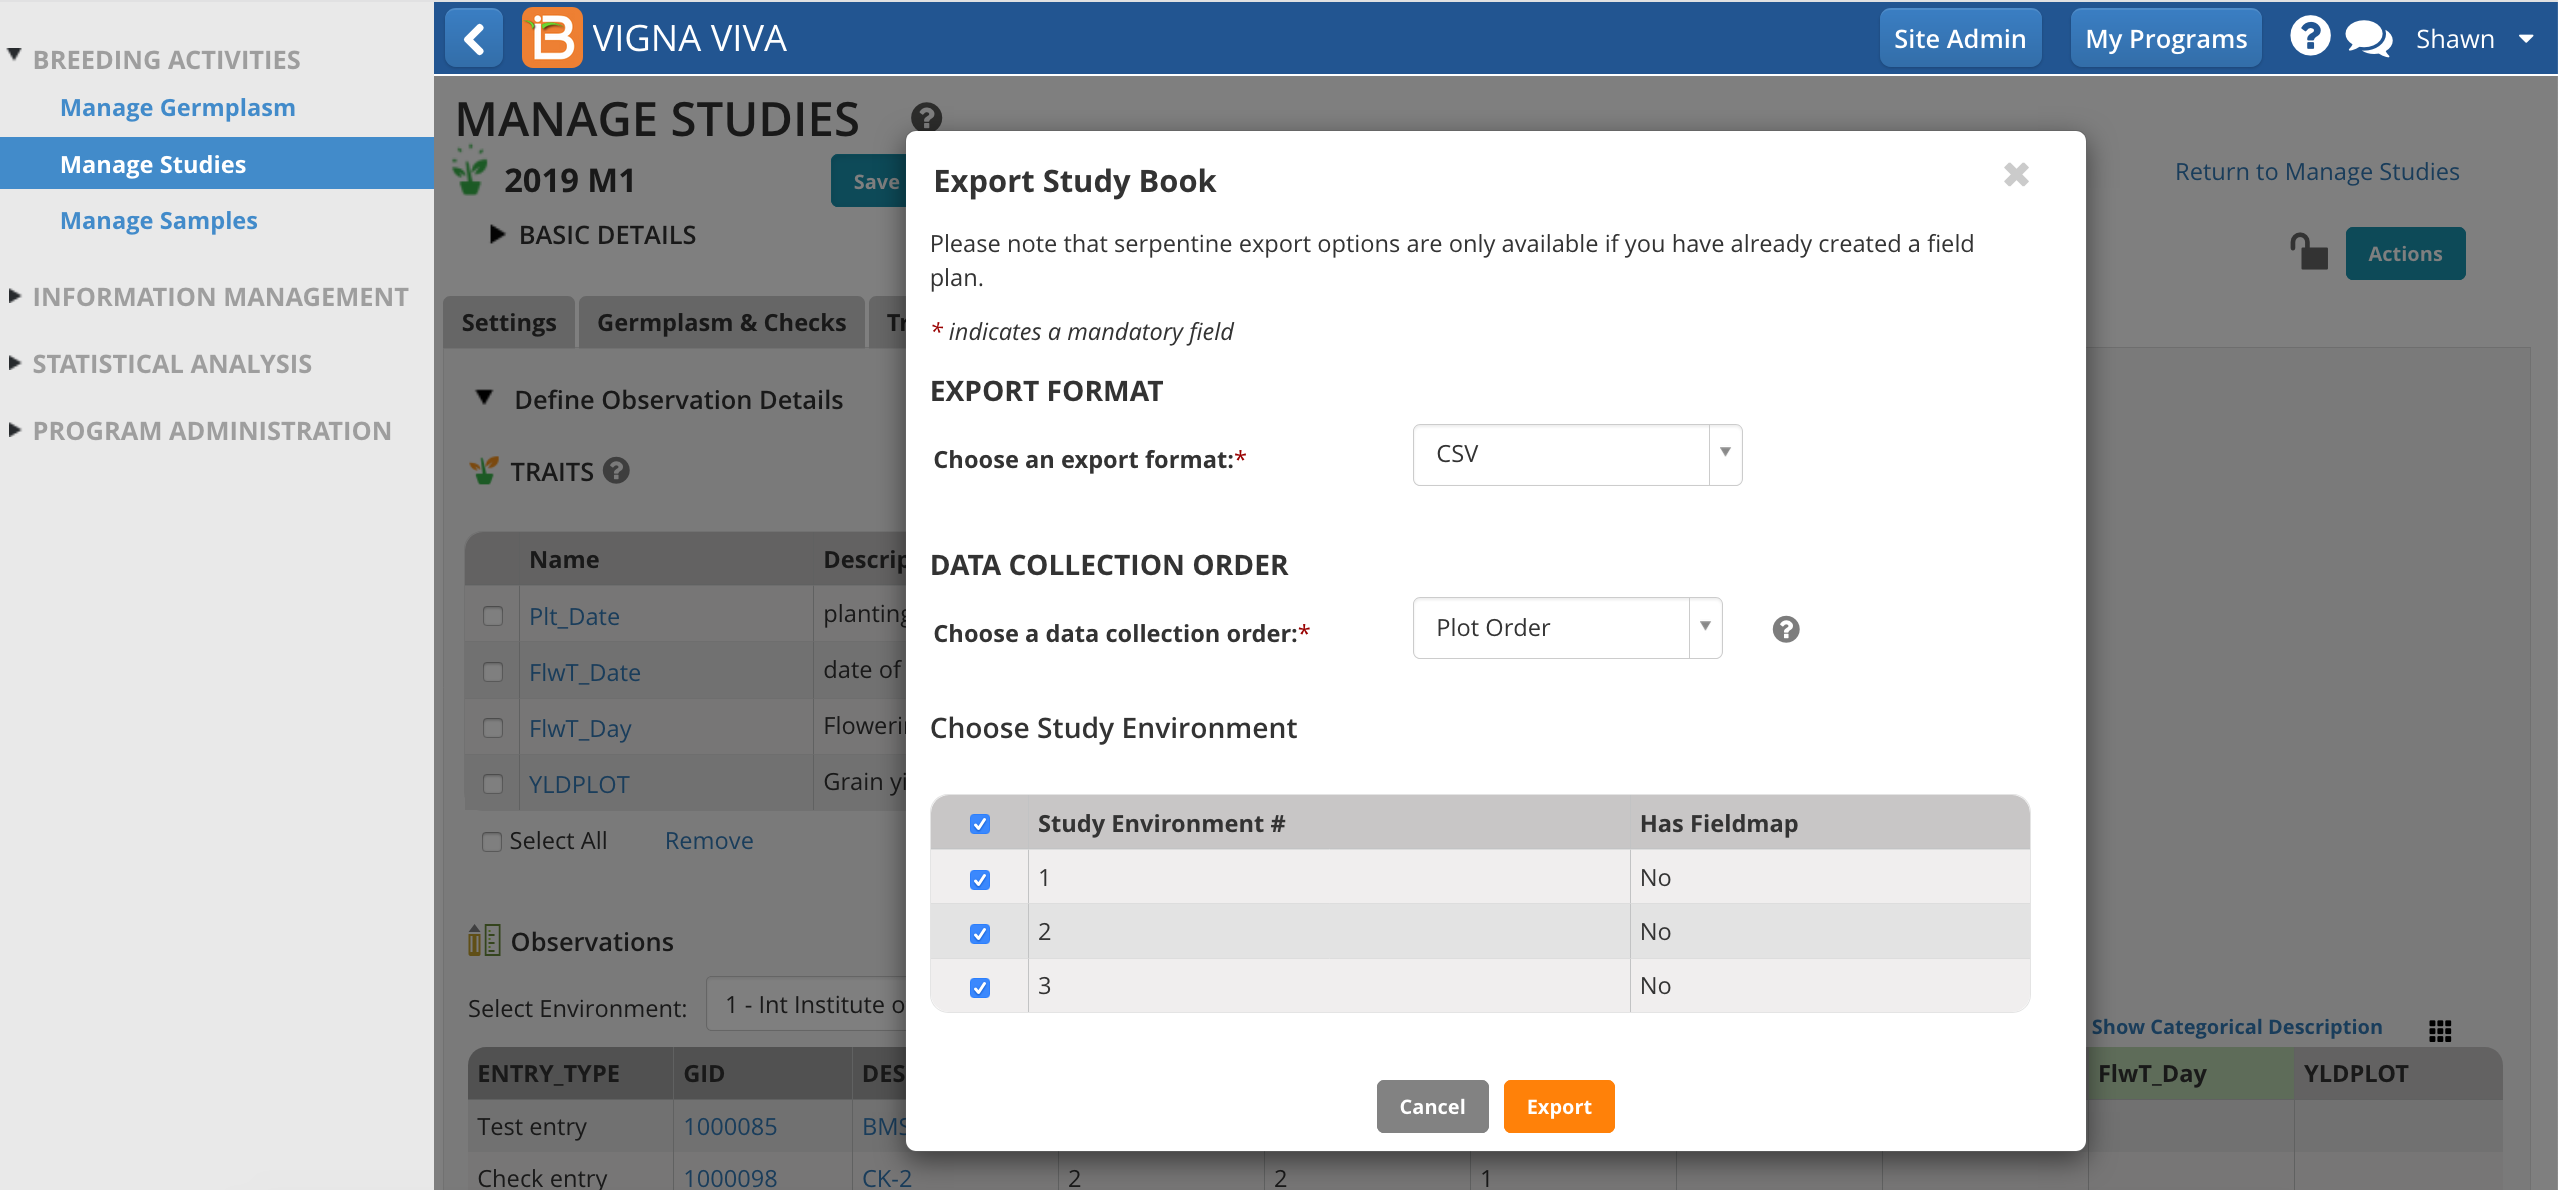
The exported file is ready for data entry or for label printing.
- Note: OBS_UNIT_ID is a unique observation id suitable for barcode labeling of individual observations.

Import
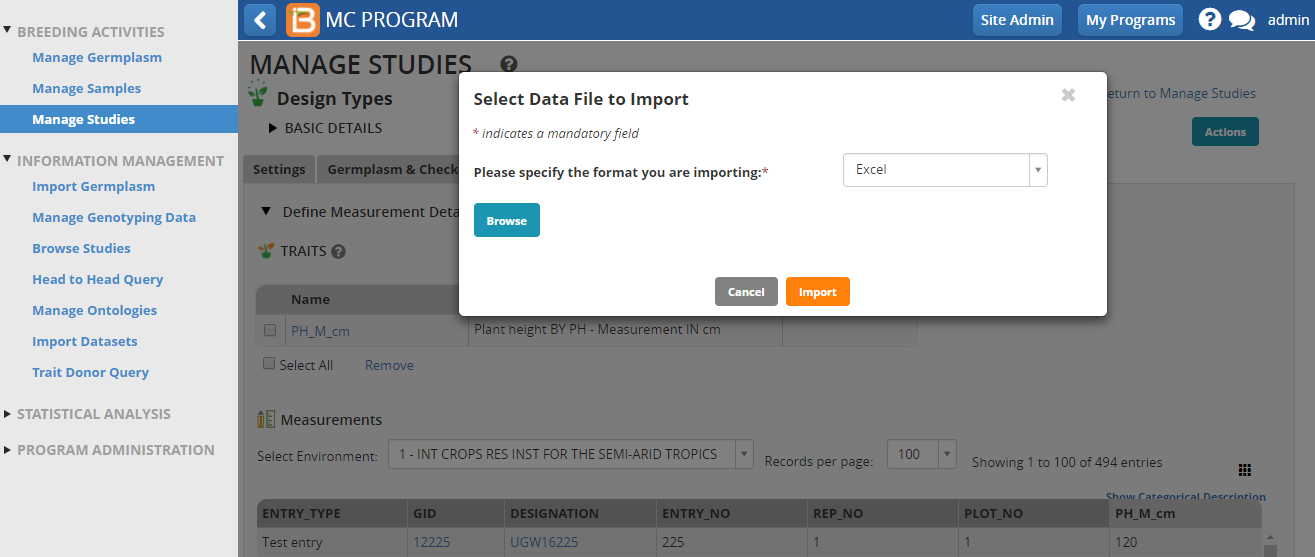
- Click on Actions>Datata Collection Options>Import measurements options to browse for the file to upload
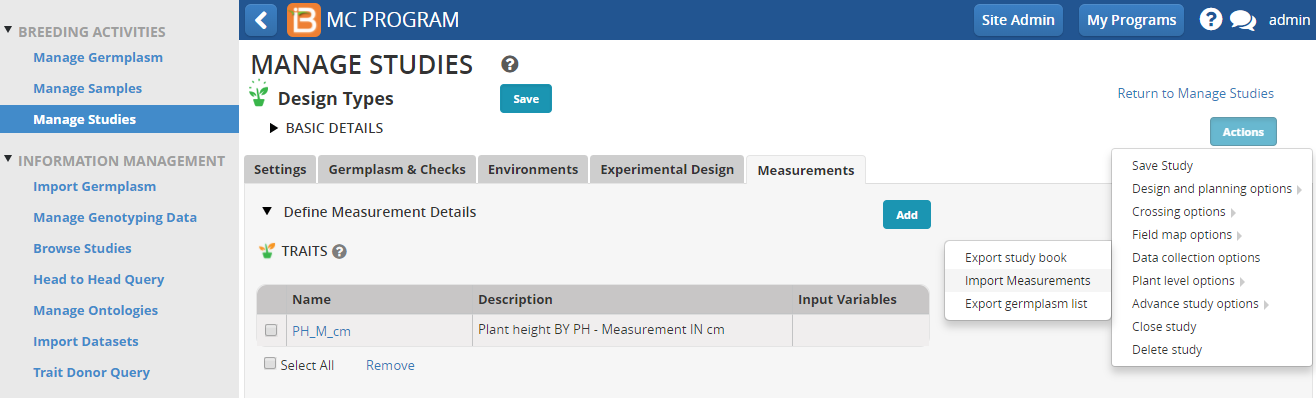
- Select the file and format you want to upload
At this point you can review the imported data. If there is a problem, you can Discard the whole dataset or manually modify the problematic values (see below).
- Click on Save to store the reviewed measurements. Note: It's important to note that existing data will be overwritten. If you don't want data for a particular trait to be overwritten you can erase the corresponding trait column from the imported file

Out-of-Bounds
If the value for a given trait variable exceeds the expected range defined in the ontology (see Manage Ontology), the BMS will flag these values in red. You are not able to save the data until the out-of-bounds values have been validated, corrected or accepted.
Review & Validate
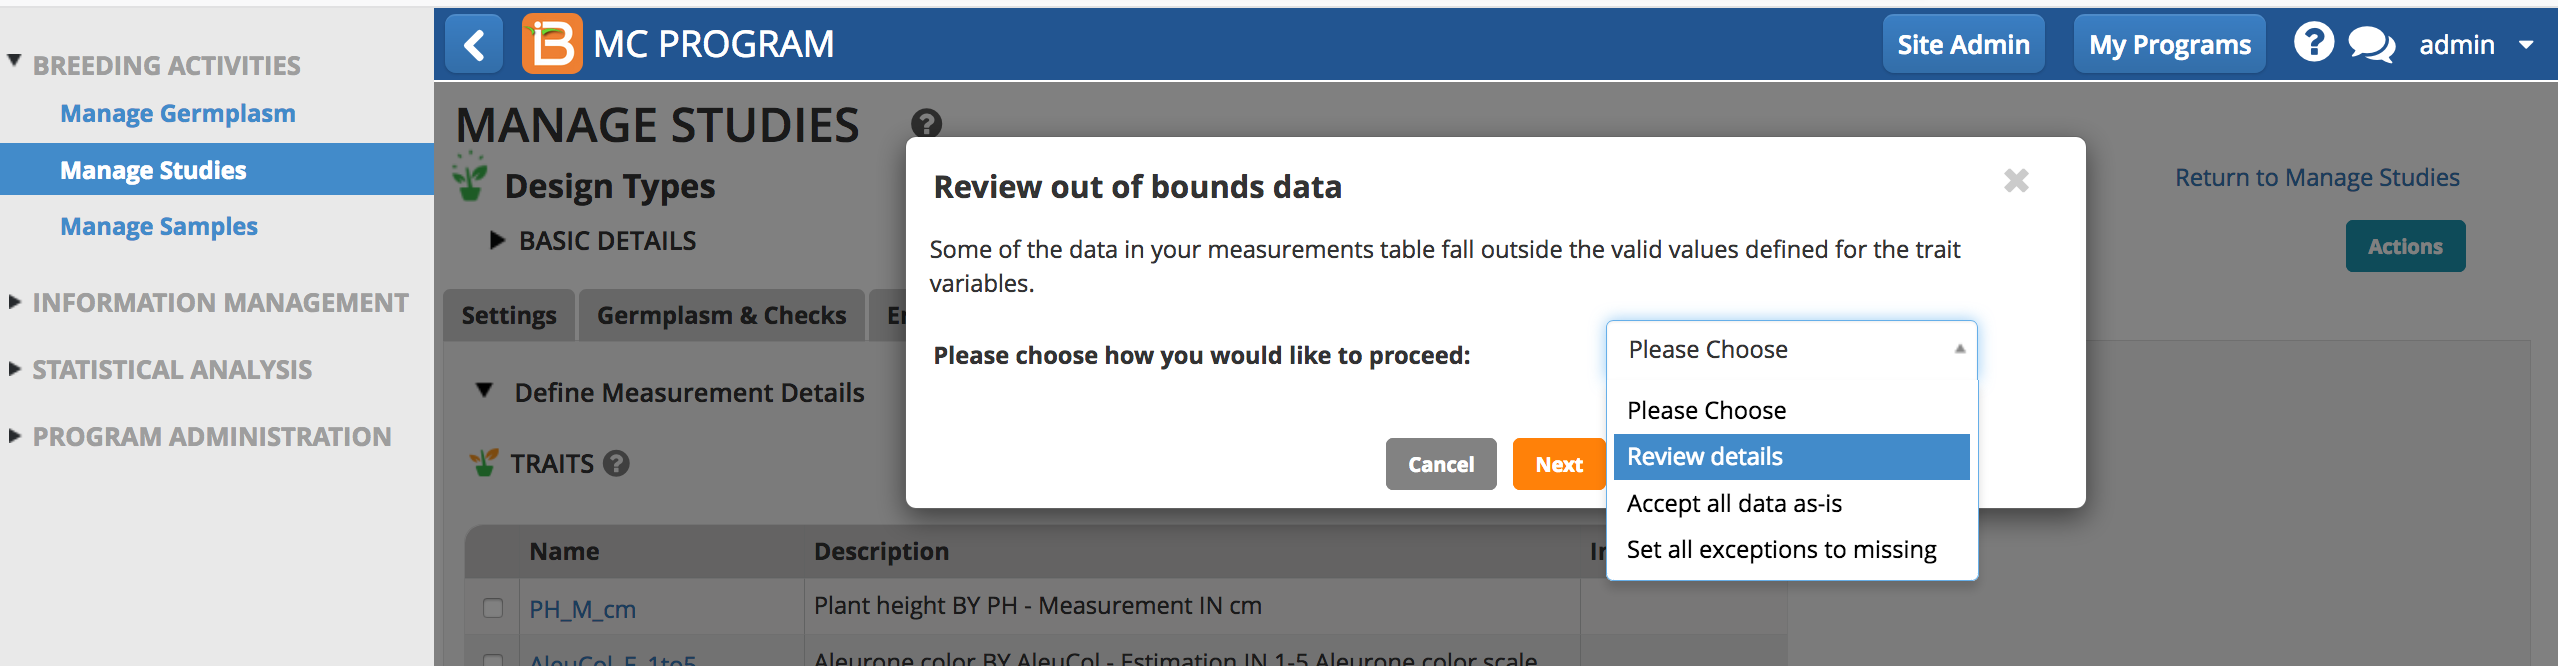
- Review out-of-bounds data from the Actions Menu under Data Collection Options.
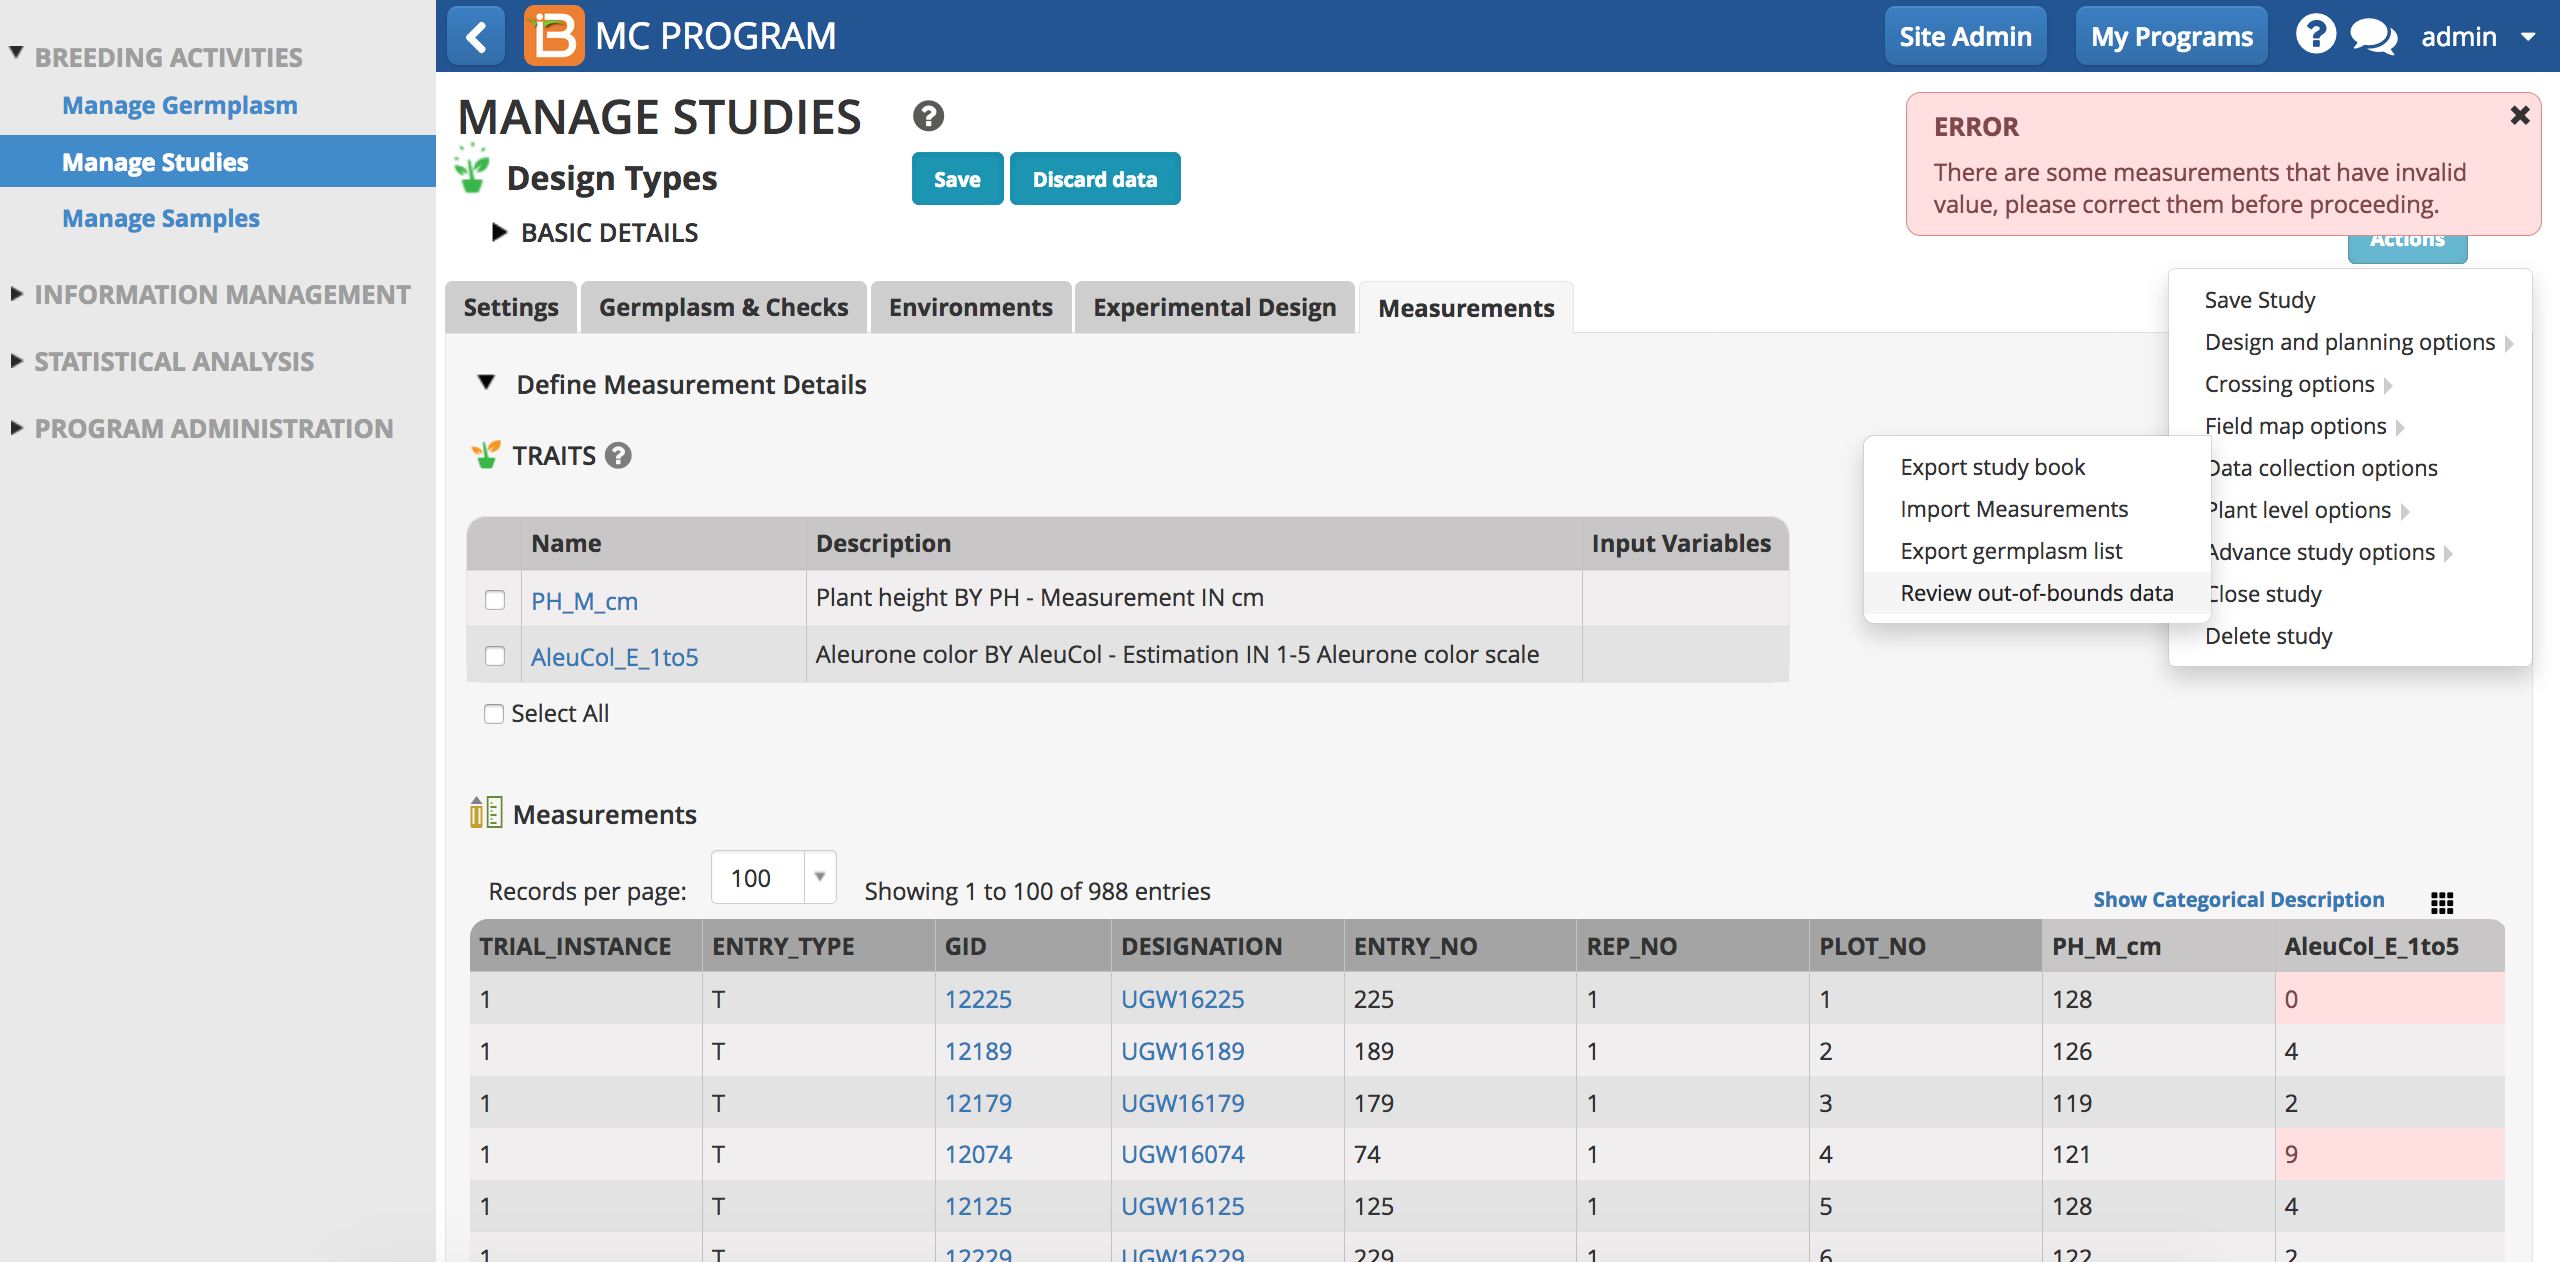
Out-of-bounds values for the aleurone color scale (1-5) are highlighted red and are preventing the data from being saved.
- Choose how to proceed with out-of-bounds data.
- Review Details
- Accept all data as-is
- Set all exceptions to missing
- Review details and select Next to navigate out-of-bound values and make individual decisions about them.
- Review the details of out-of-bounds data. Enter revised values, accept the out of range values, or set the data to missing. Finish
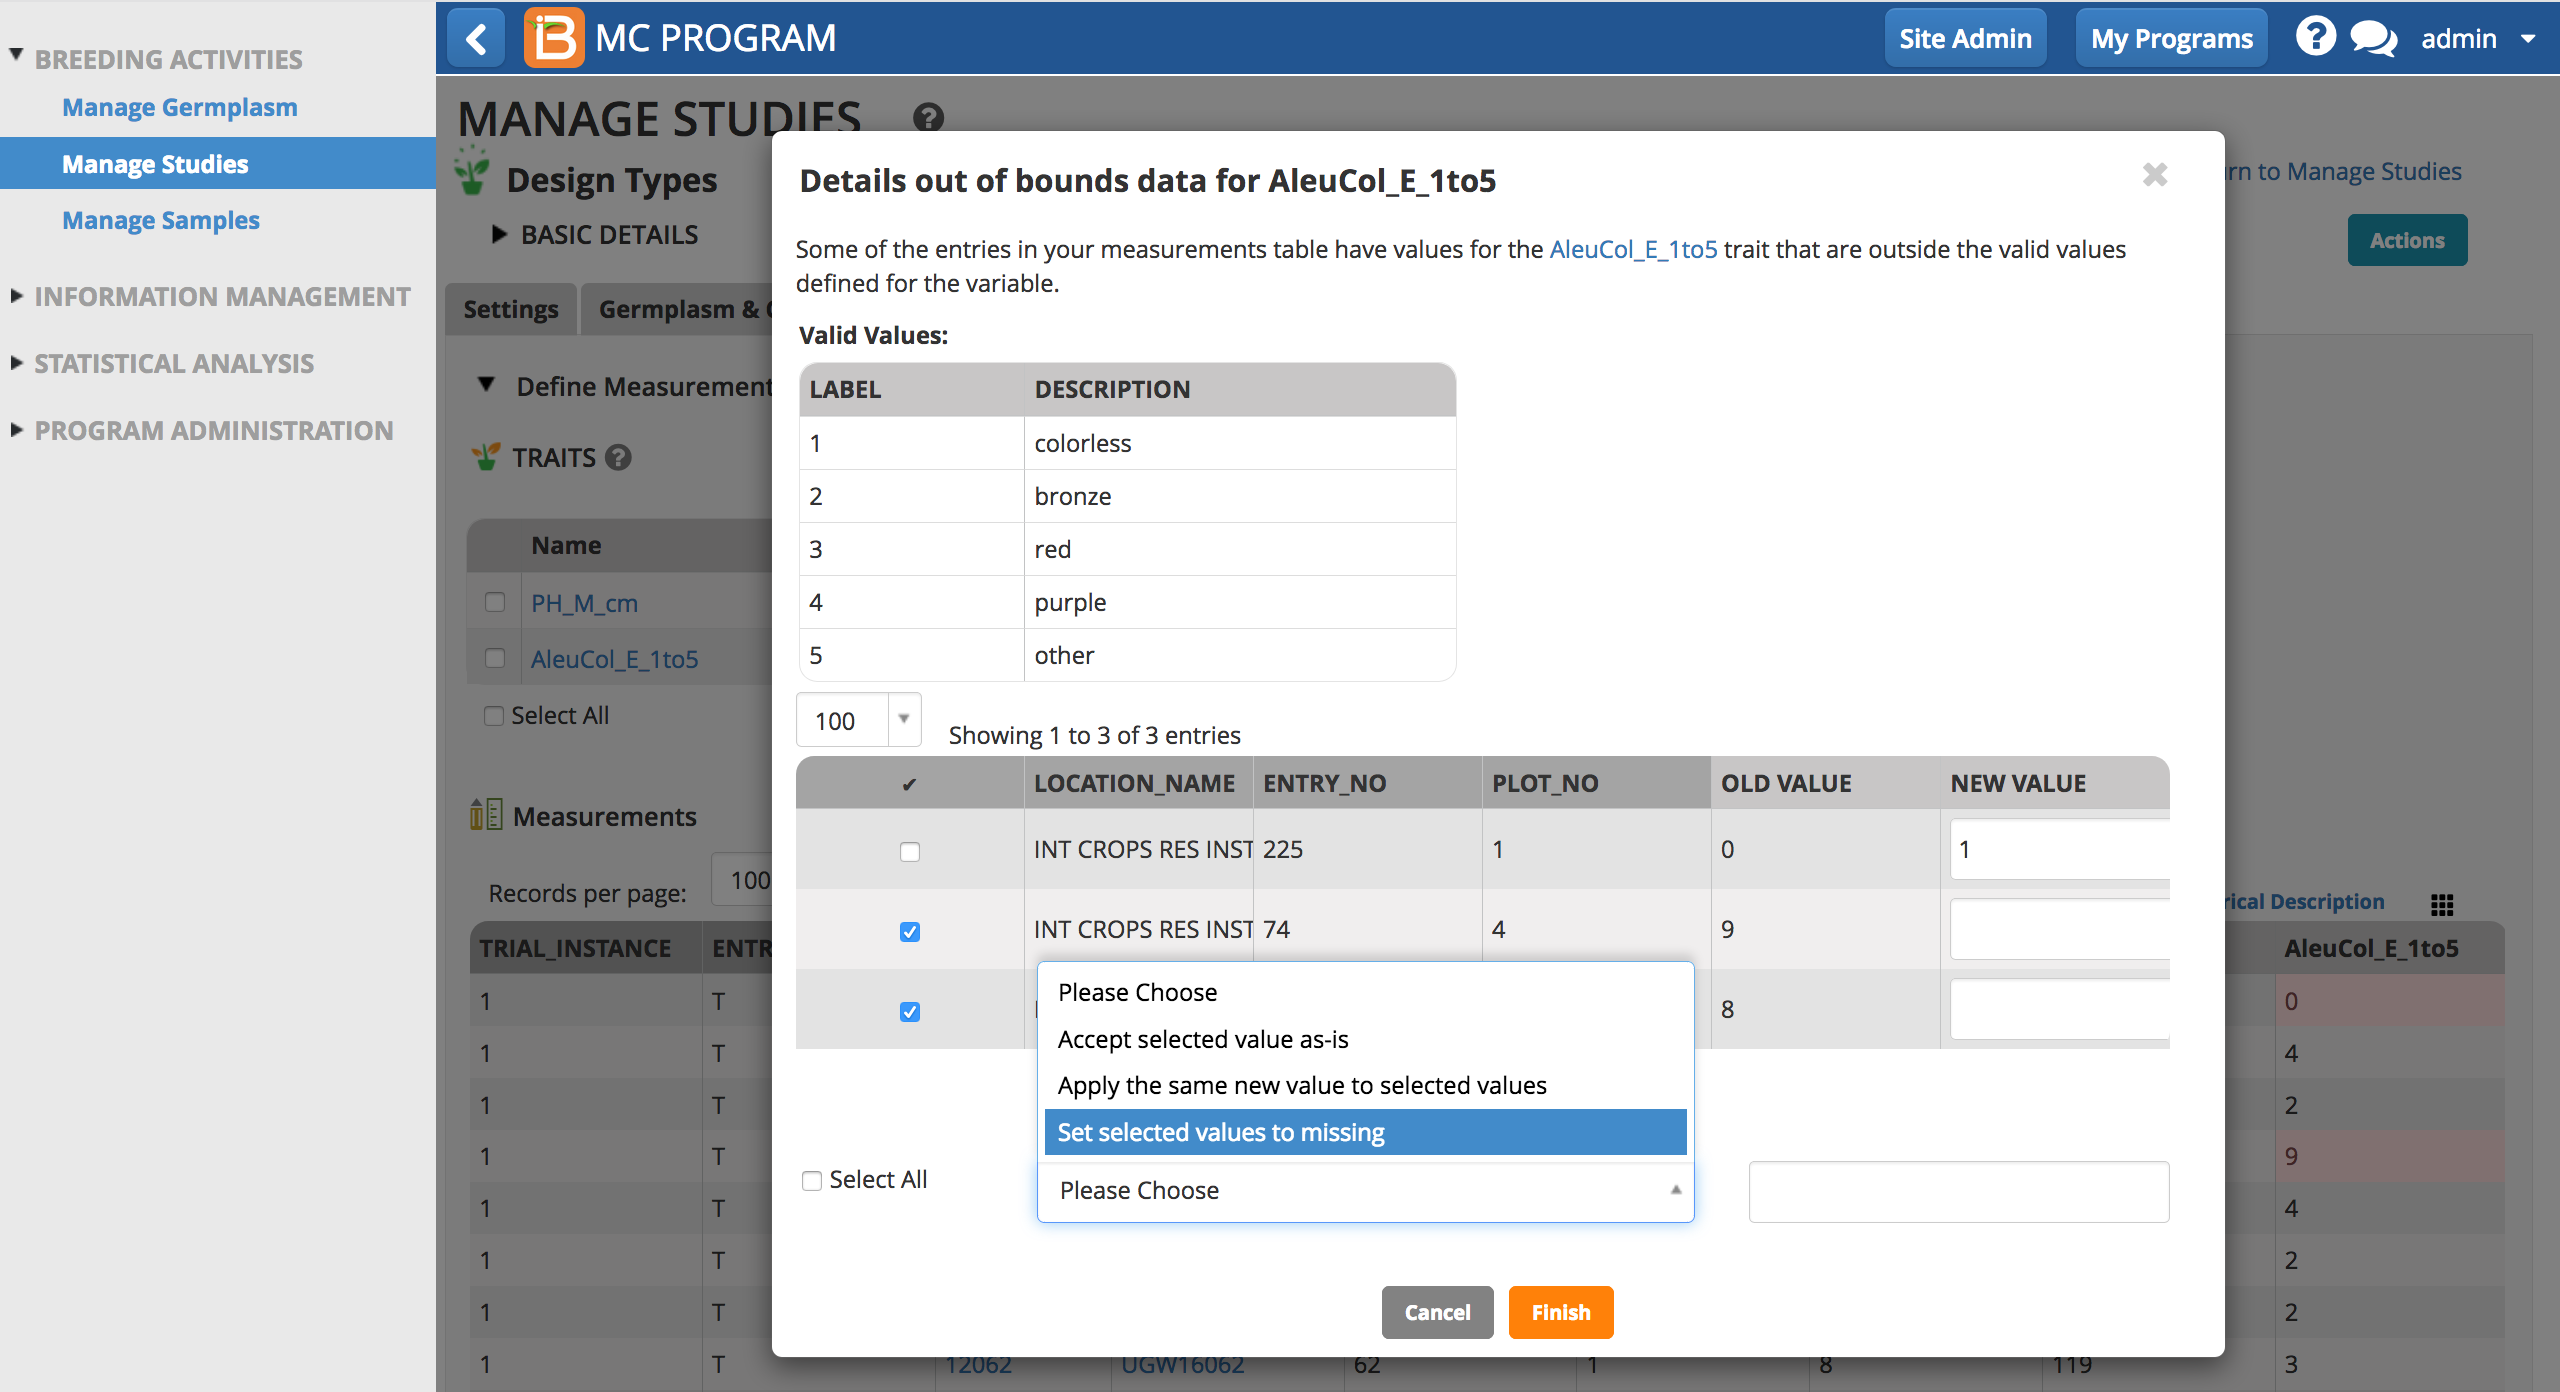
Aleurone color (scale 1-5) has three out-of-bounds values. Plot number one was given a revised value of 1 and the other two plots are set to missing.
- After correction and acceptance, save the study.
Set all exceptions to missing will designate out-of-bounds as "missing".

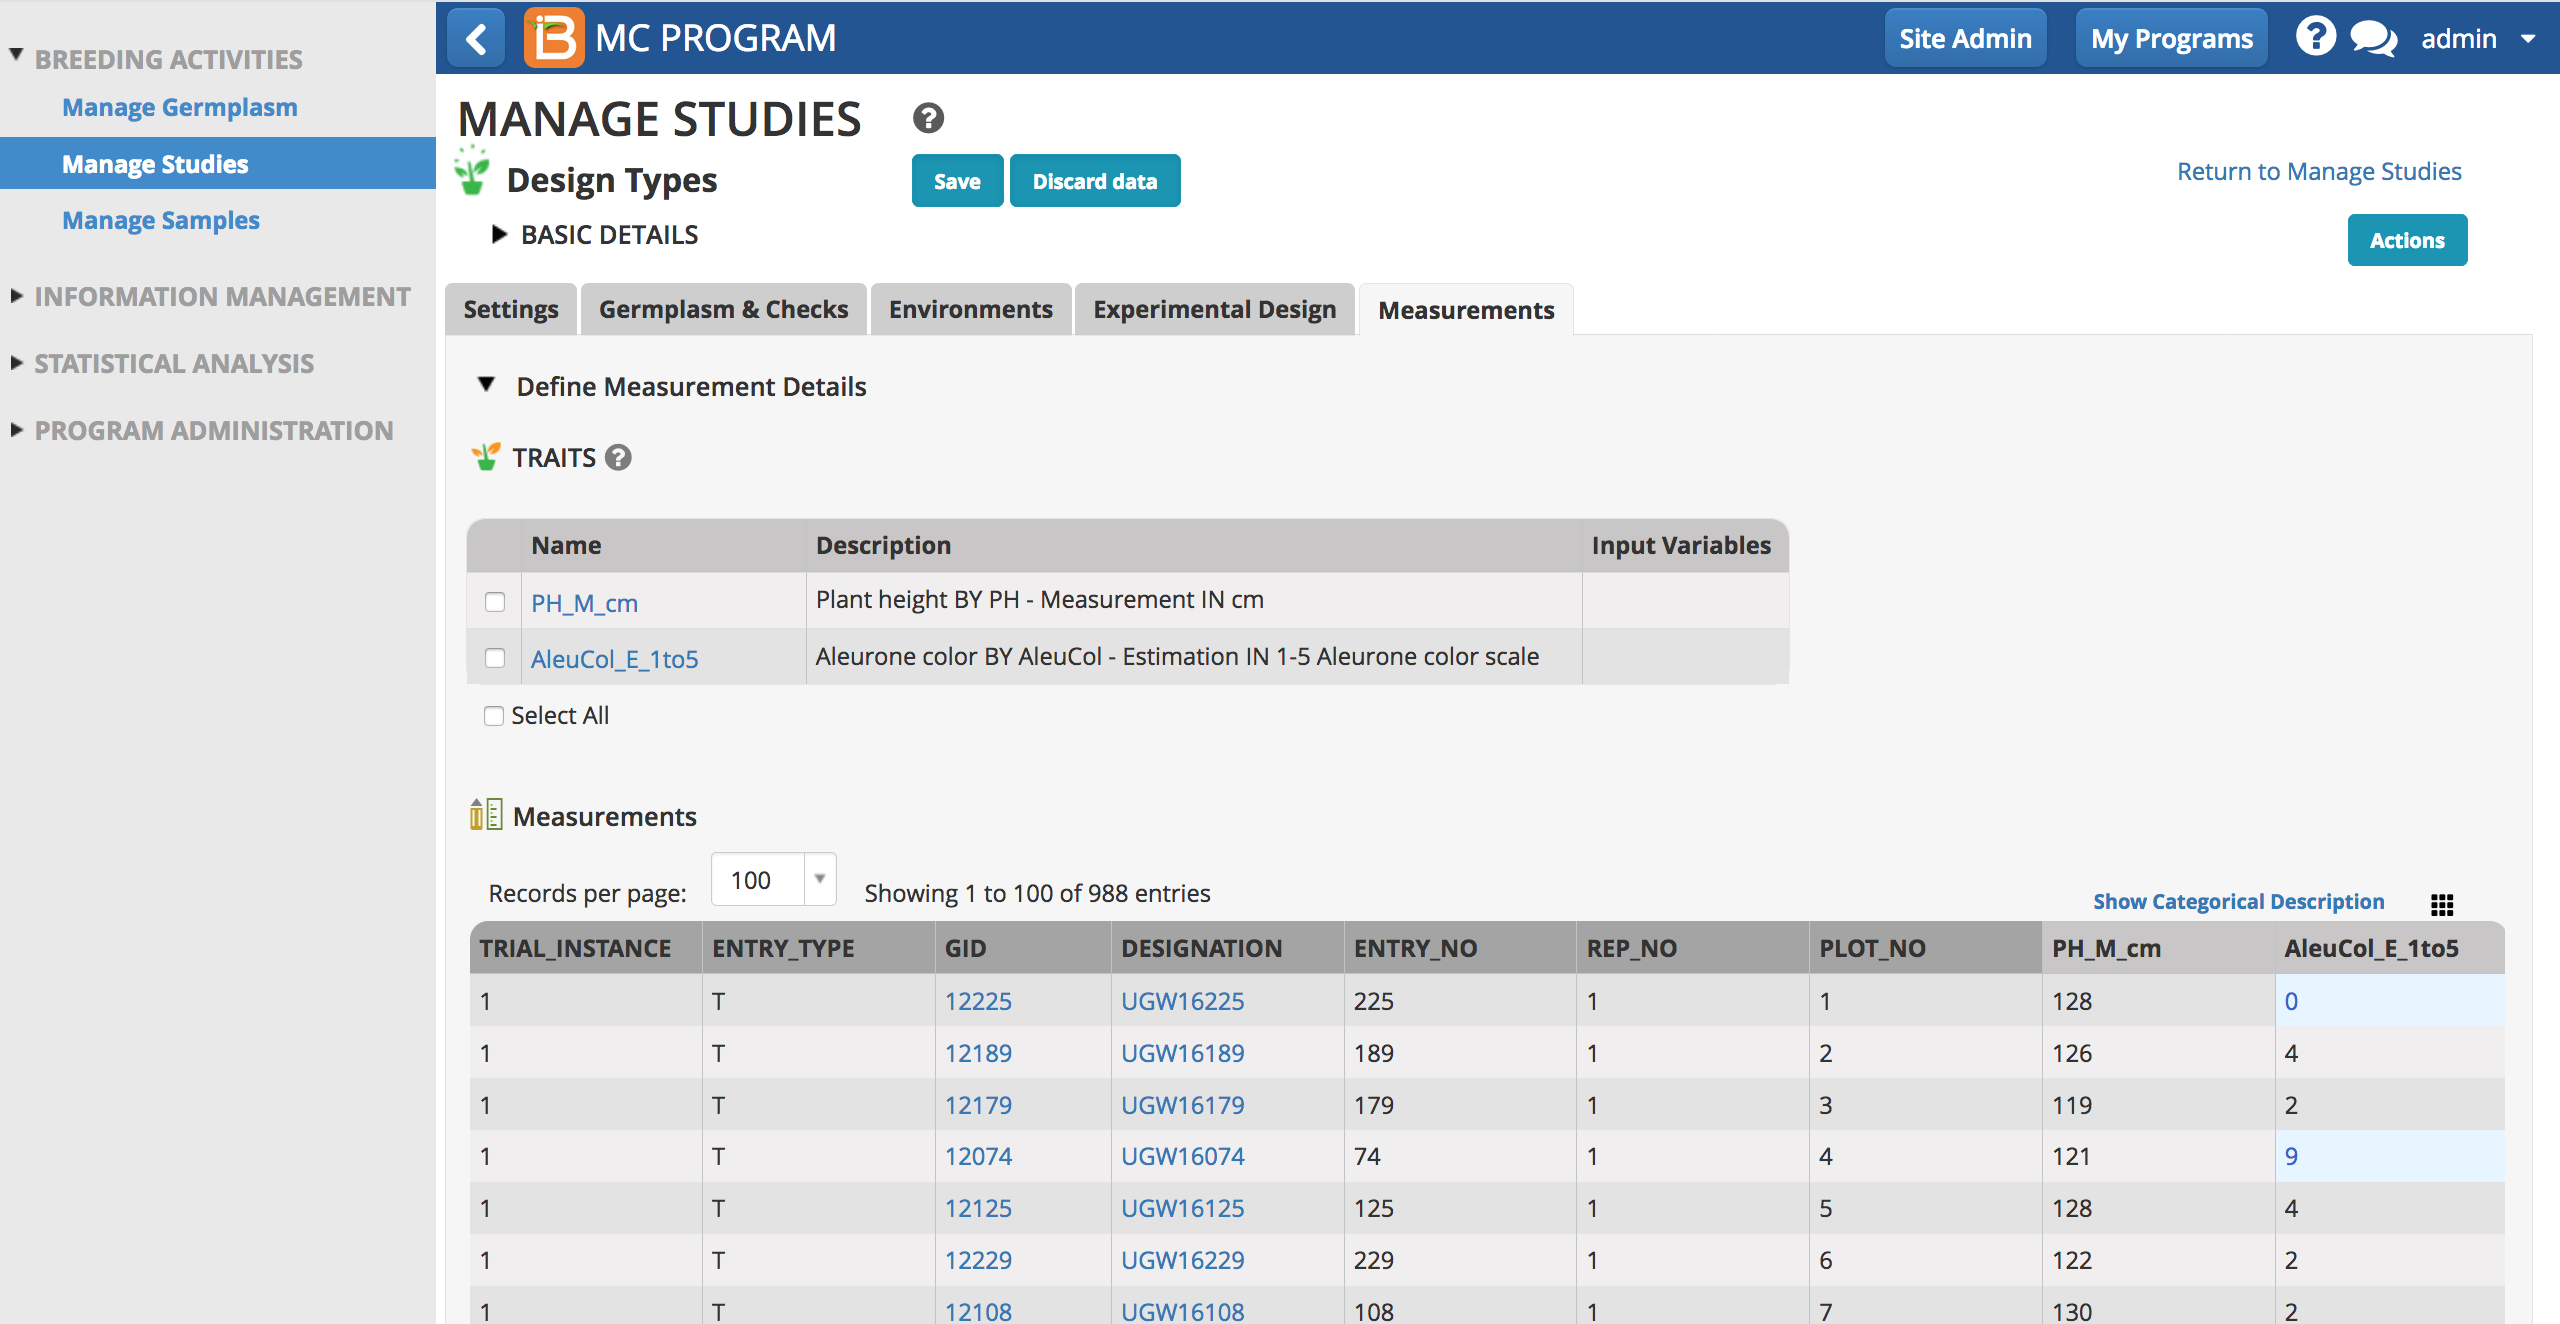
Accepting data as-is will not change the out-of-bounds values. Accepted out-of-bounds values are highlighted a light blue color.
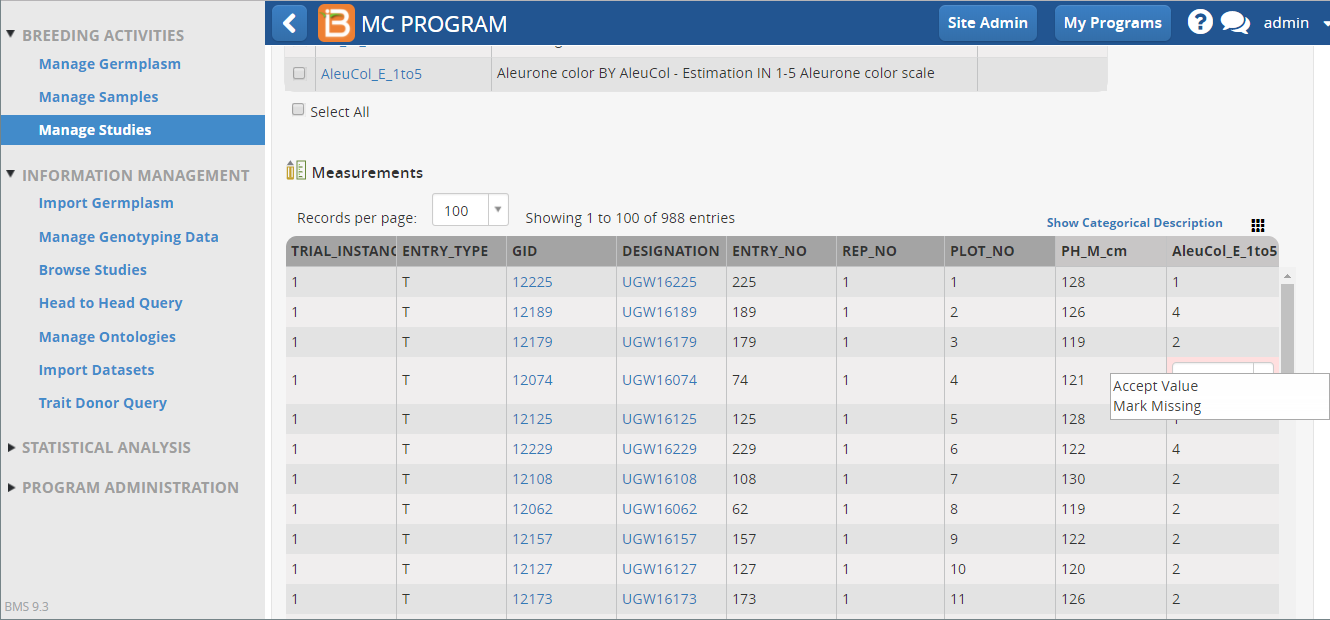
Inline Validation
- Perform inline decisions with out of bound data by editing a given cell. Either enter new value or right click to accept or exclude.
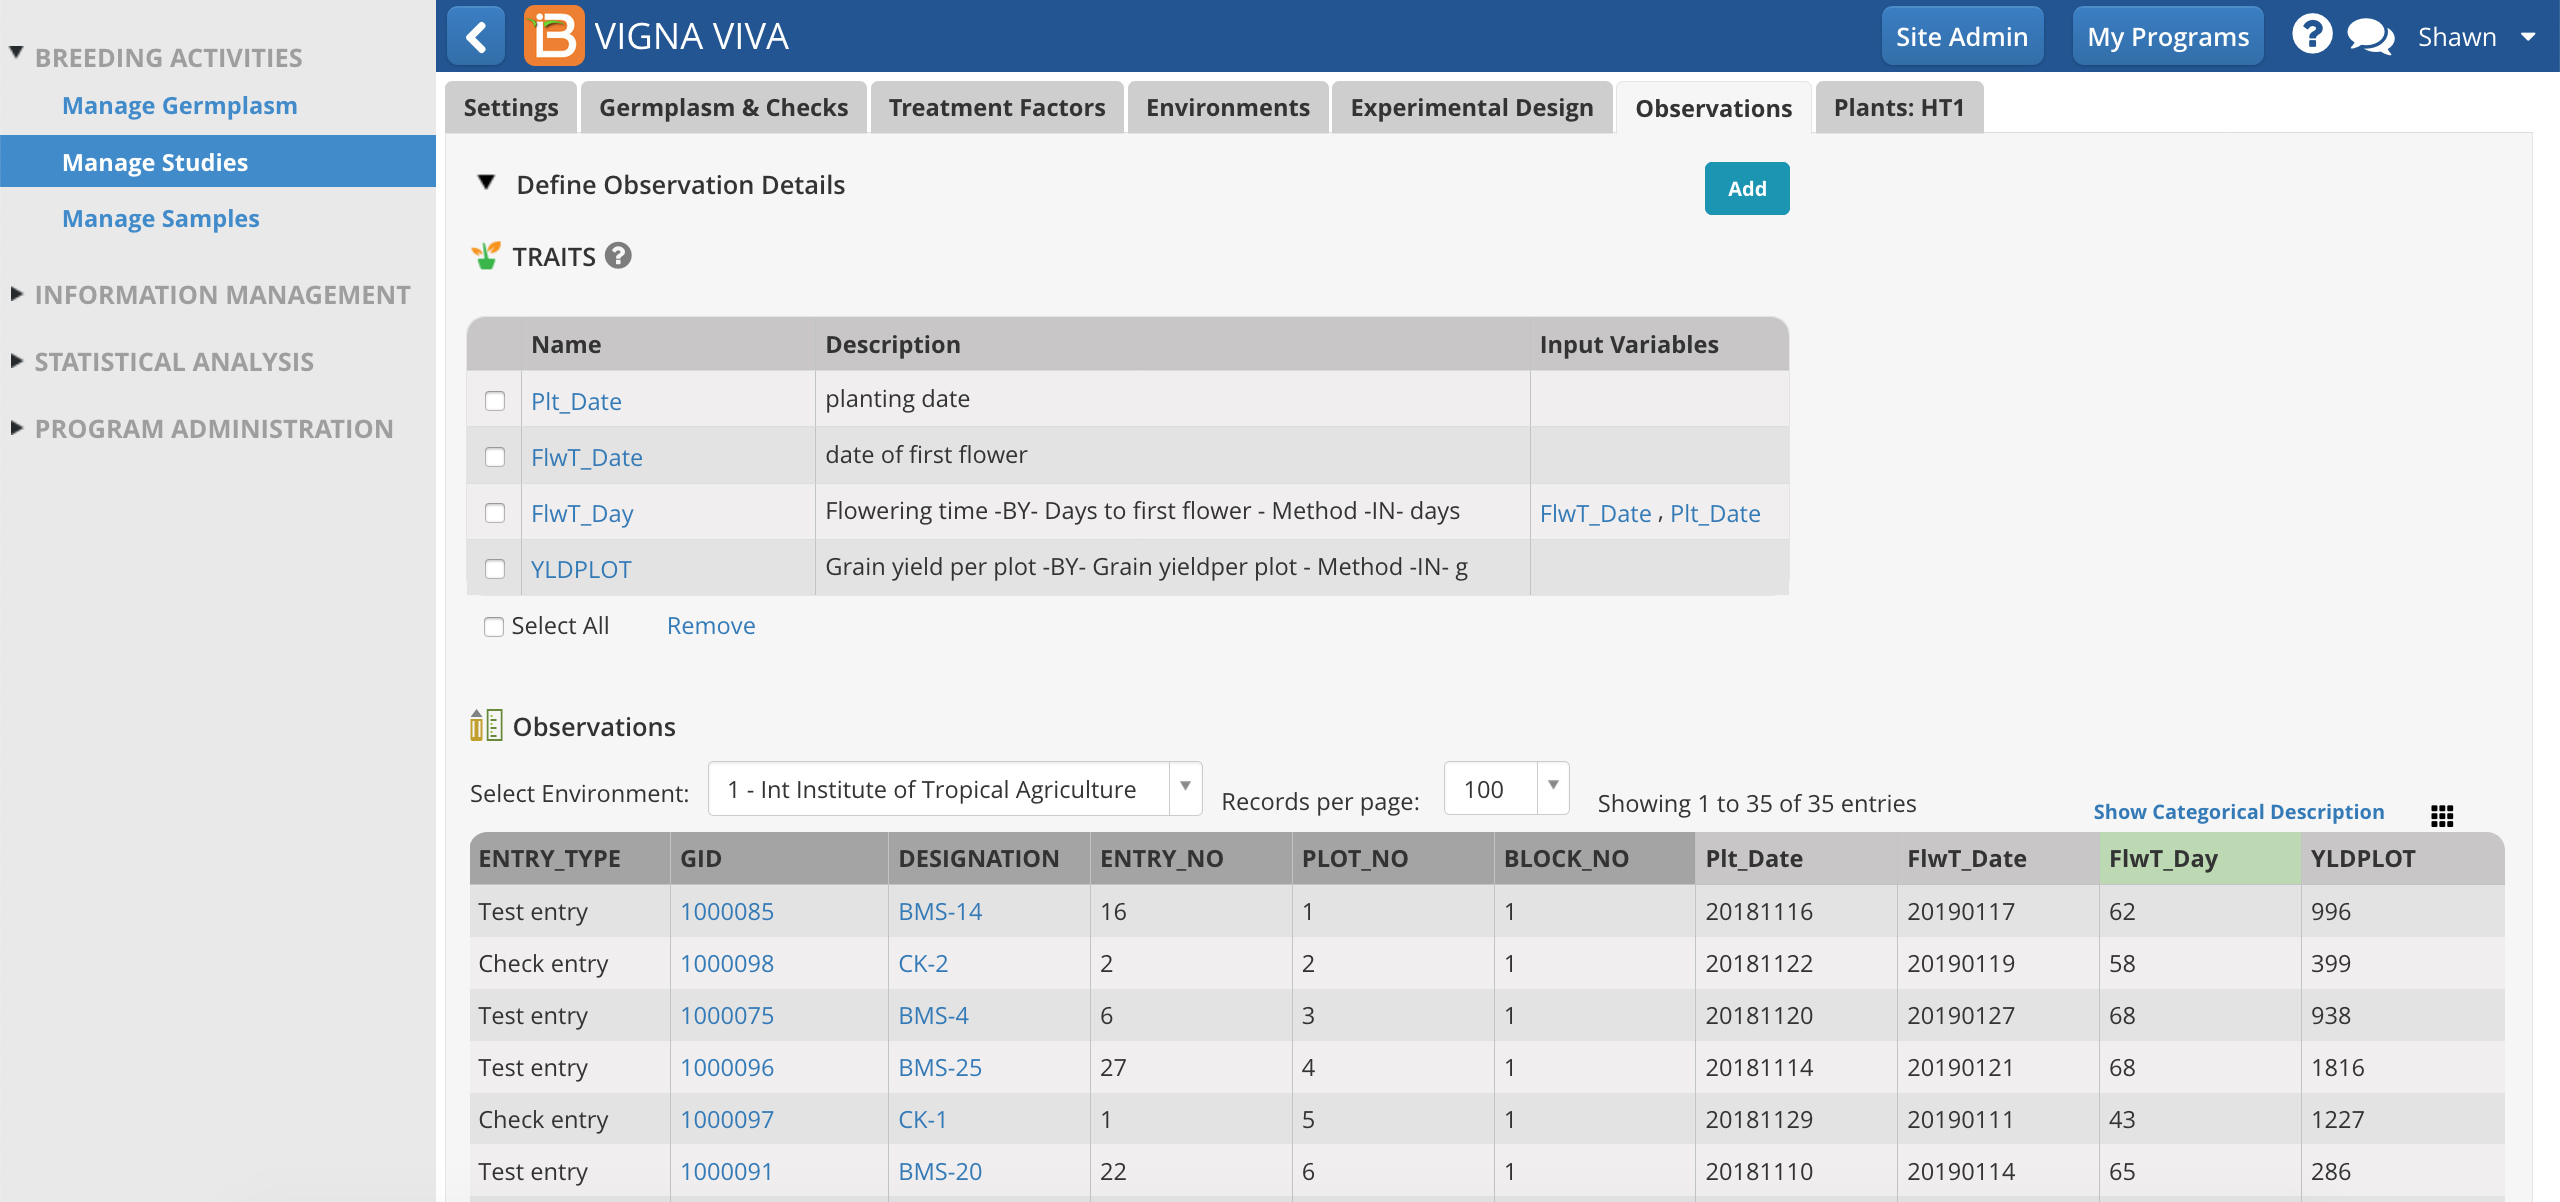
Derived Variables
Derived variable names are highlighted green within the measurements tab. The input variables are visible in the trait summary. (See more on adding Formulas to traits in the Ontology).
Add Derived & Input Variables
You must add the inputs for derived variable calculations to the dataset. Saving a study when an input variable is missing results in a notification.
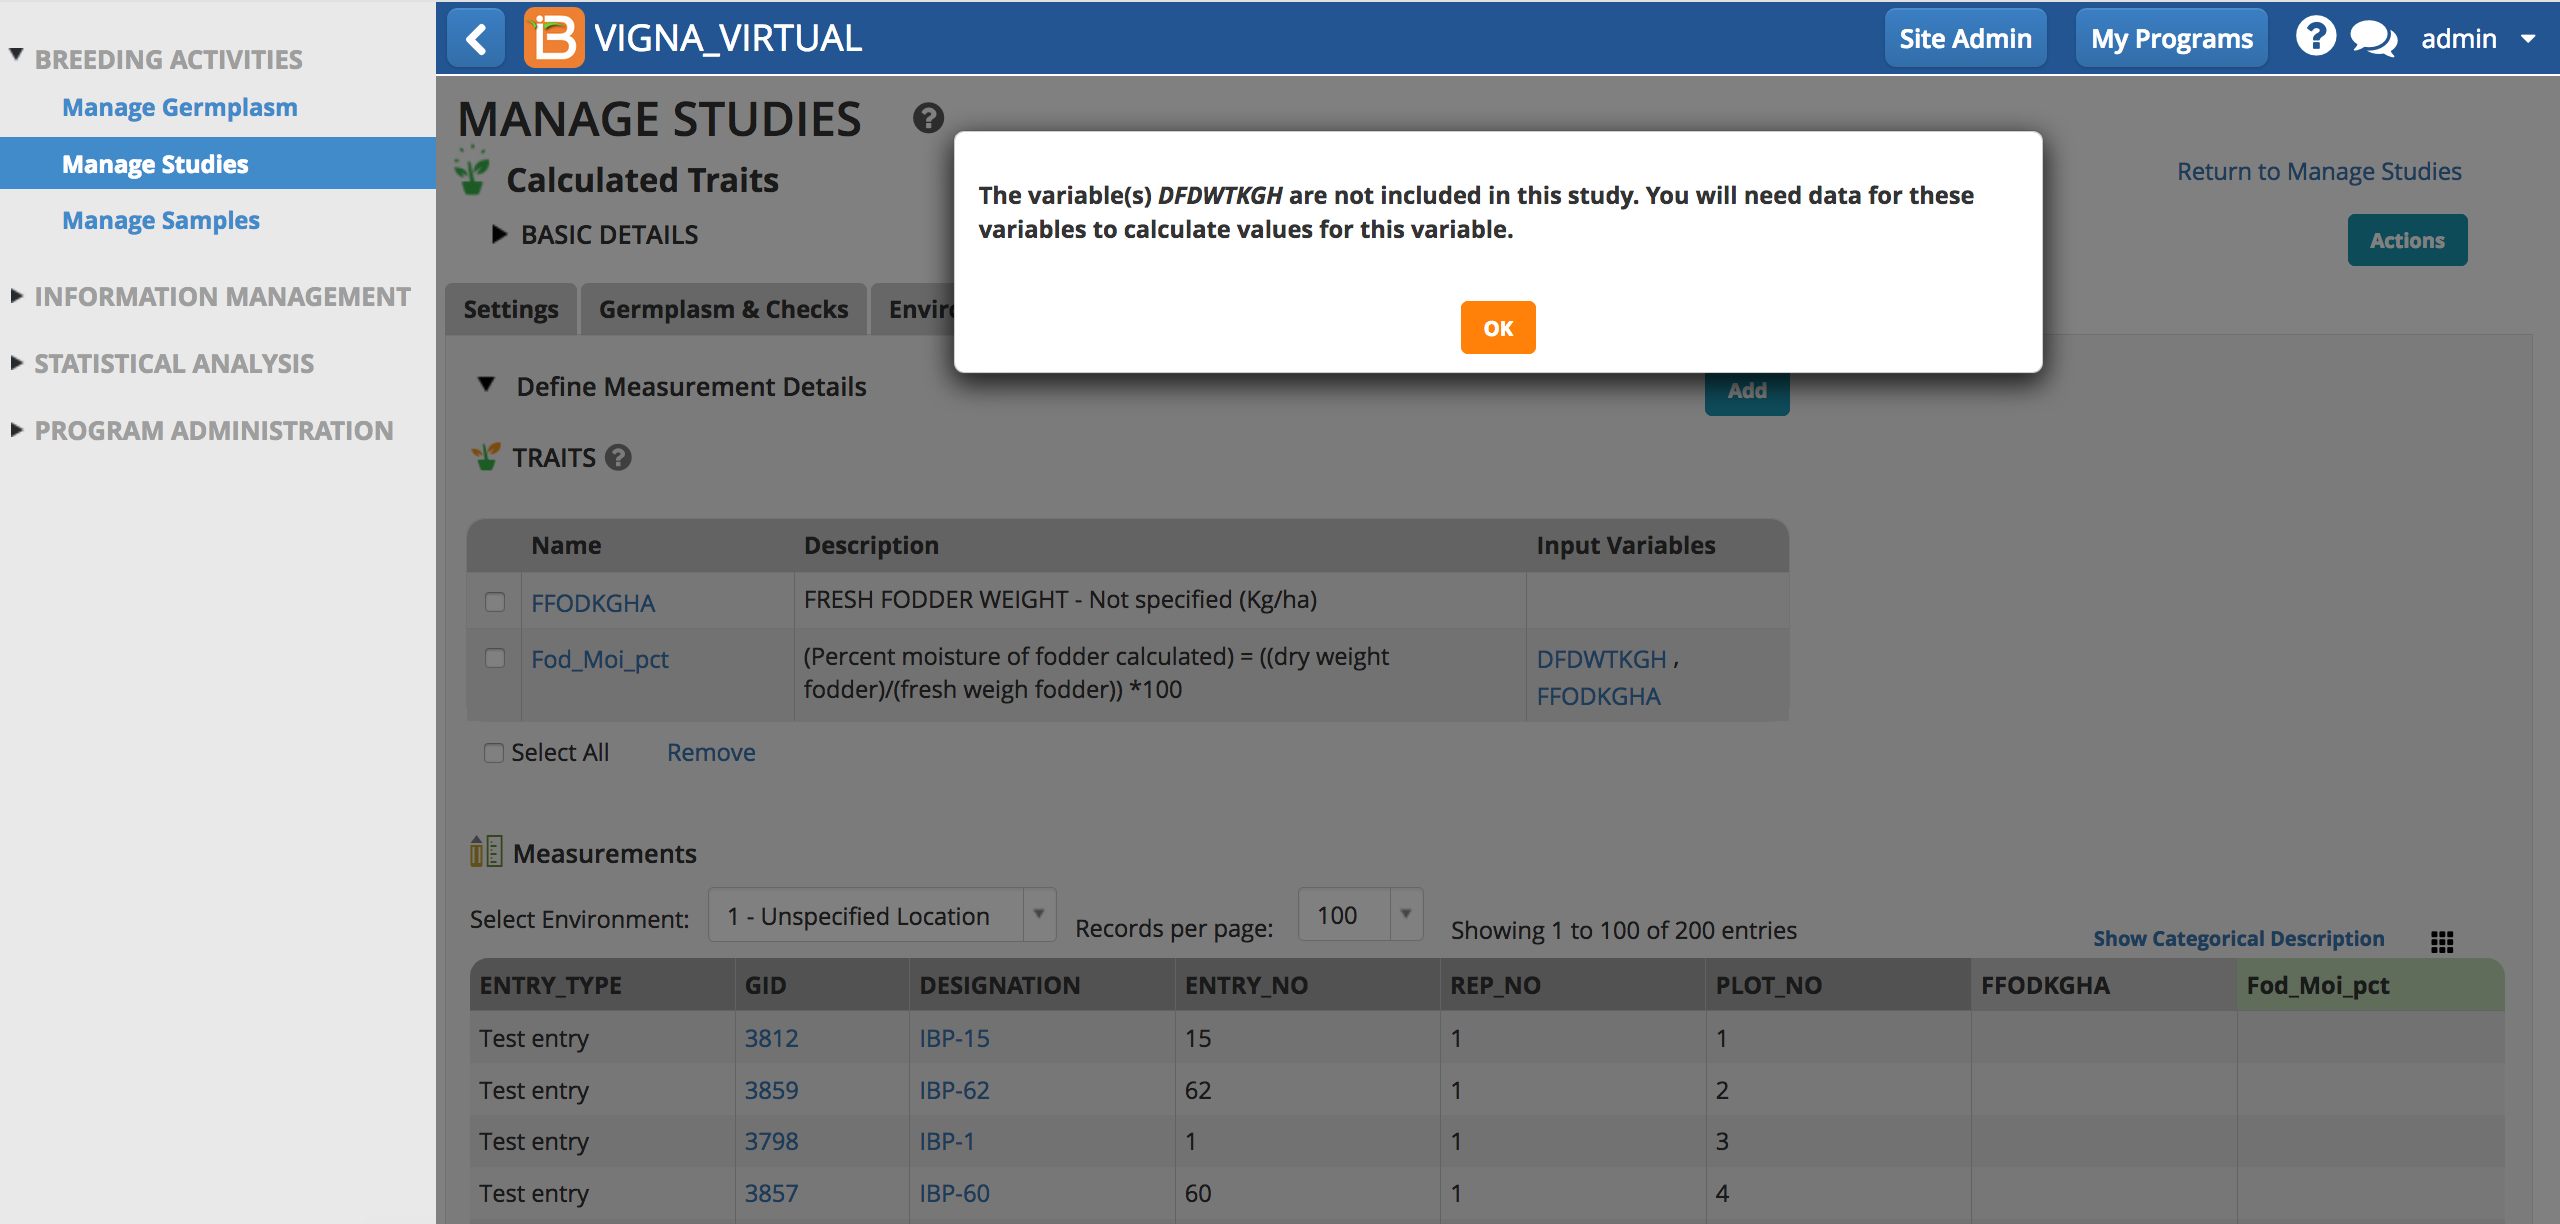
Warning message that one of the input variables needed to calculate Fod_Moi_pct is missing from this study
Execute Calculations
- Select execute calculated variable.
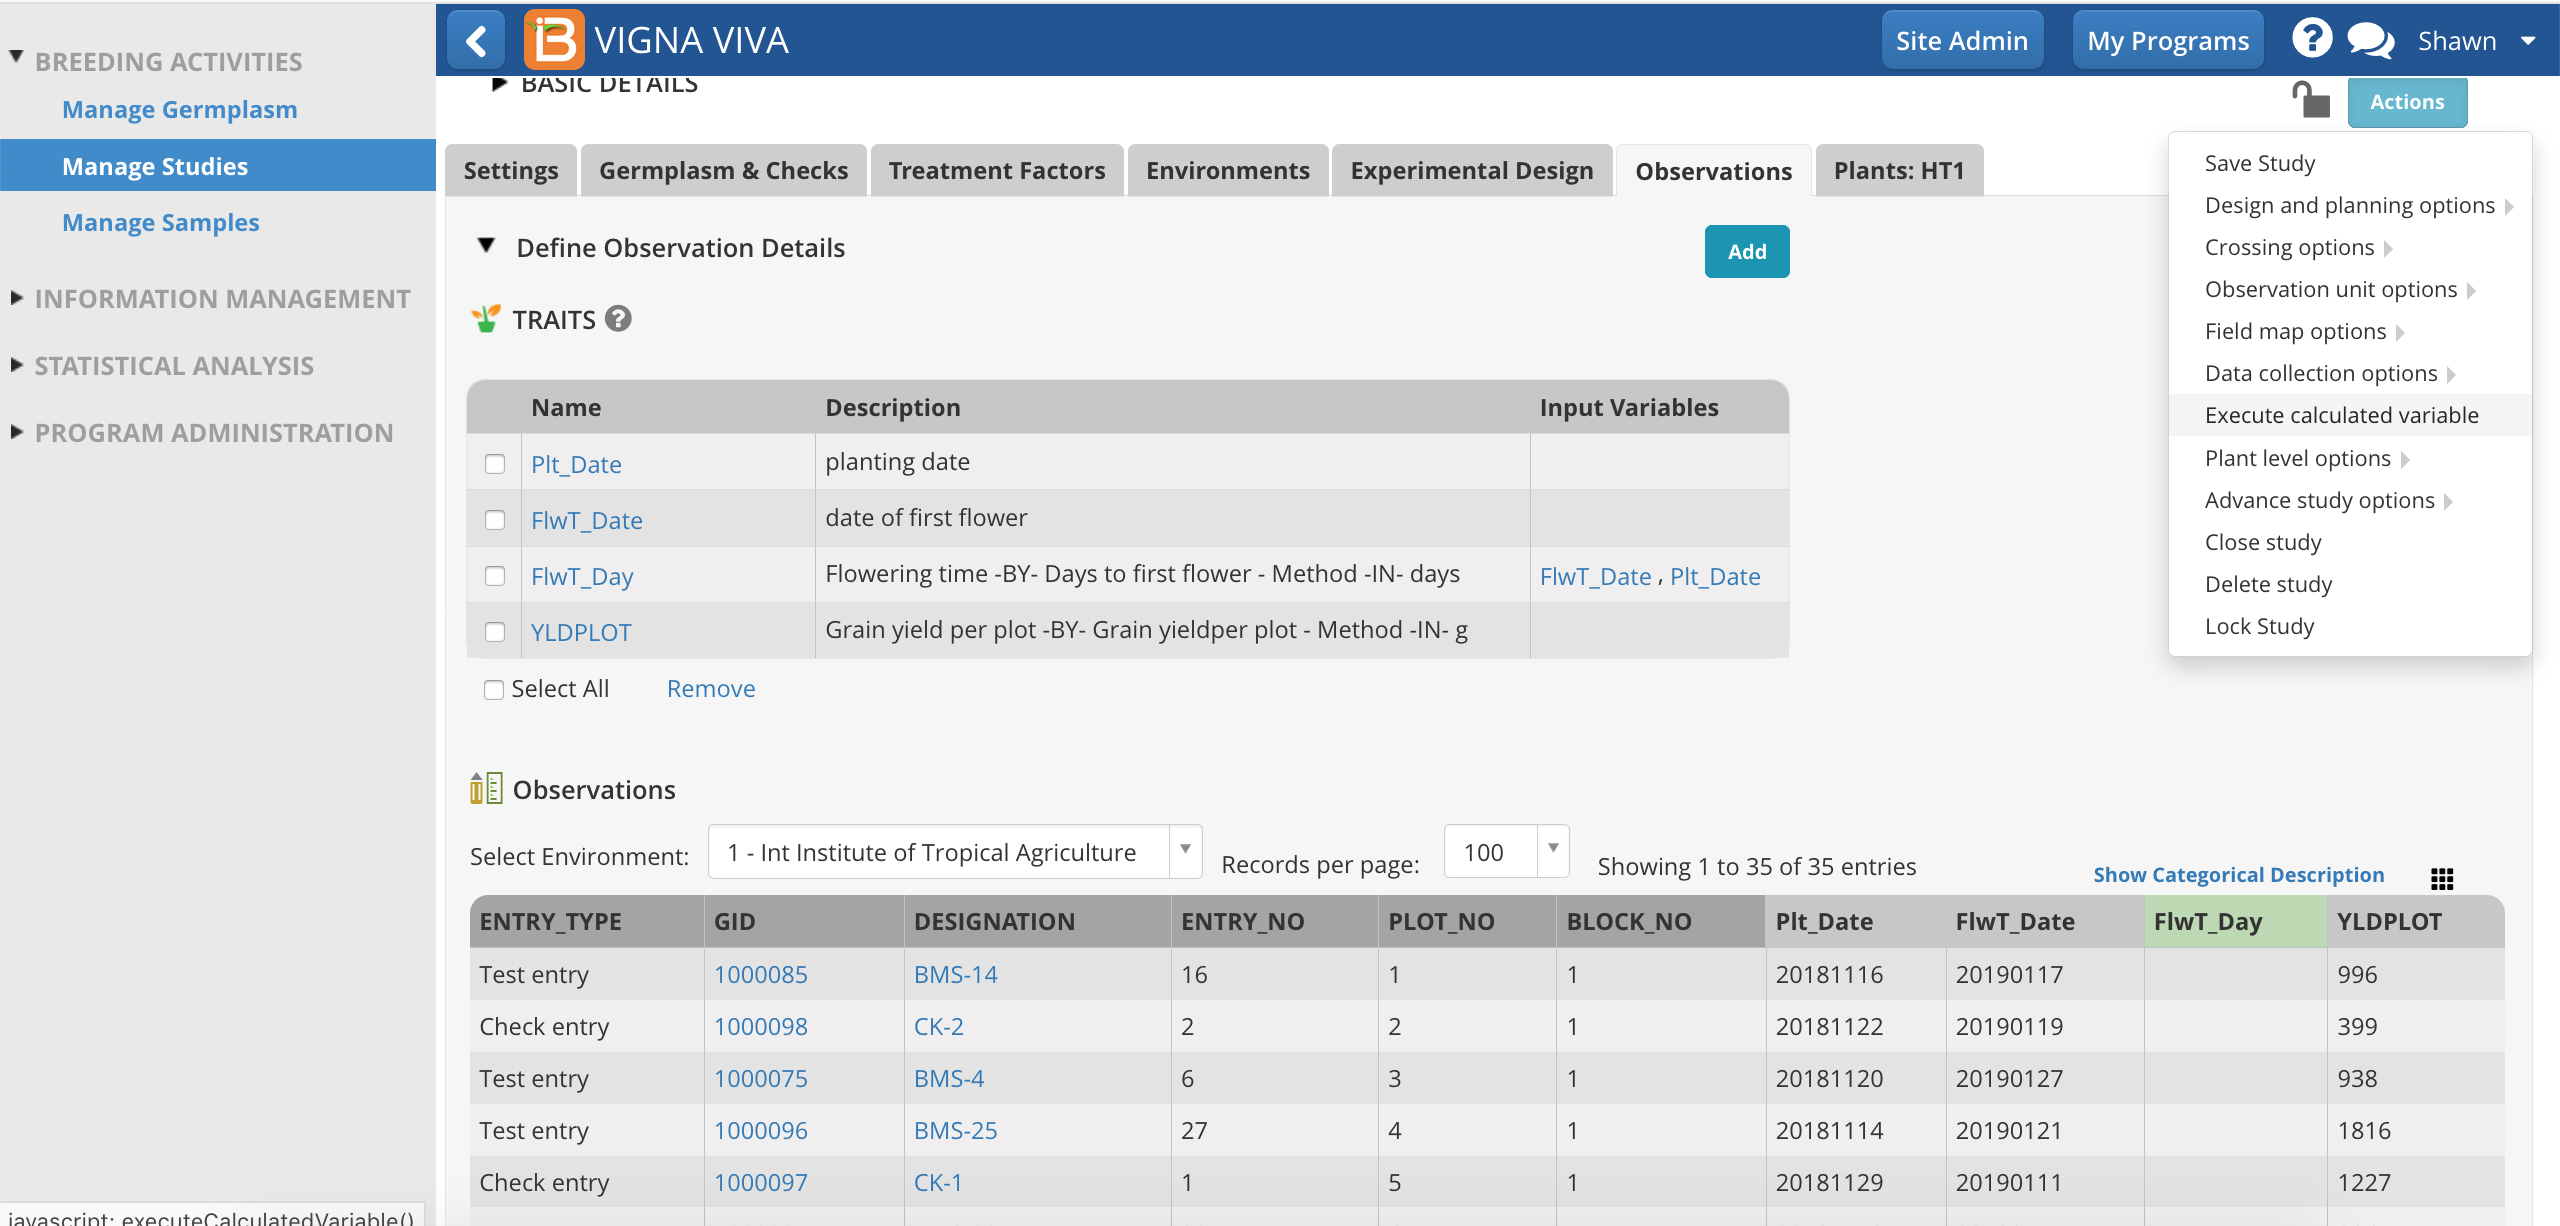
FlwT_day is a trait derived from a calculation of inputs from two other traits, Plt_Date and FlwrT_Date.
- Select the derived variable to Execute calculation. All instances are selected by default.

- Save the calculations. Keep in mind that derived variables are subject to the same out-of-bounds validation (see above) as other variables. Out-of-bounds values will need to be accepted, rejected, or corrected to save.
Sub-Observations Tab (beta)
Sub-observations tab v12 has expanded functionality compared to observations tab. Expect to see an unification of the behavior between observations & sub-observations and expanded user documentation in upcoming versions.
New Features Summary
- Selections are added with traits in the sub-observations tab
- Export all instances in a single study book file (.csv)
- Data loading takes place in 2 stages: pending and accepted.
- Batch actions for data filtering
- Expanded column filtering from the table

Data Staging
When you import sub-observation data, these data are staged in pending view. Pending view flags out of bound data and reveals if data will be over written. Data staging in pending view allows the Breeding Management System to accept data without overwriting existing data. Data staging provides an important quality control step, especially now that the system can except data automatically via BrAPI from external applications, like digital scales and handheld data capture apps.
Pending
Pending data is NOT available in the database for queries and analysis. Pending data must be either accepted for long-term storage or discarded. The filtering and batch action functionalities are still under development. Expect improvements in upcoming versions.
- Import observations. Select Accept or Discard.

- If the pending data contains values that fall outside of the min/max range defined by the ontology, choose to accept the data as is or to set all exceptions to "missing". If accepted as-is, you have the opportunity later to review and edit these values. Proceed to accept the data.

Accepted
Accepted data is in long-term database storage and available for QC as well as queries and analysis. The filtering and batch action functionalities are still under development. Expect improvements in upcoming versions.

Data for 3 traits (plant height, nodule weight, and aphid damage score) and number of plants selected have been accepted into the database.
Import Data After Acceptance
Once data has been accepted it can be overwritten or additional data added via data import. In the following example, a breeder has accepted data, but notices an error in the measurement of nodule fresh weight in the originating spreadsheet. She is able to correct the spreadsheet and import the file again.
- Review the pending data. Select Accept or Discard.

The BMS only displays new data in pending view. Although the file uploaded also contained plant height and selections, these data are not shown in pending view because they match the already accepted data. Only nodule fresh weight needs to be reviewed in pending view. Notice that the first nodule fresh weight measurement of 153g will be replaced with 15.3g once if the pending data is accepted.
