

Summary
This tutorial describes how to design and plant an F1 nursery. (Field mapping and label printing steps are not covered - these activities are described in an earlier tutorial, Design & Plant Crossing Nursery.) The tutorial also covers how to advance to the F2 generation with random bulk breeding methods and record F2 seed harvest amounts.
Start a New Nursery
- From the Manage Studies tool, select Start a New Study.

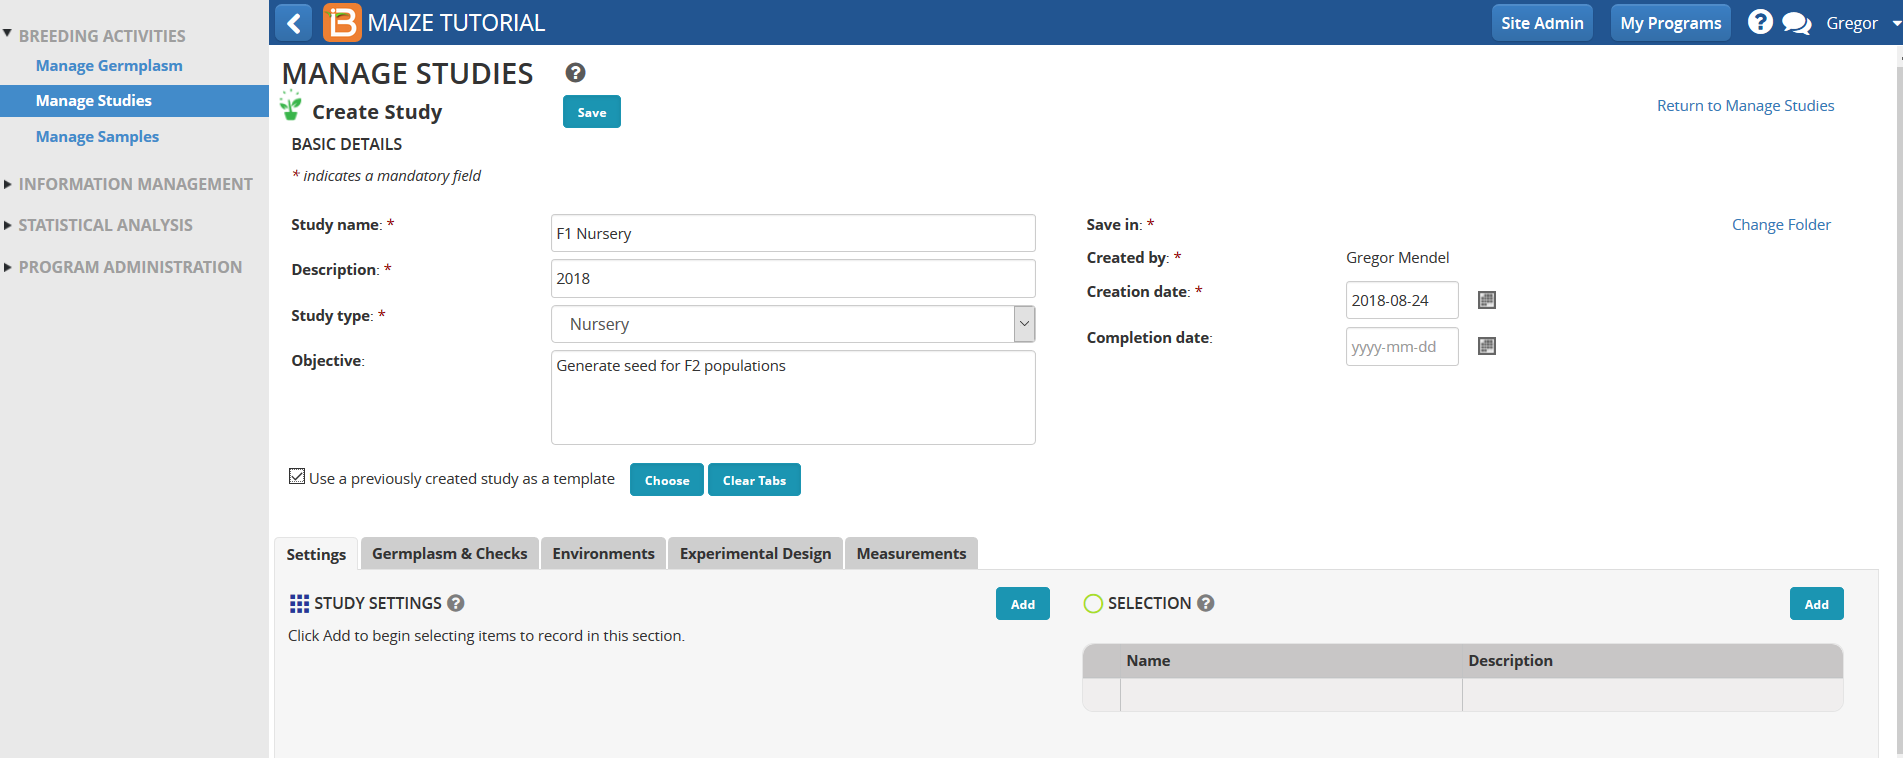
Nursery Details
- Identify Nursery as the Study type and name and describe the F1 Nursery. Use a previously created nursery as template. Select Choose.
- Choose the previously created Crossing Nursery as a template.
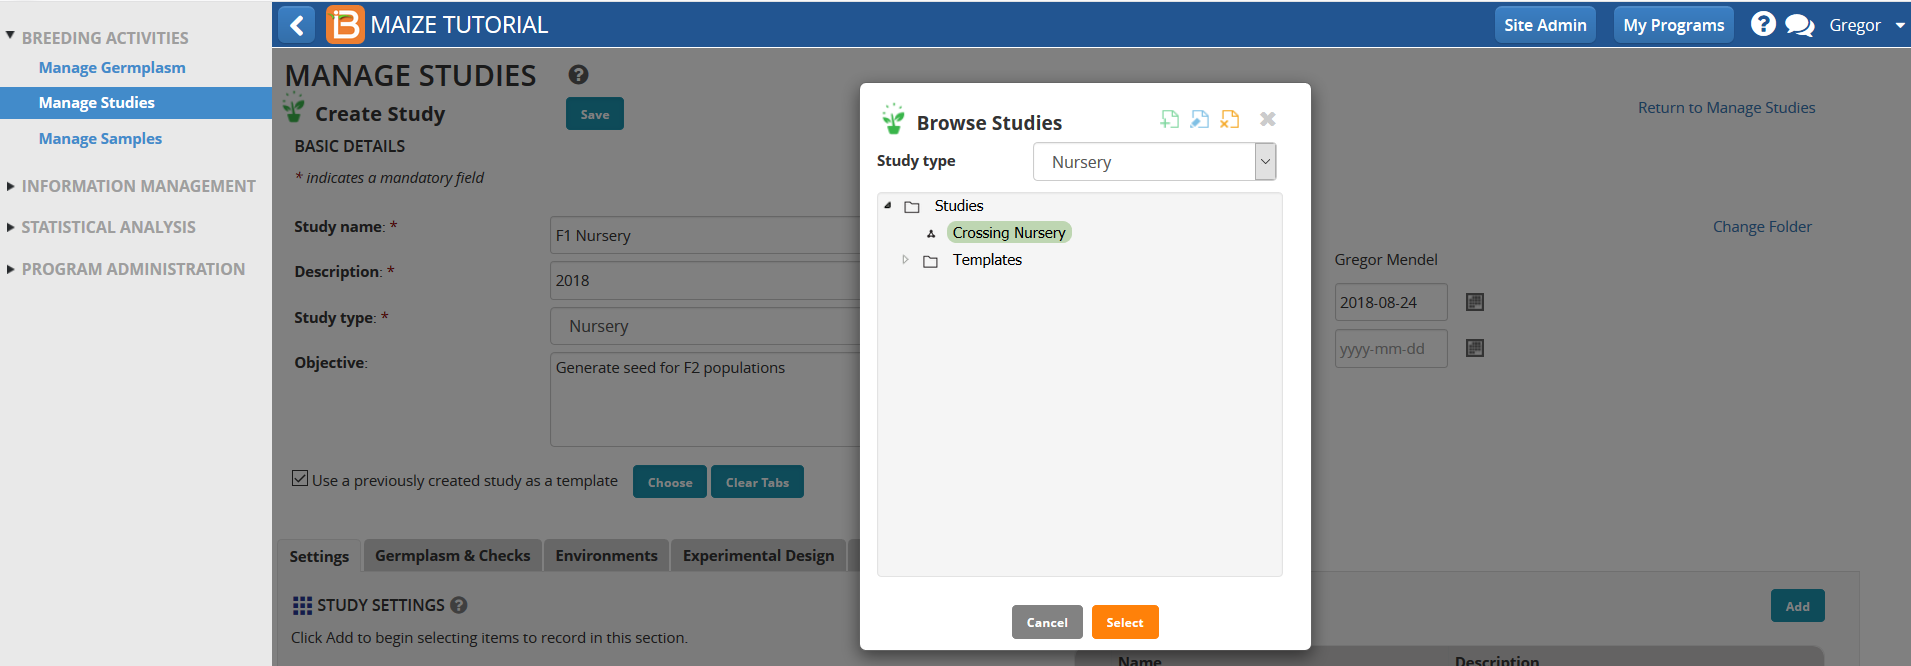
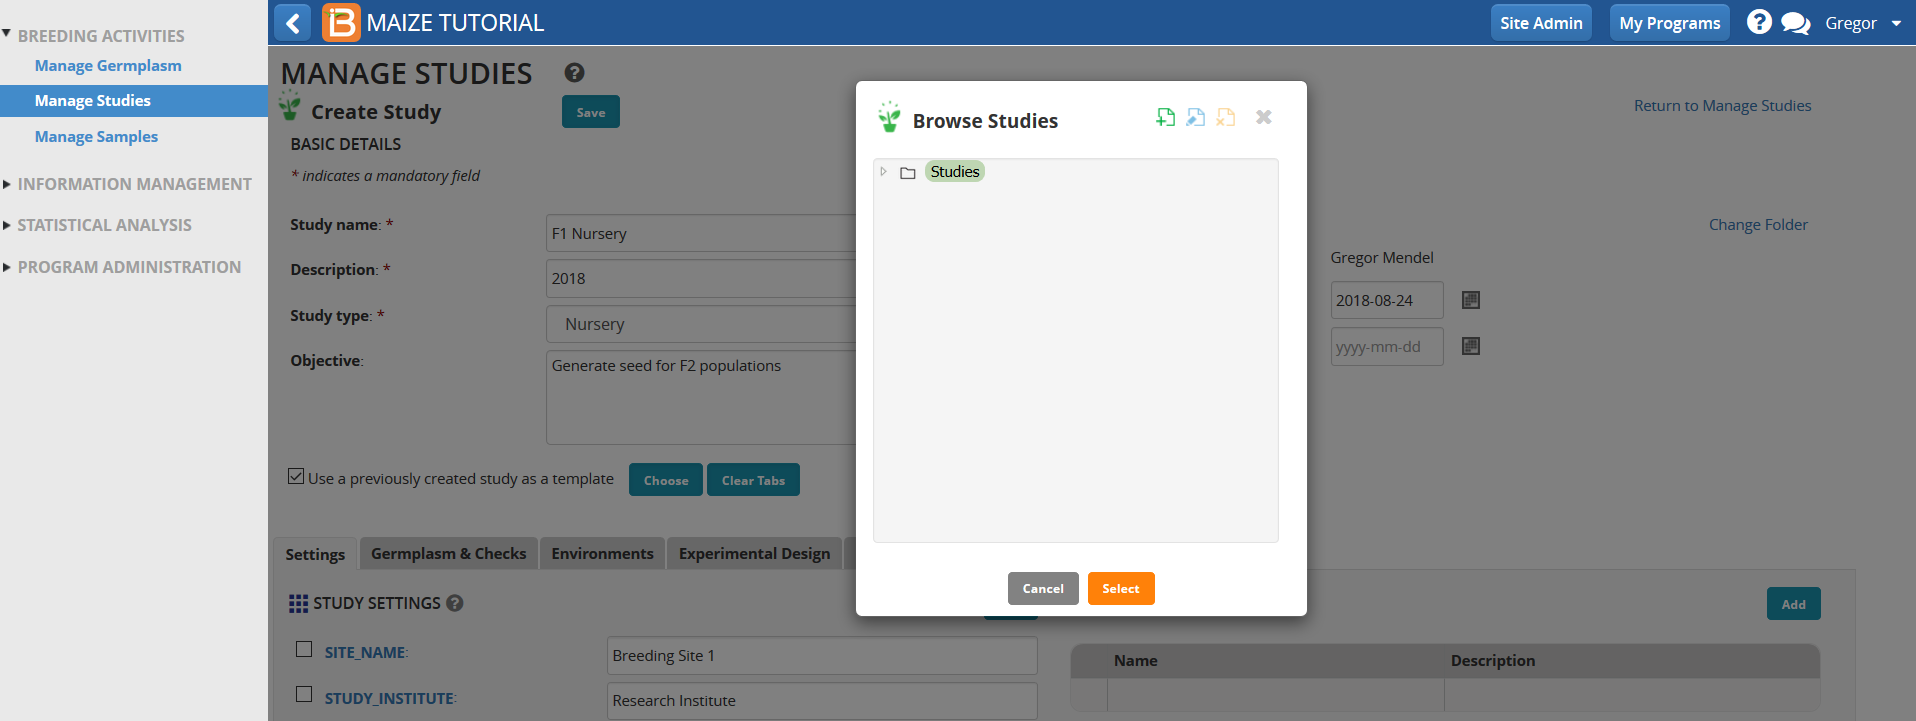
- The settings specified in the crossing nursery now populate the F1 nursery.
- Save Nursery
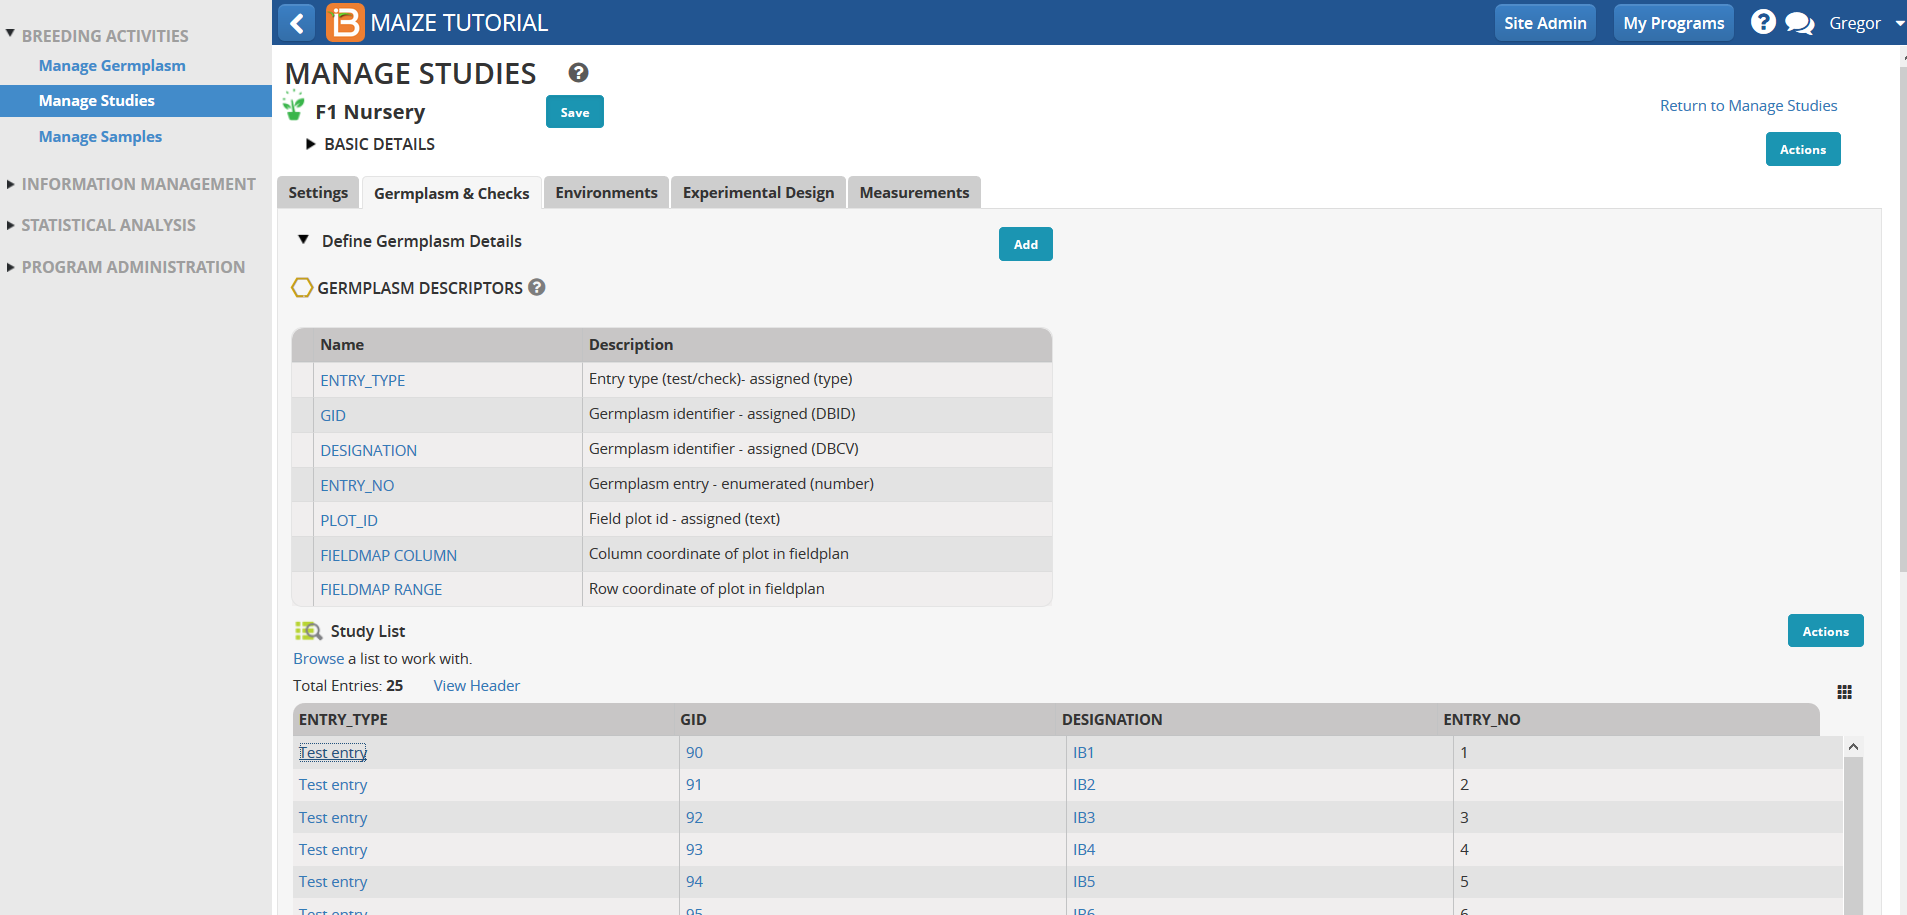
Germplasm & Checks
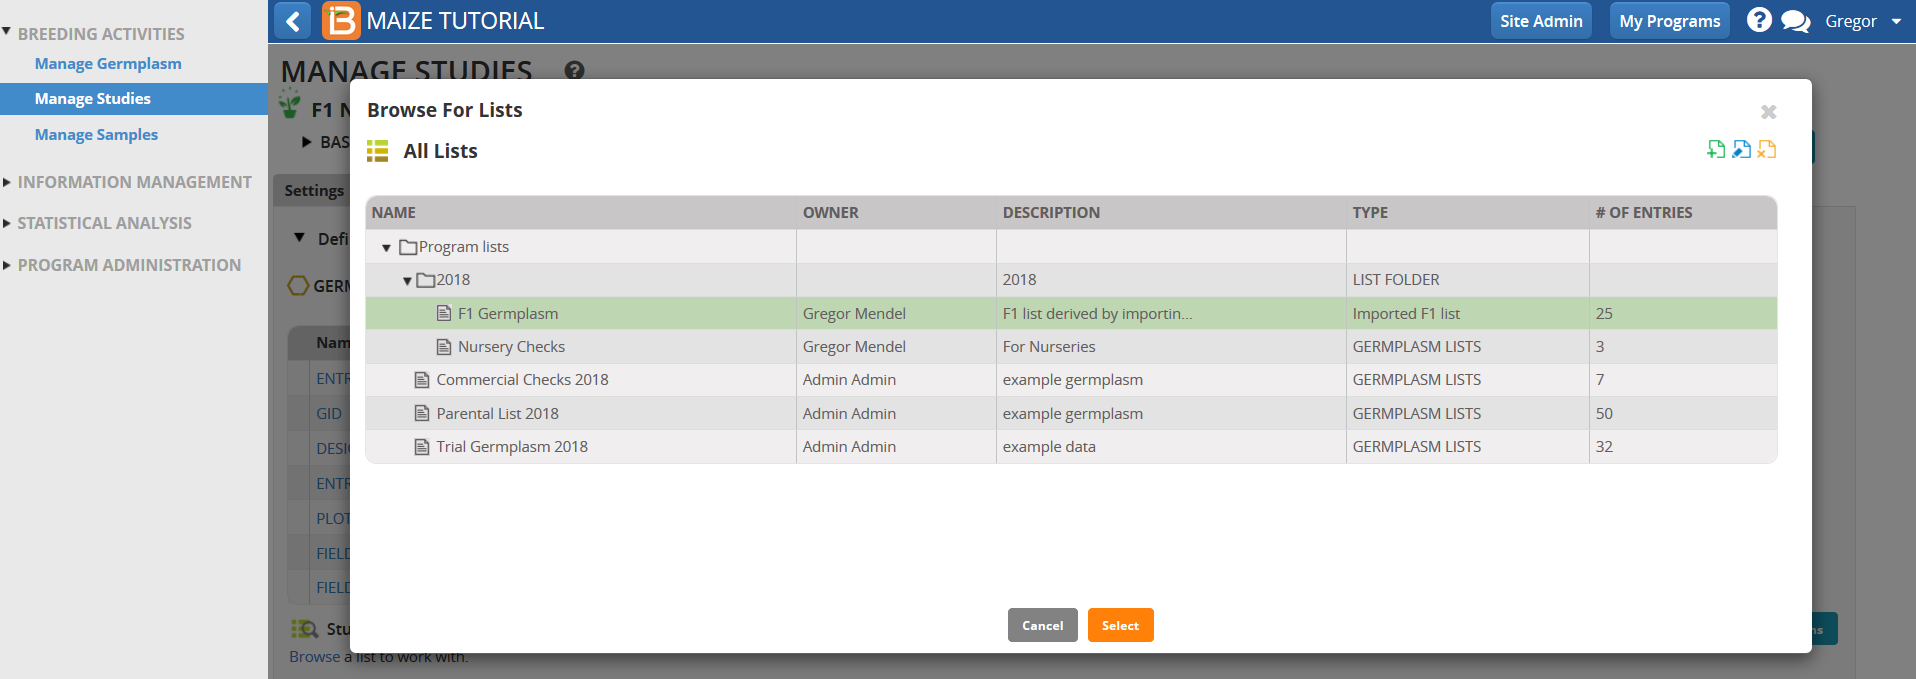
- Select the Germplasm & Checks tab and Browse for the F1 nursery list.
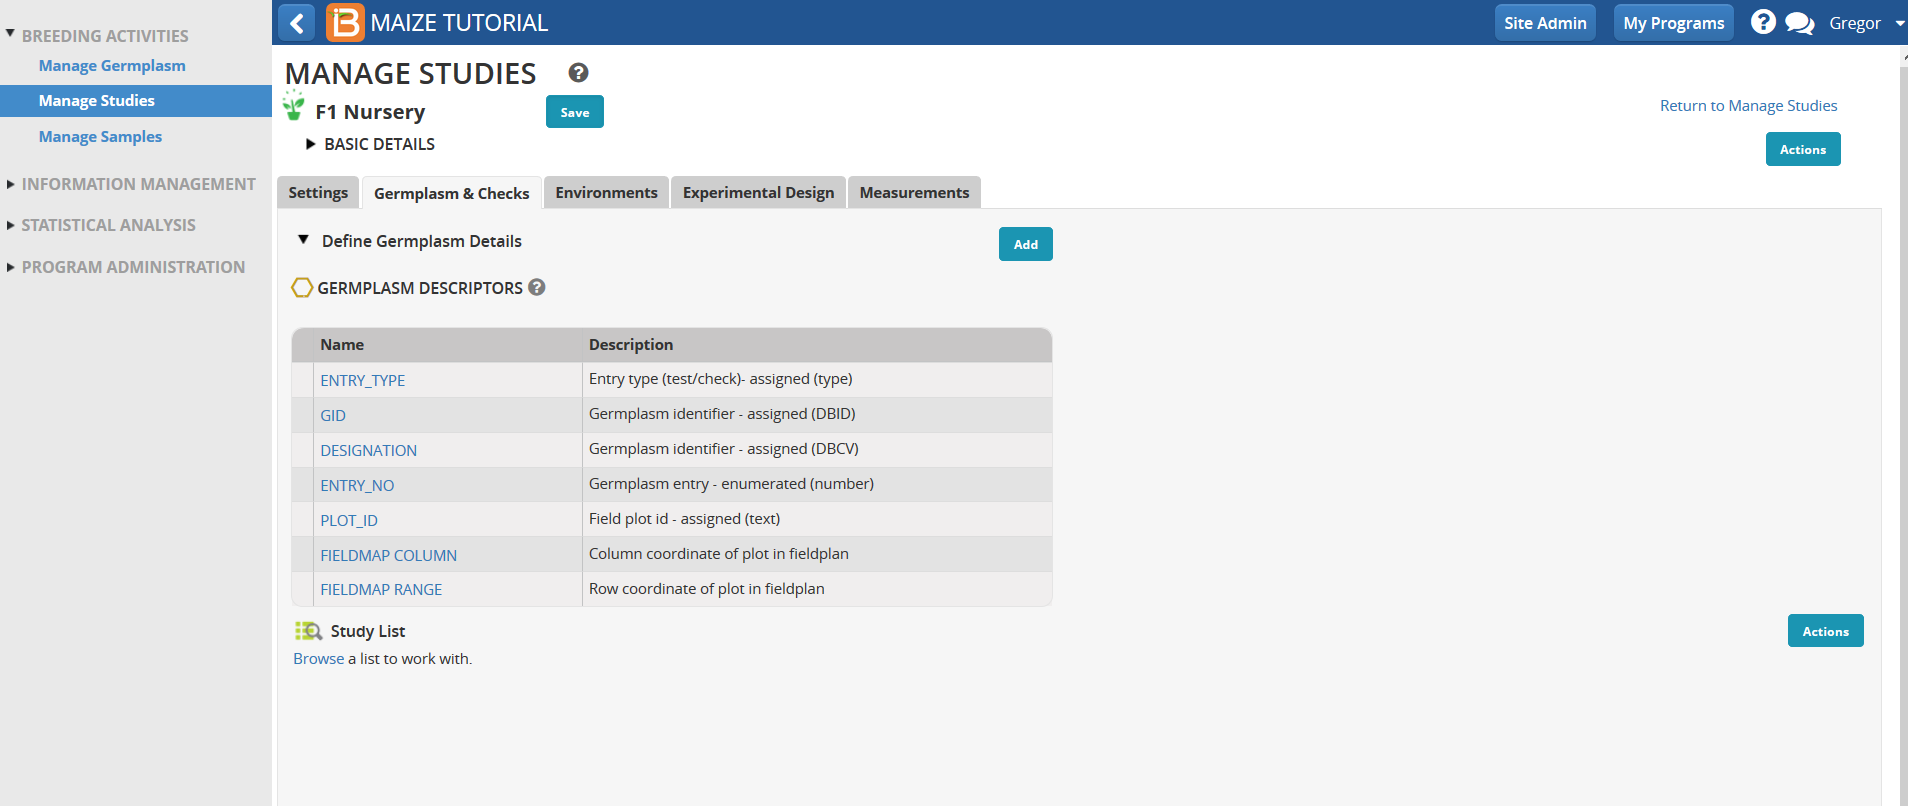
- Select the 25 entry F1 Germplasm list - these will be the F1 nursery test entries. Maize F1 nurseries generally have no checks.
- Save the nursery.
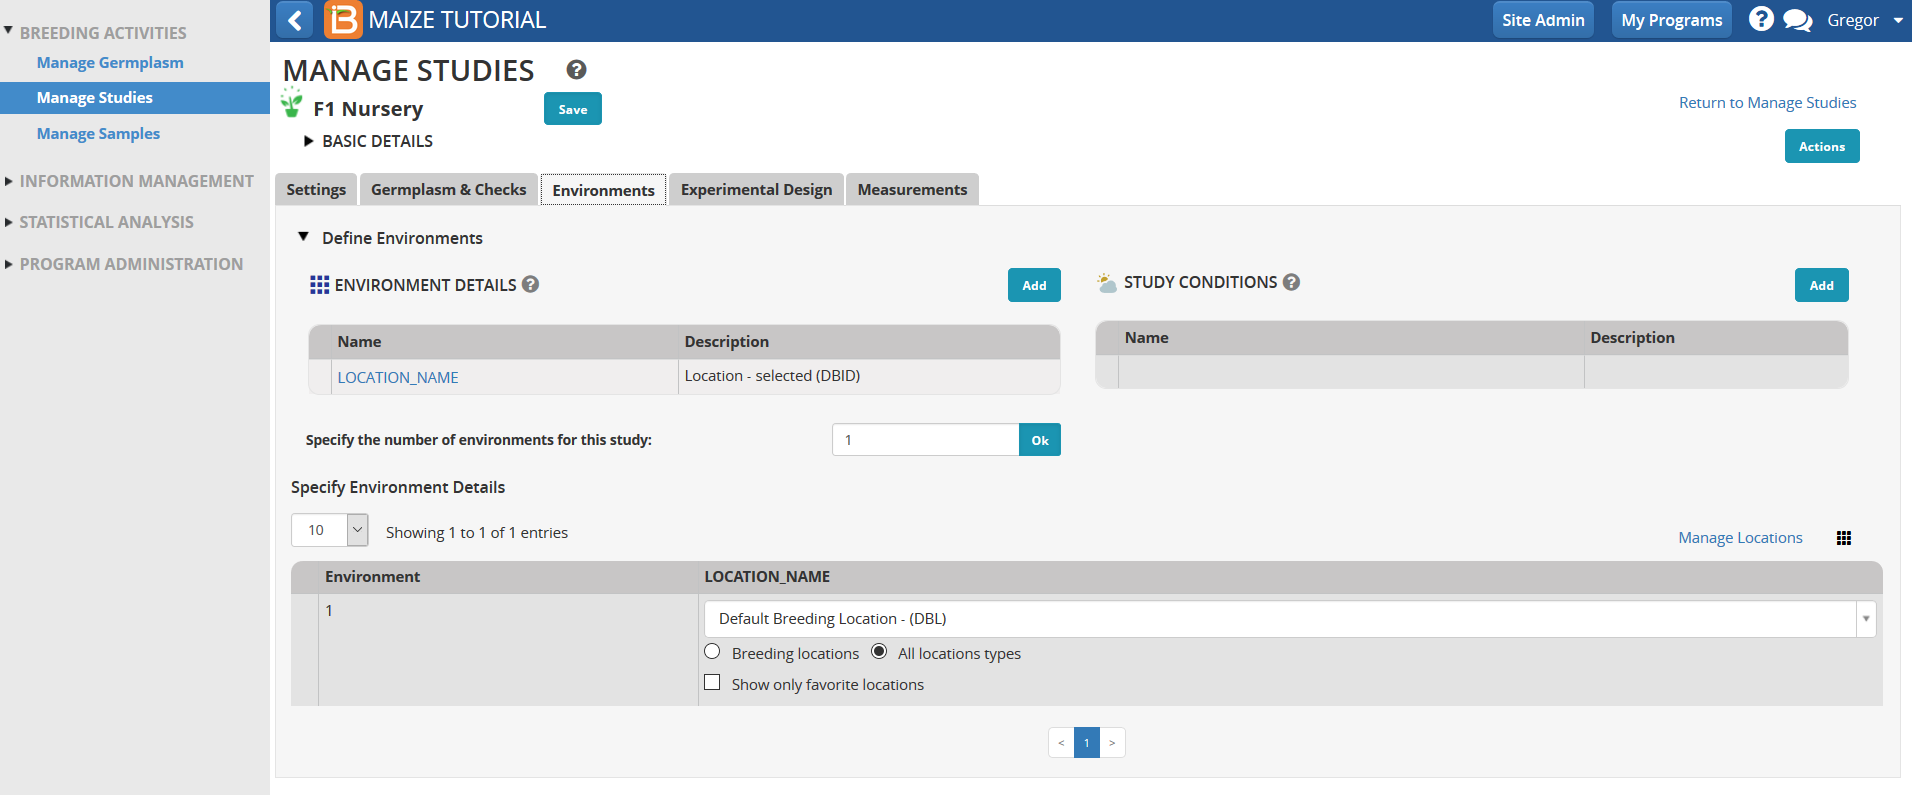
- Open the the Environment tab
Default Breeding Nursery is highlighted.
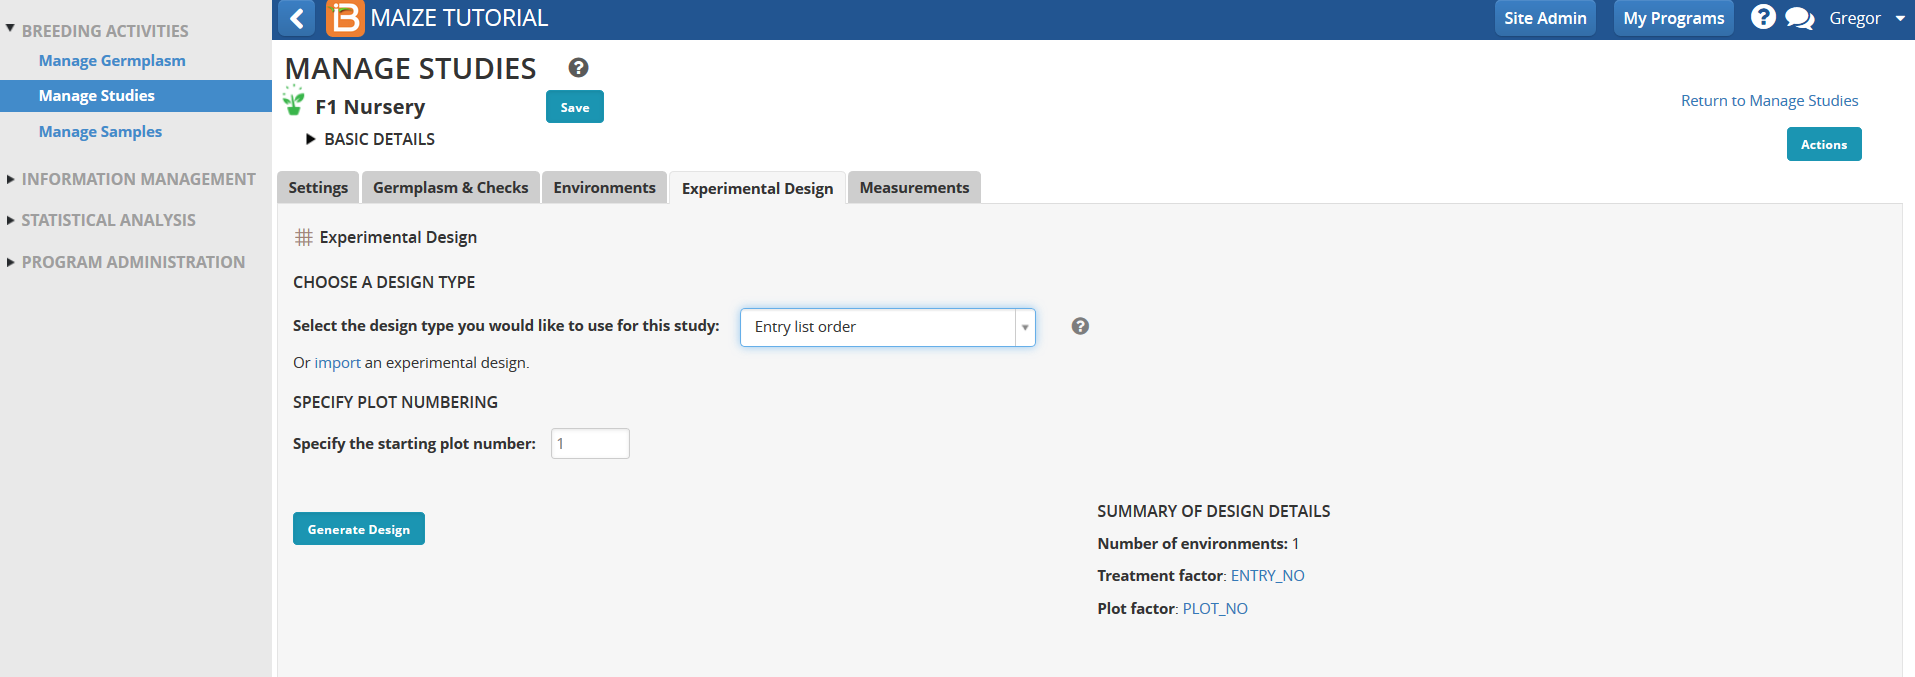
- In the Experimental Design tab, select Entry list order as the design type.
- Generate Design
- Save
Withdraw Seed for Planting
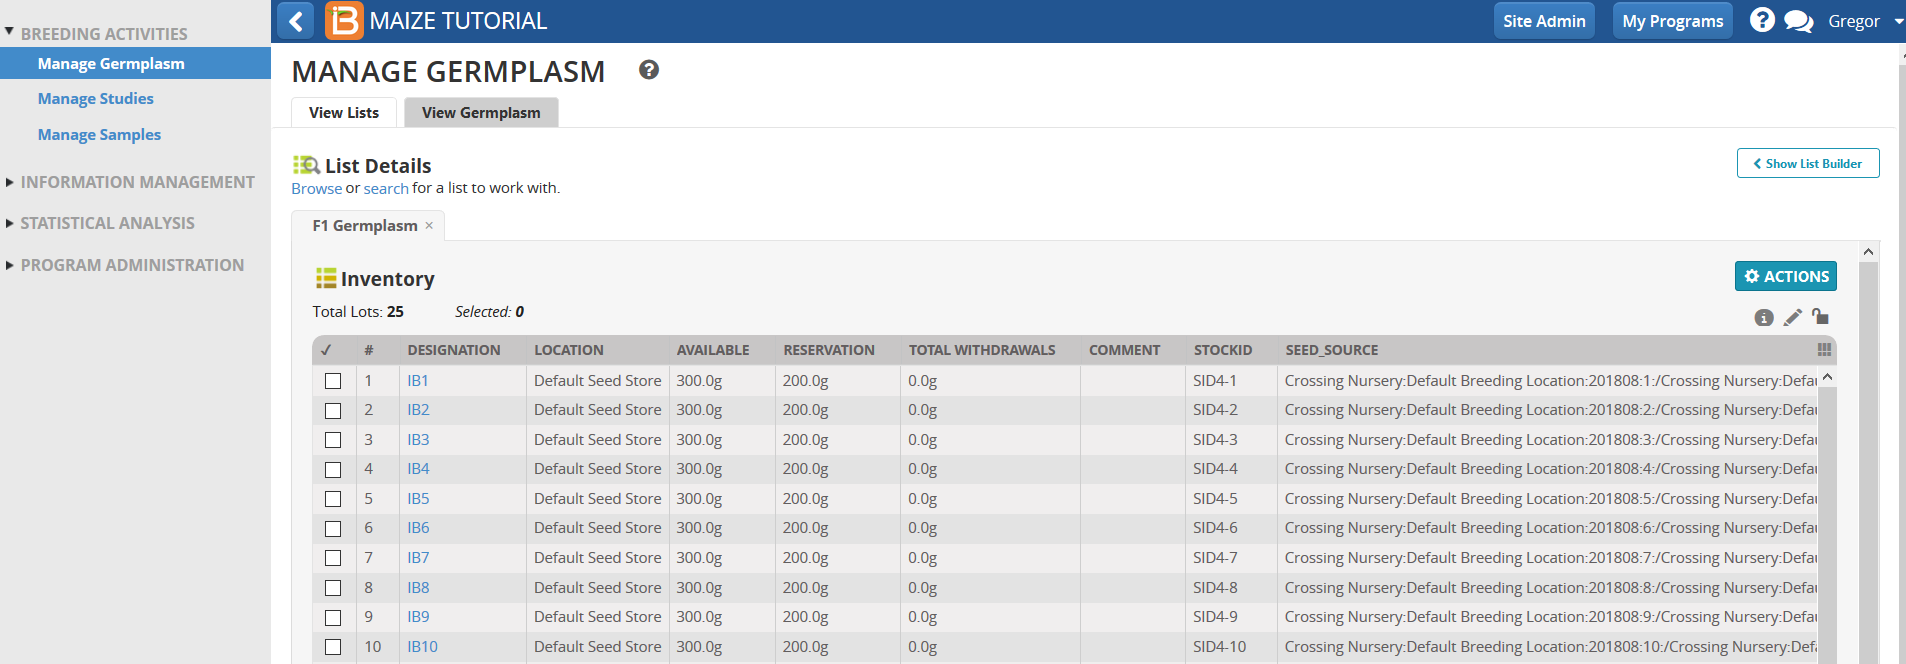
- Return to Manage Germplasm and open the F1 Germplasm list in Inventory View.
In the previous tutorial, we reserved 200g of seed from each entry for the F1 nursery. This amount is indicated in the Reservation column.
- Export Seed Preparation list from inventory view.
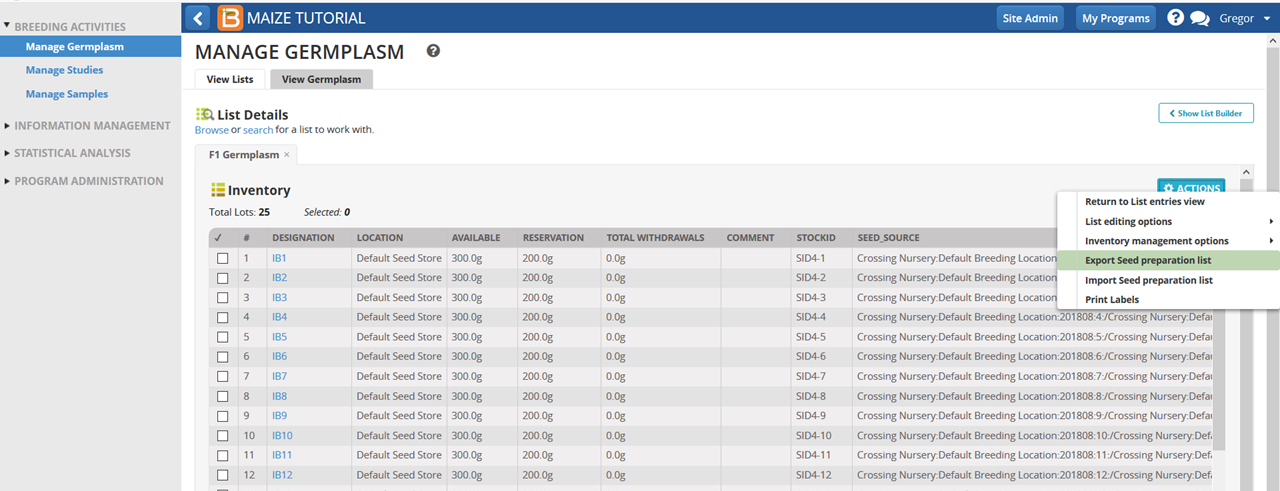
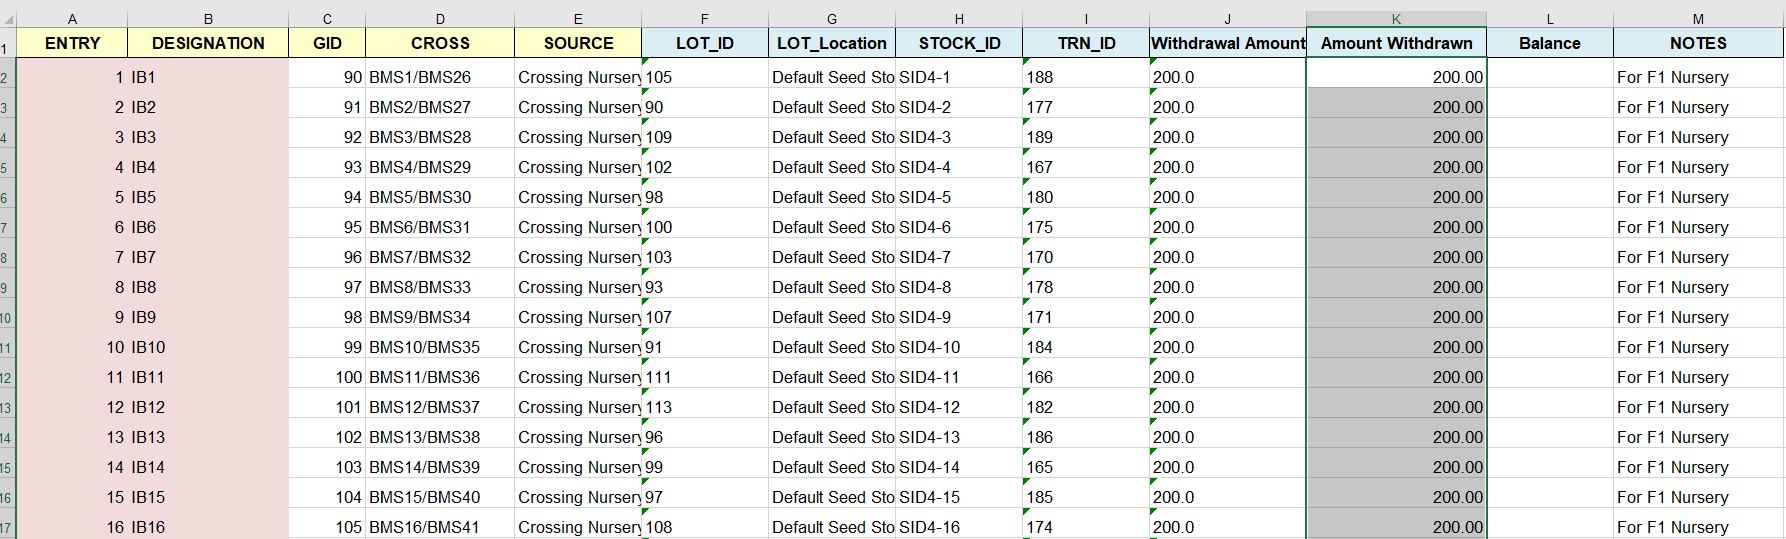
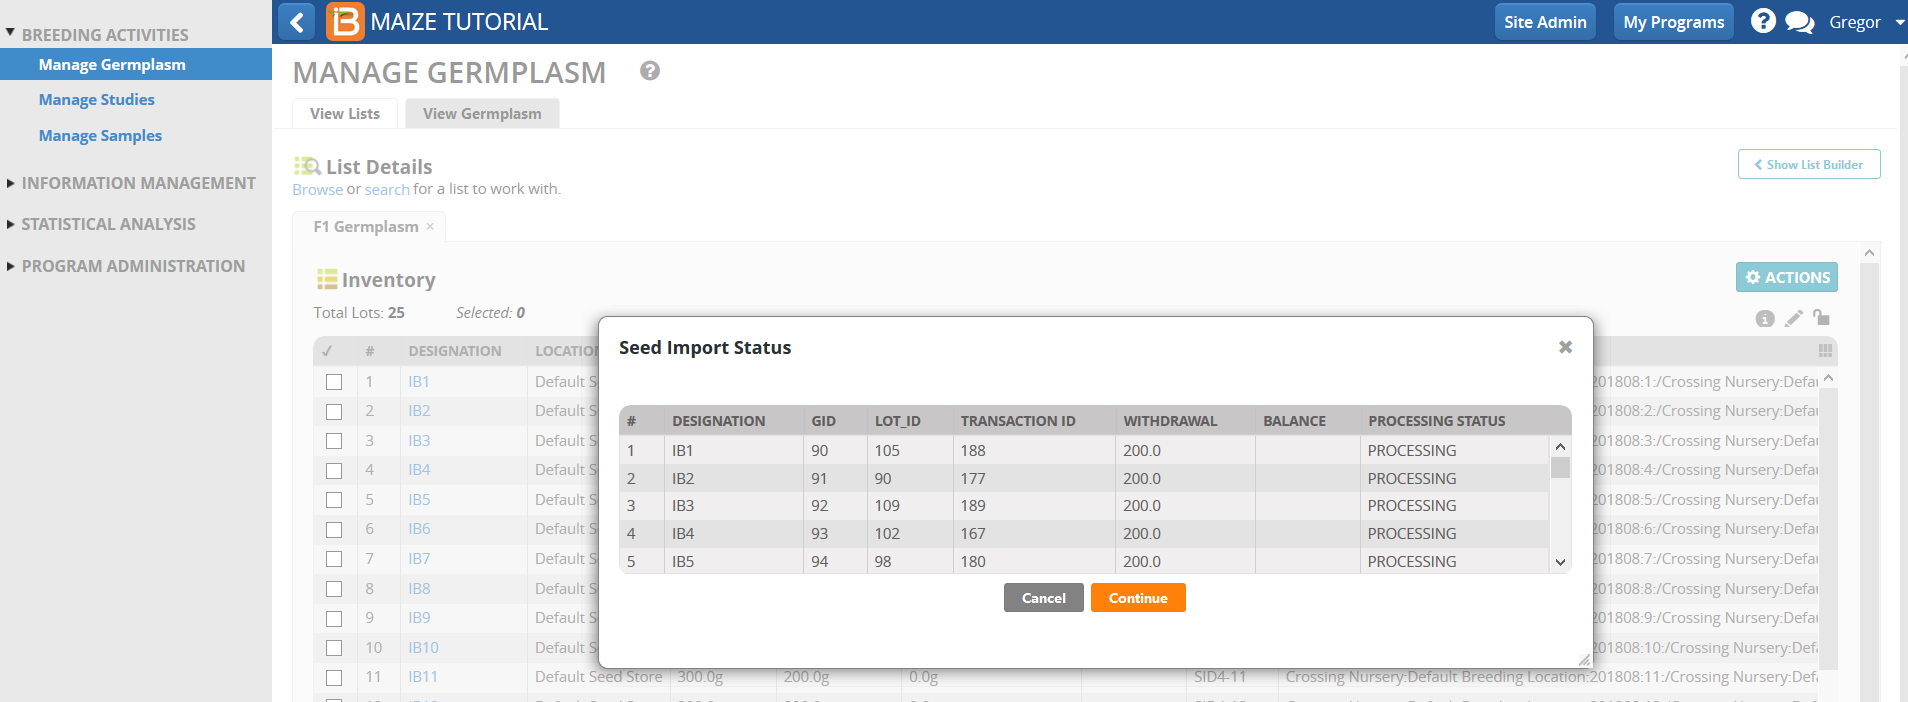
- All reserved entries are included on the seed preparation list. Fill the Amount Withdrawn column with 200g for each entry and save (.xls).
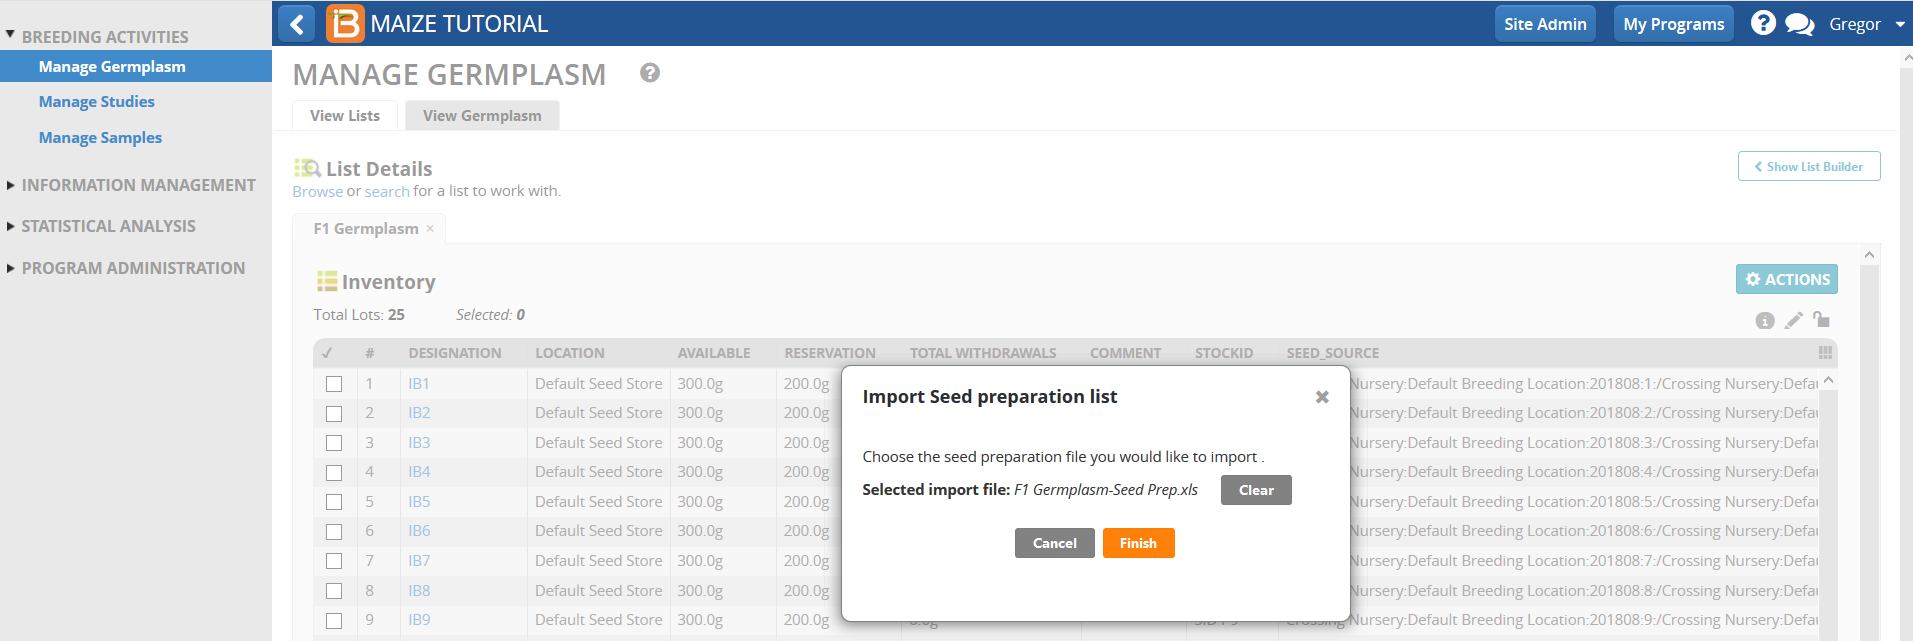
- Select Import Seed Preparation list from the Actions menu. Browse and upload the saved Seed Preparation list. Select Finish.
- Continue.
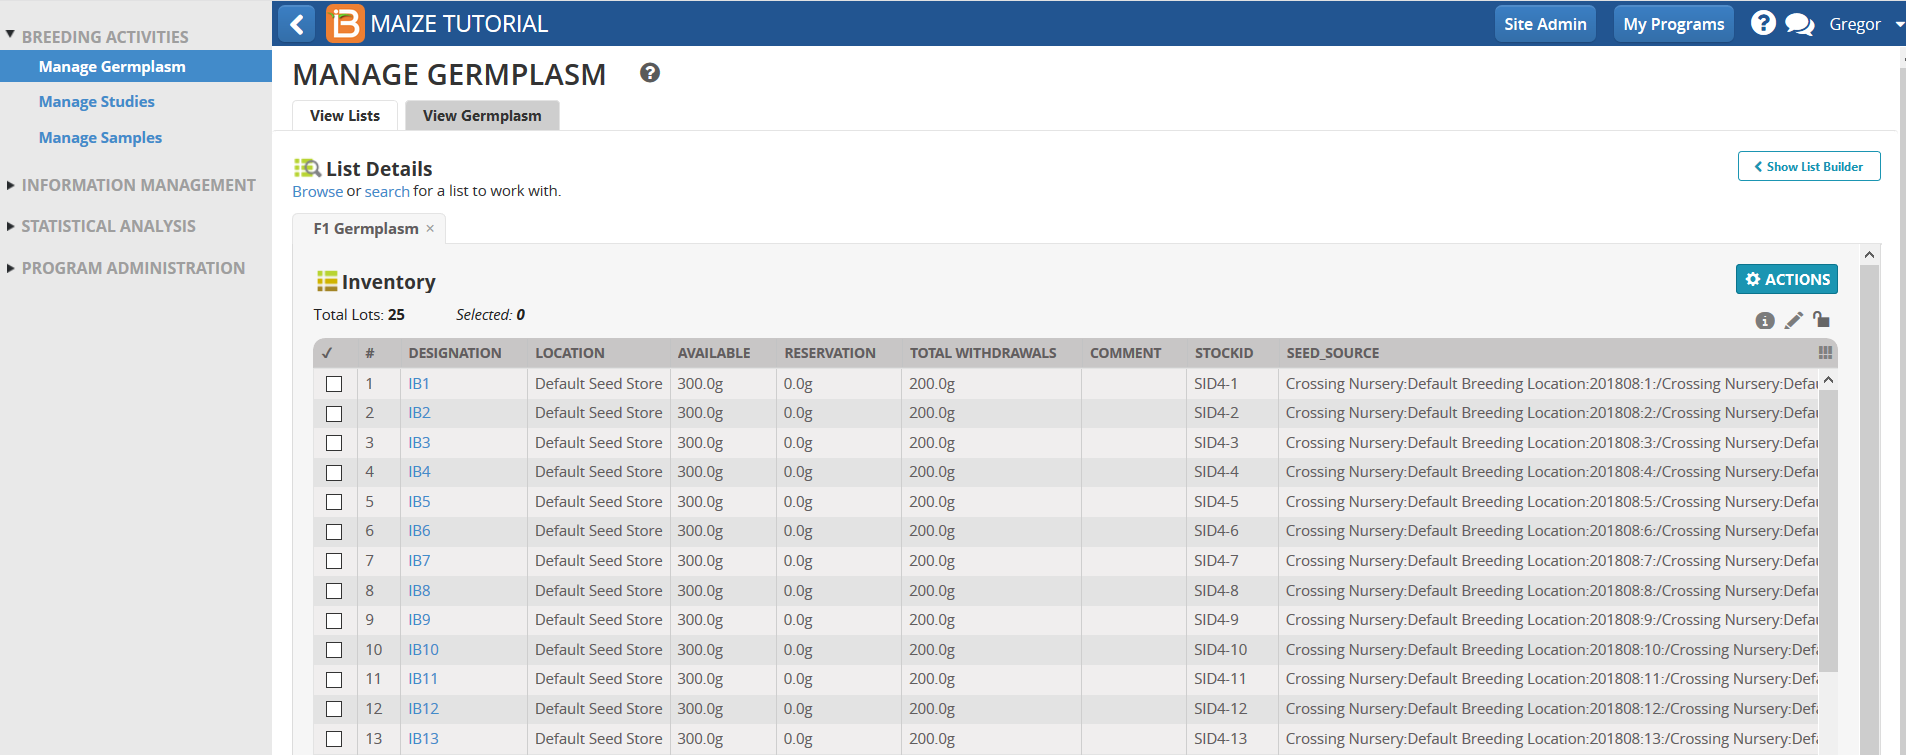
The 200g of seed is reported in the TOTAL WITHDRAWALS column. The F1 nursery is now ready to be planted in the field to be advanced to the F2 generation.
-
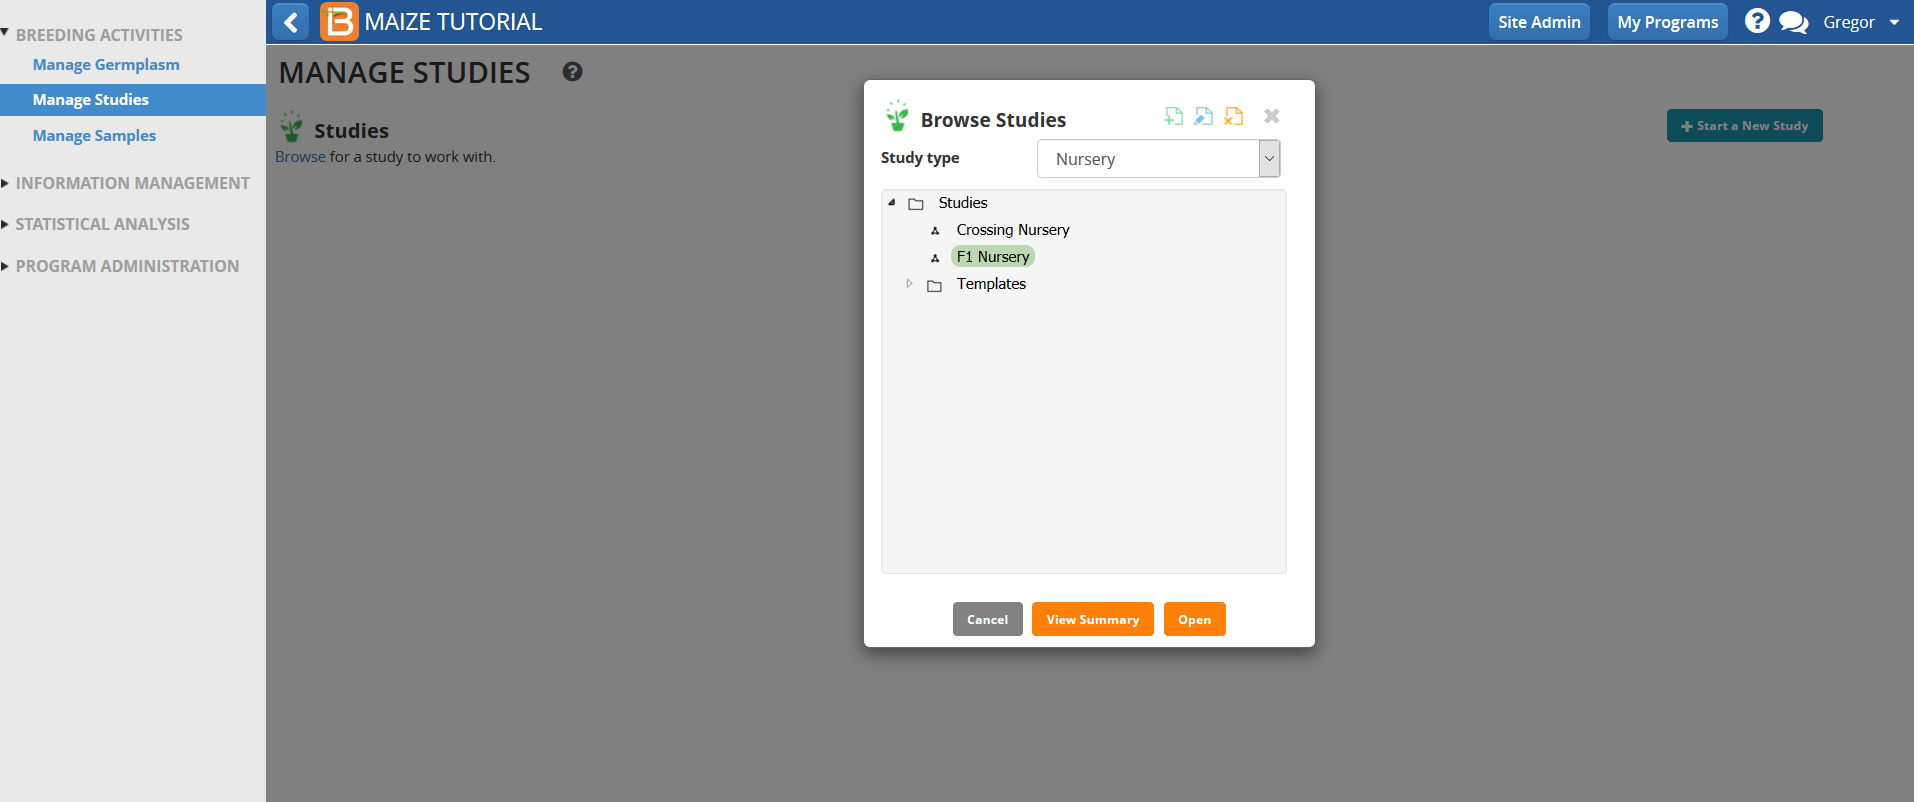
From the Manage Studies tool, browse and open the F1 Nursery.
Random Bulk Advance to F2
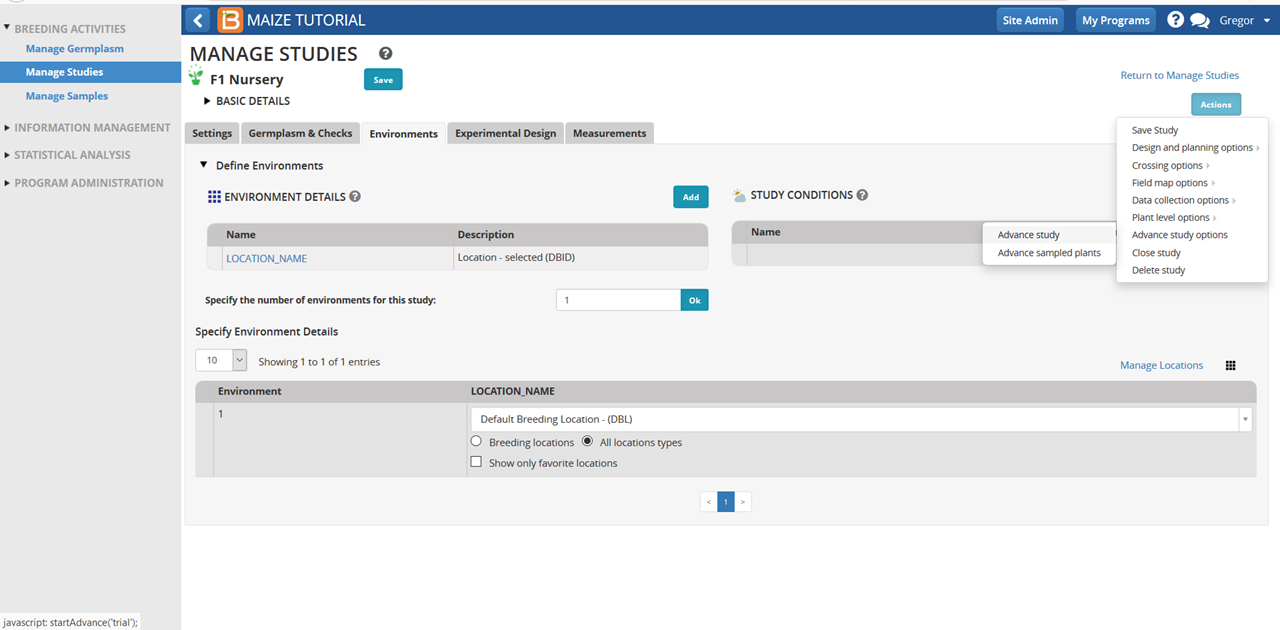
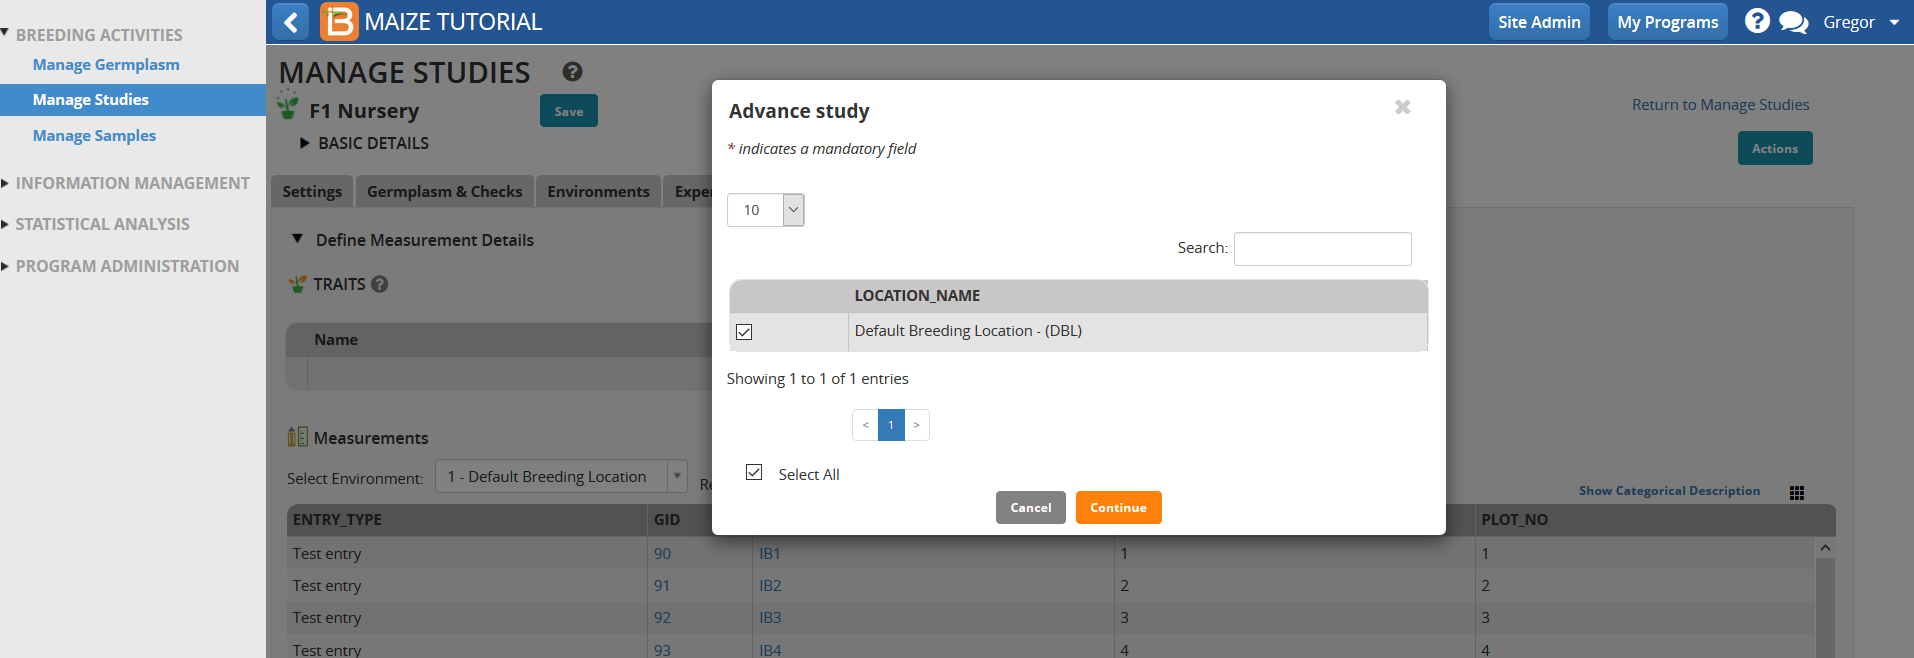
- Select Advance study from the Advance study options in the Actions menu.
- Continue
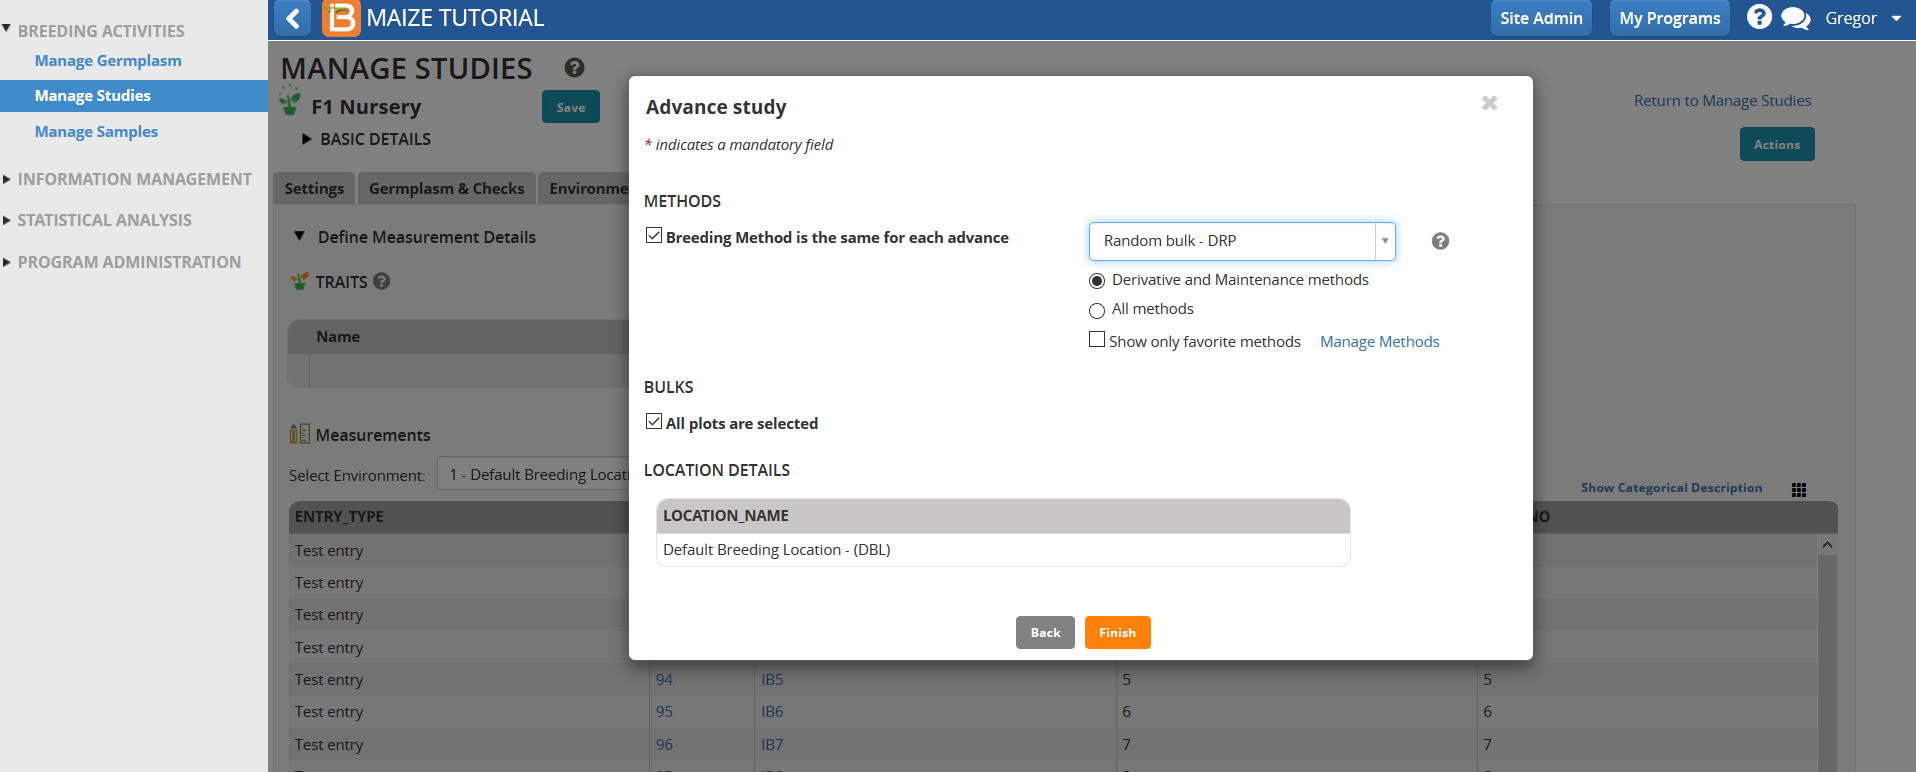
- Choose the random bulk breeding method to produce F2 generation by selfing the F1 population and bulking all seed from each plot. Select Finish.
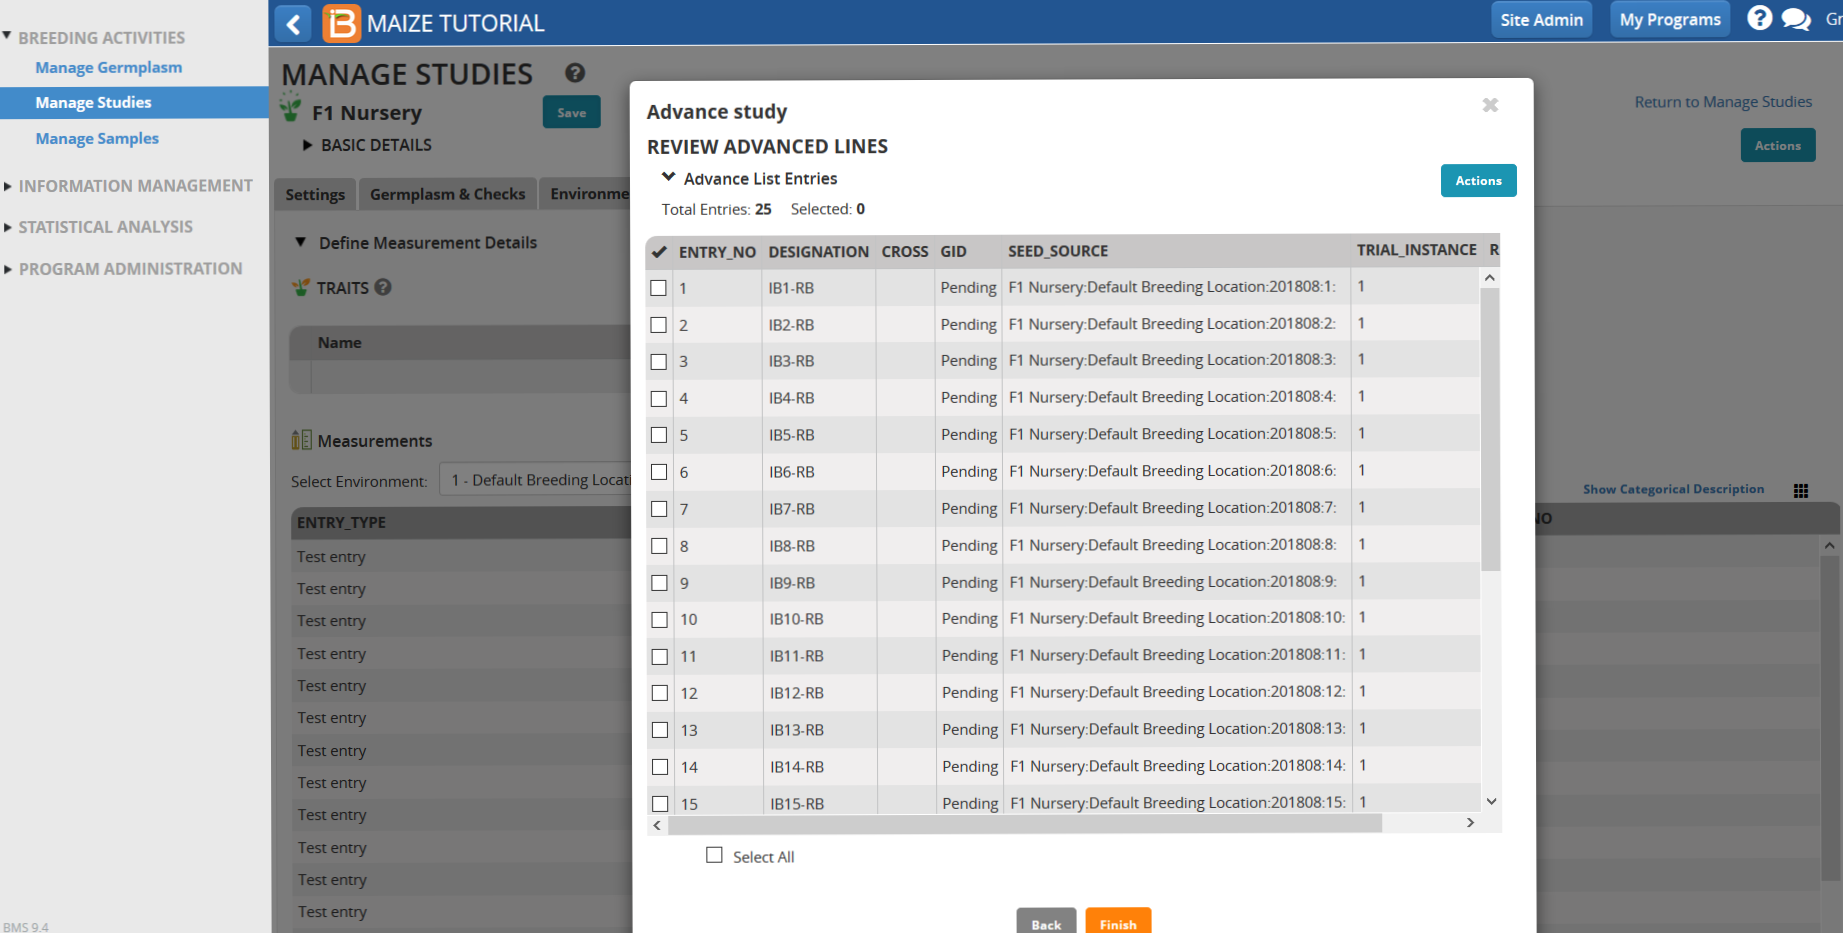
- Review the pending F2 lines and select Finish.
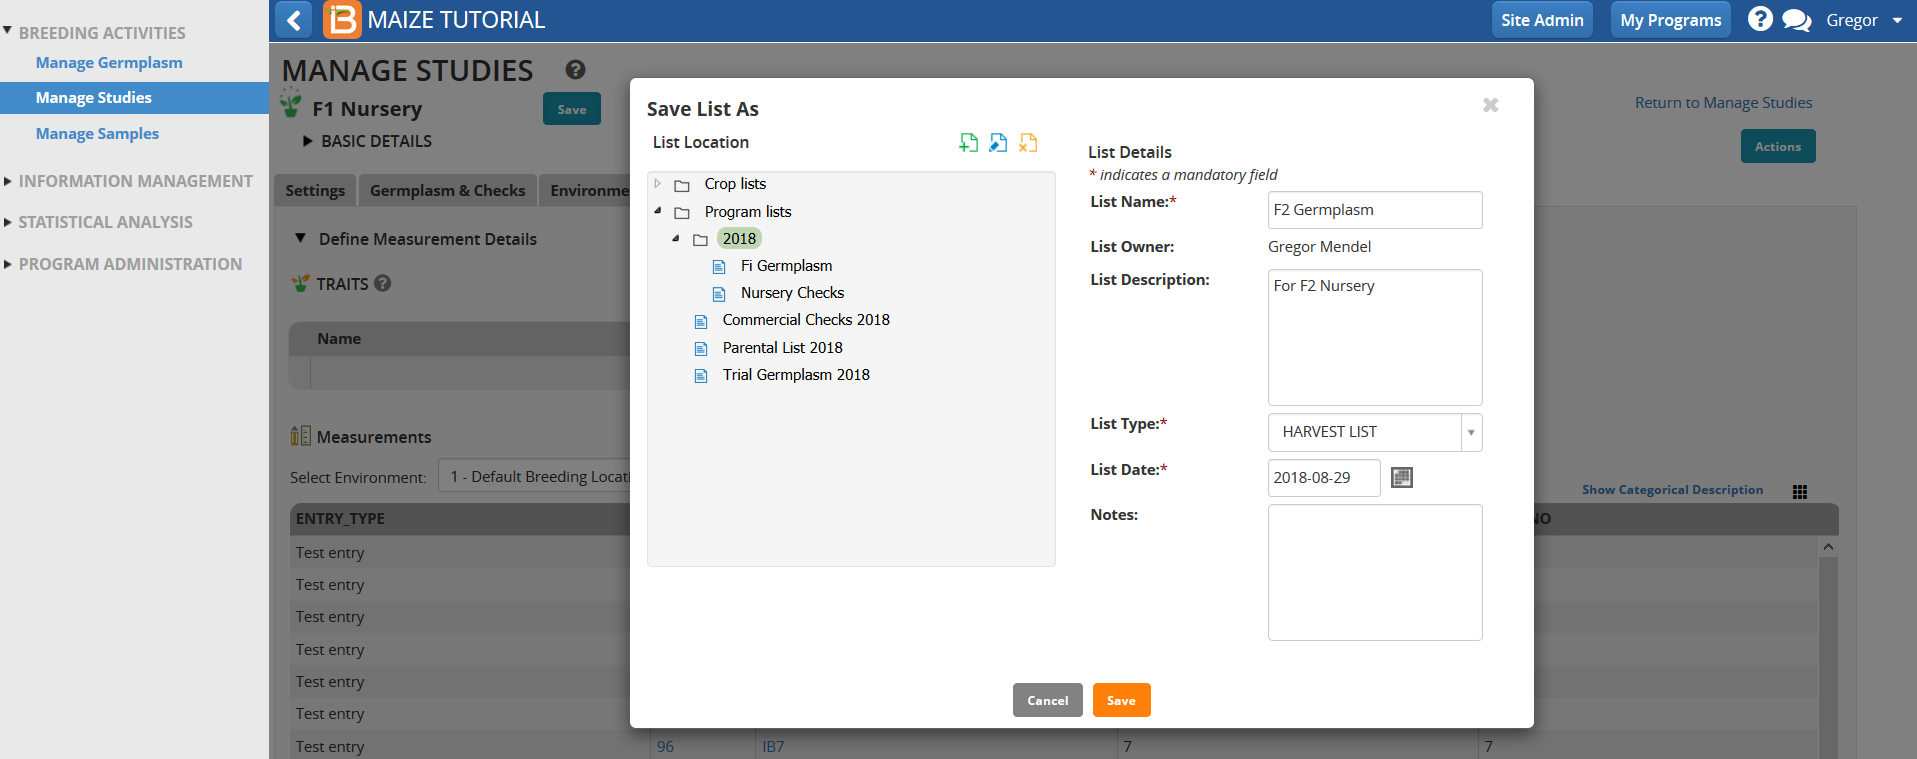
- Name, describe, and save the F2 Germplasm list in the 2018 folder.
Harvest F2 Seed
- Select Generate Stock List to record the amount harvested from Advance List Actions menu.
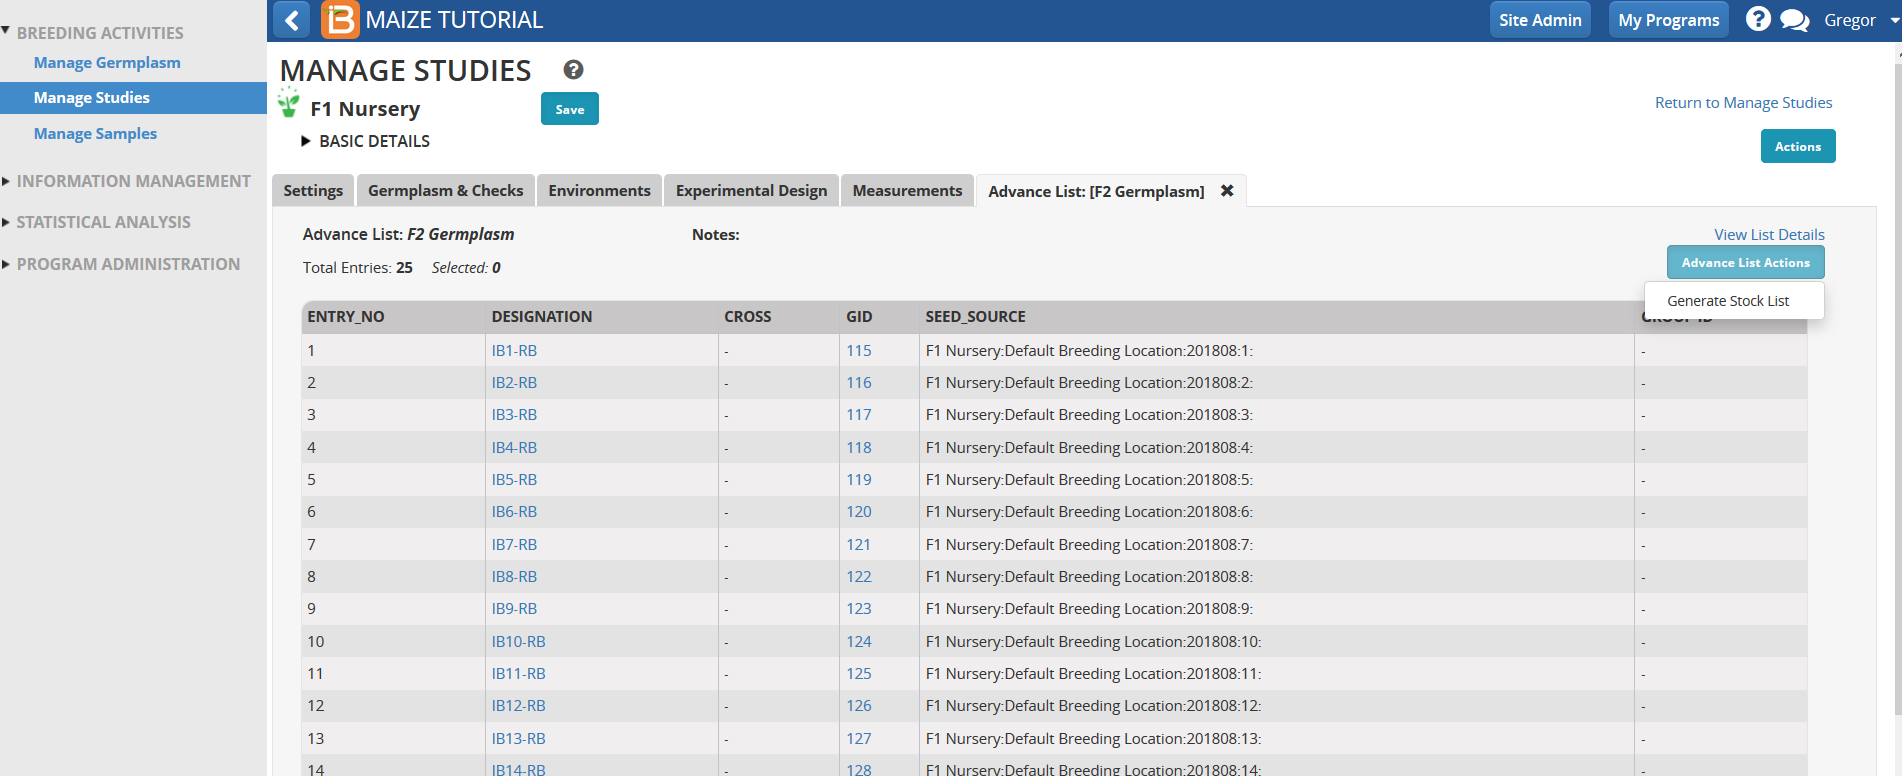
- Continue.

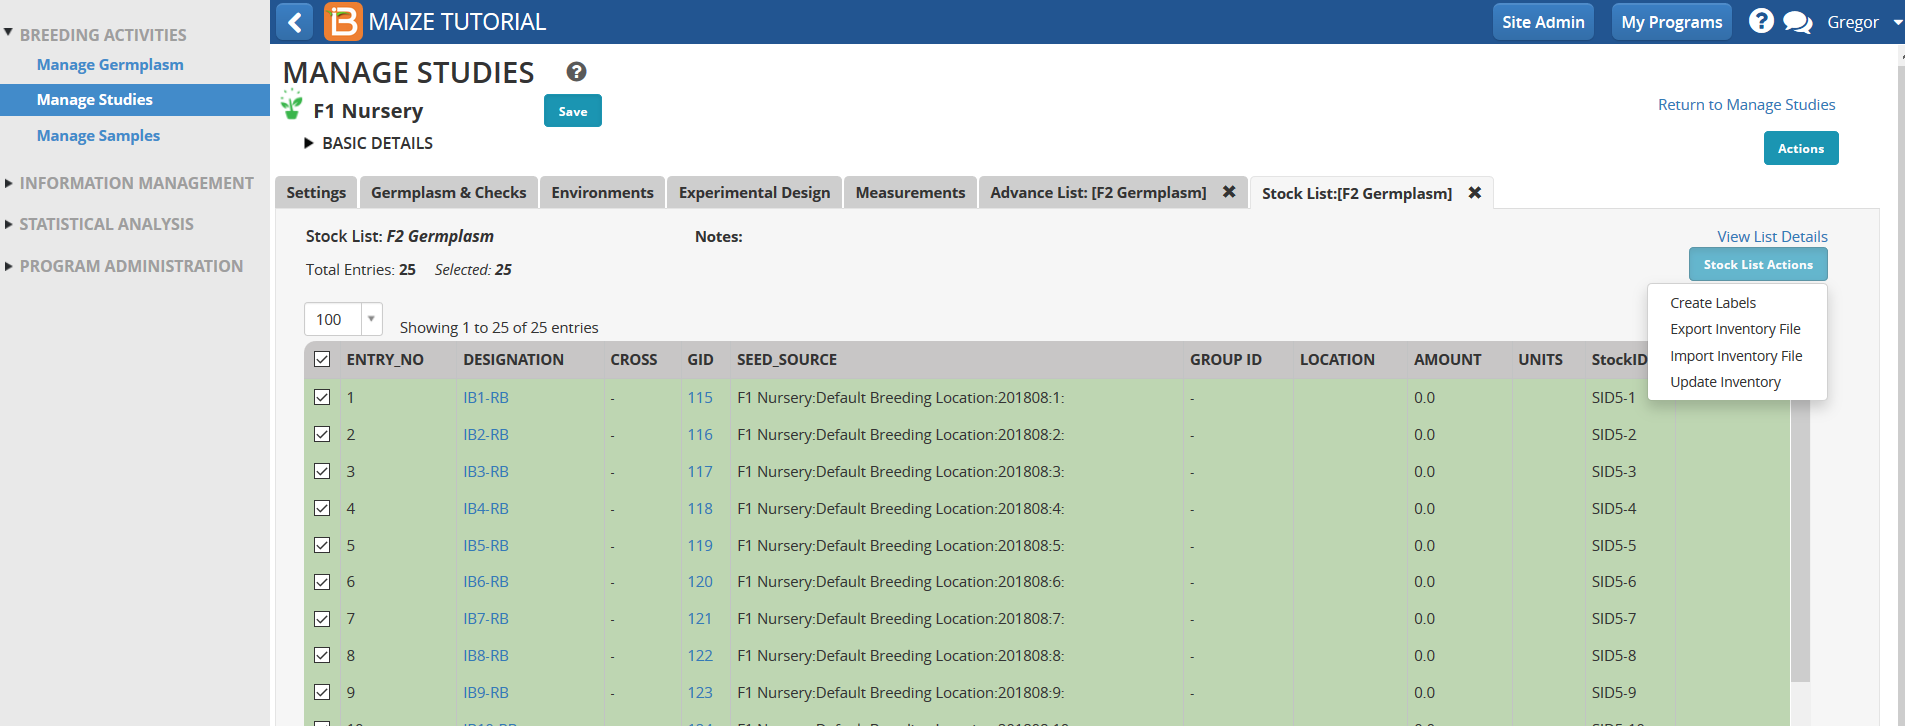
- Highlight all 25 entries and select Update Inventory from the Stock List Actions menu.
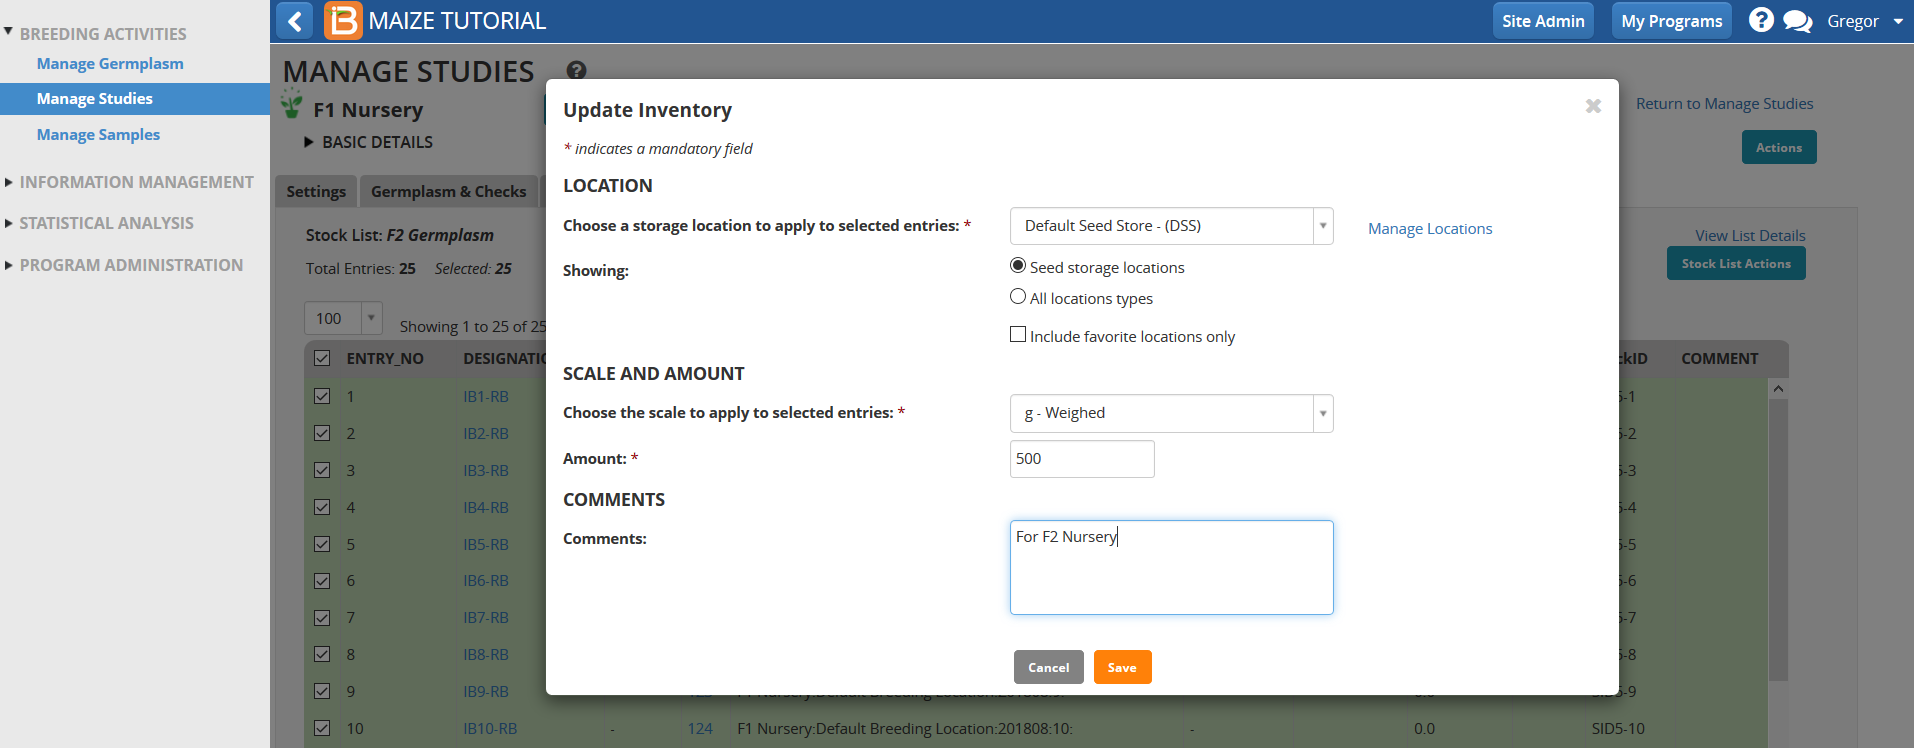
- Choose a seed storage location and g -Weighed as the units of measurement. Enter 500 for the seed amount and Save.
Review Germplasm list with Stock IDs
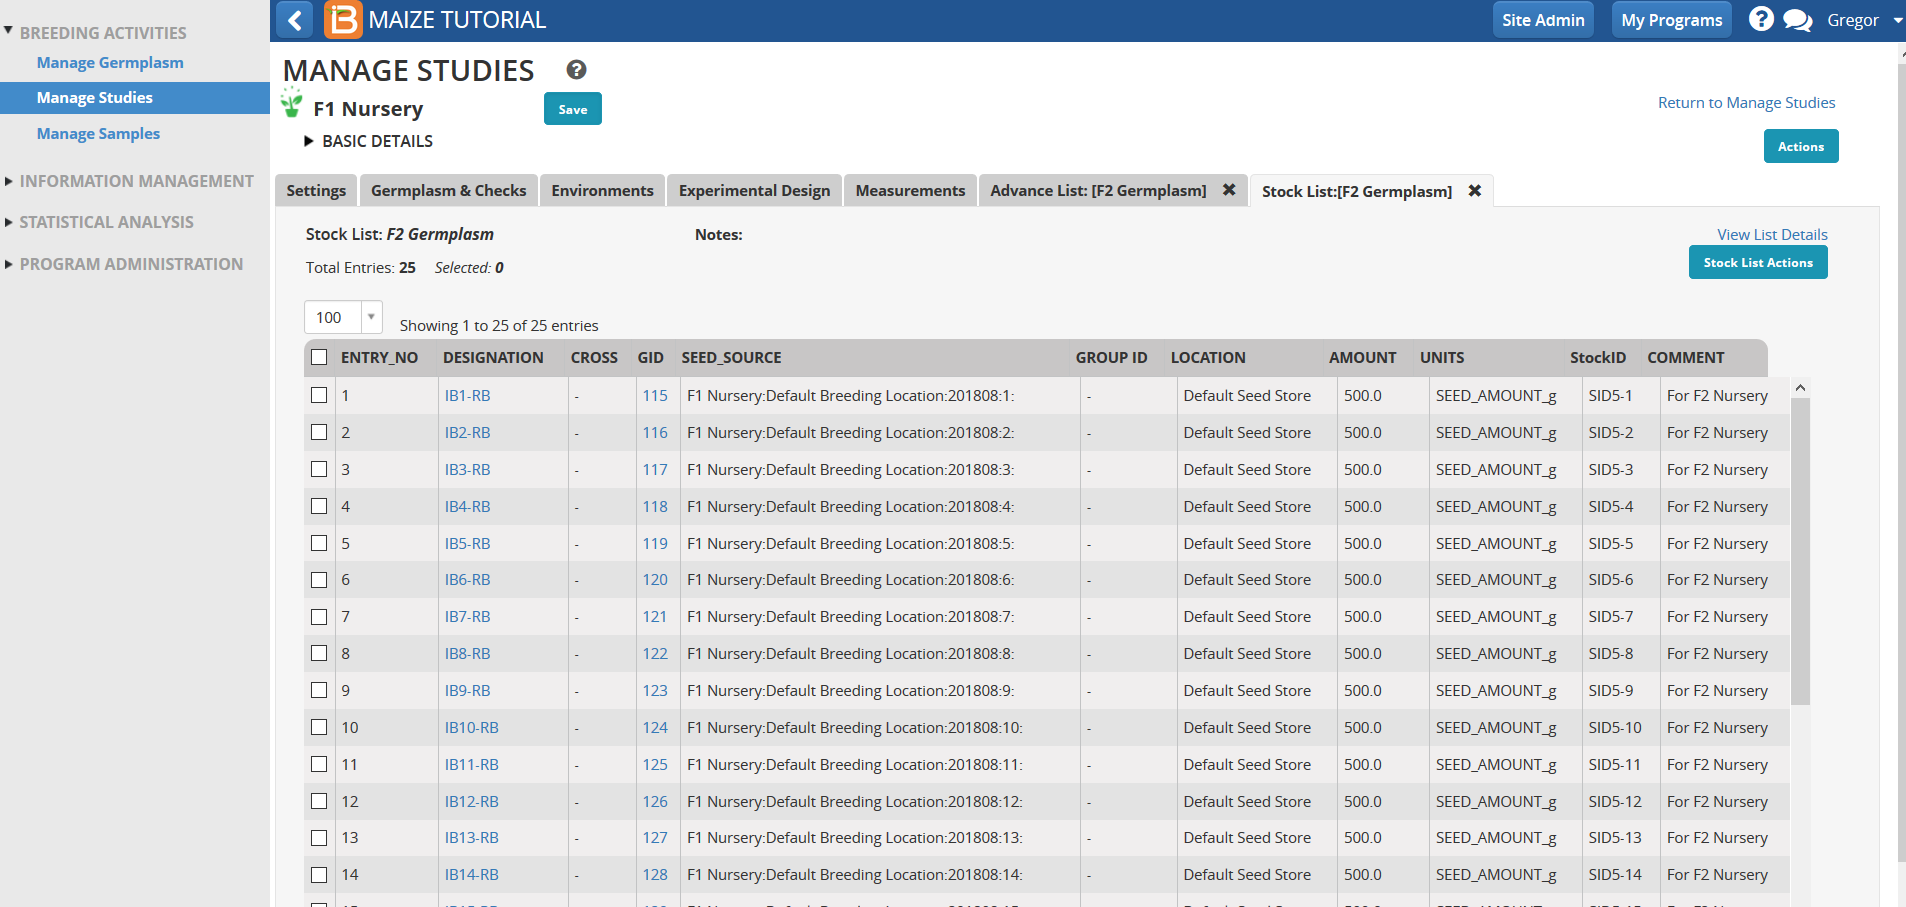
500 grams of seed has now been applied to all 25 F2 germplasm entries.
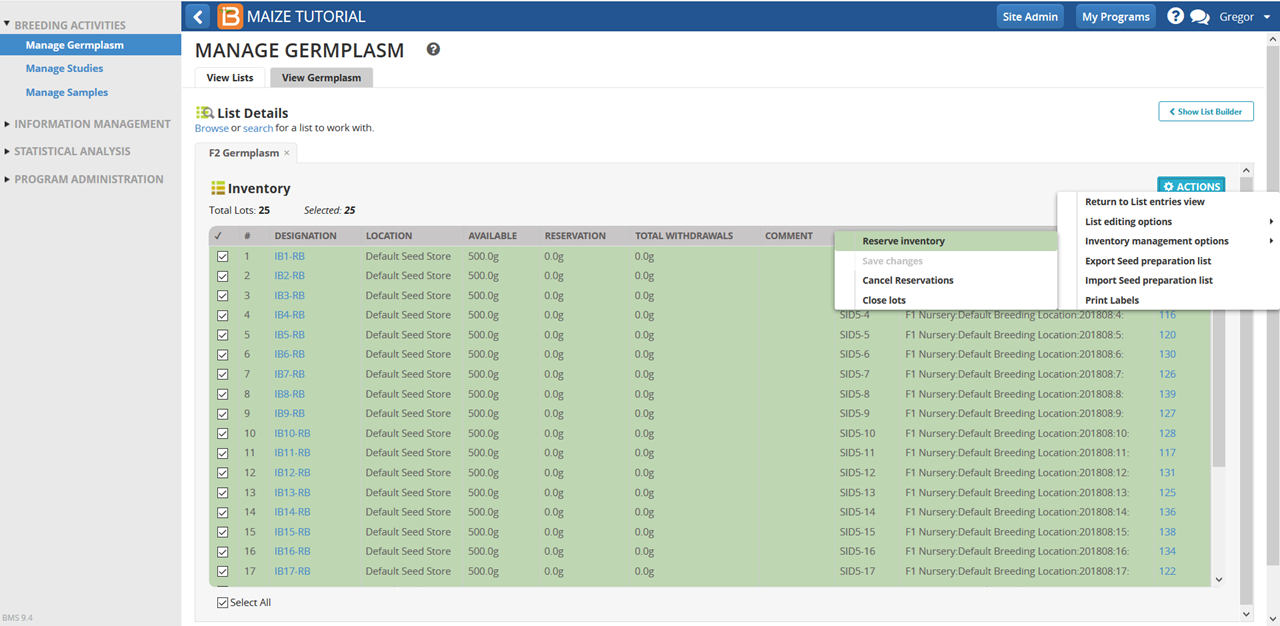
Reserve F2 Seed for F2 Nursery
- Return to Manage Germplasm. Browse and select the F2 Germplasm list. Select Inventory View from the Actions menu. Highlight all entries and select Reserve Inventory from the Inventory Management Option in the Actions menu.
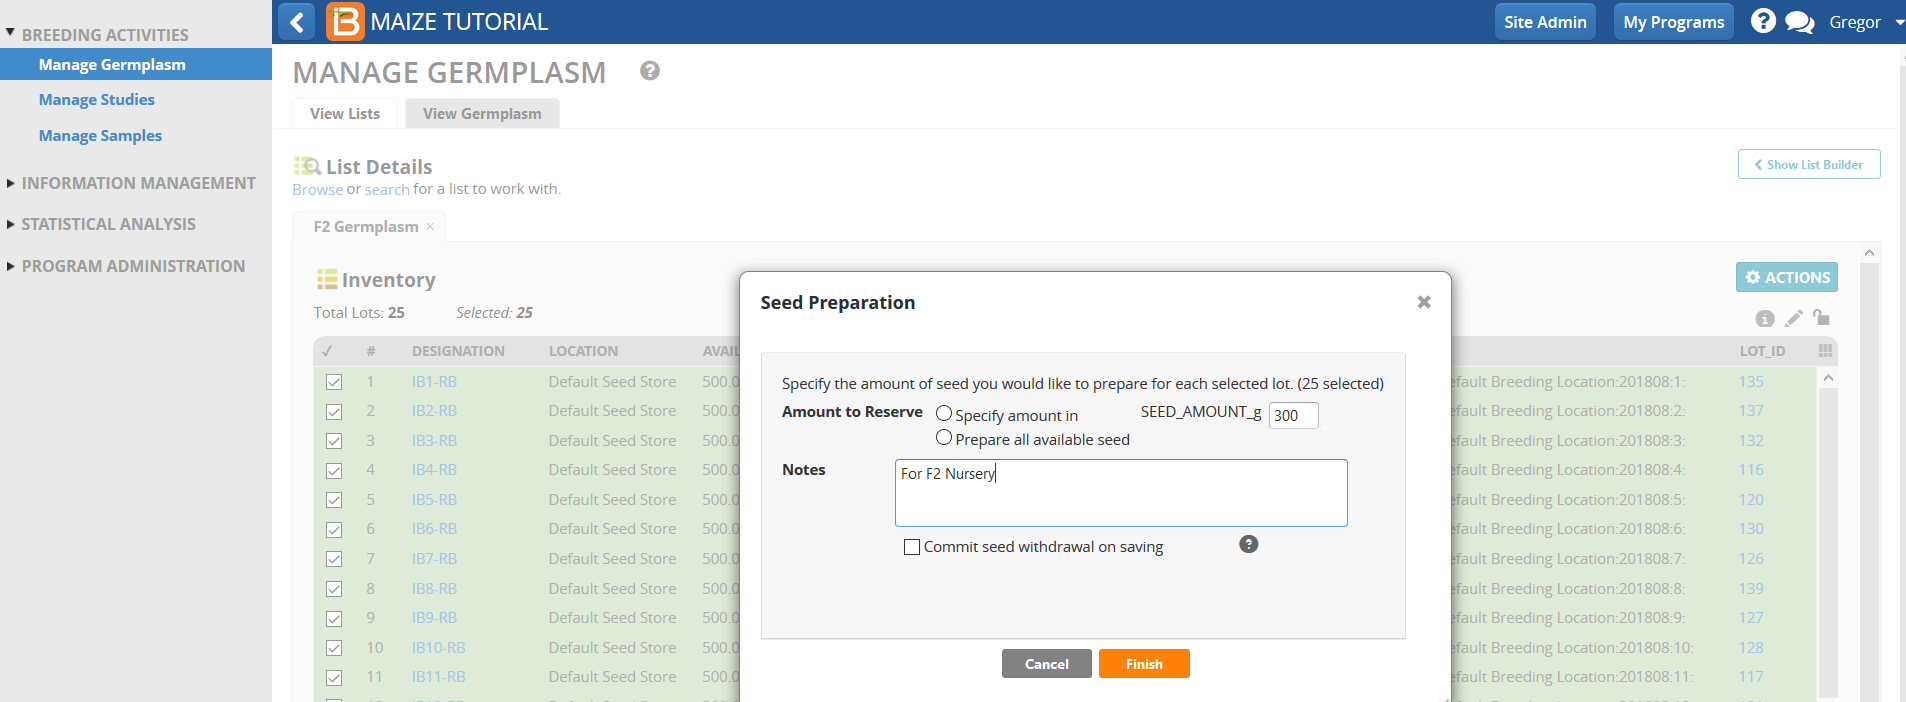
- Specify 300g for each entry for the F2 nursery. Select Finish.
- Save changes under Inventory Management Option.
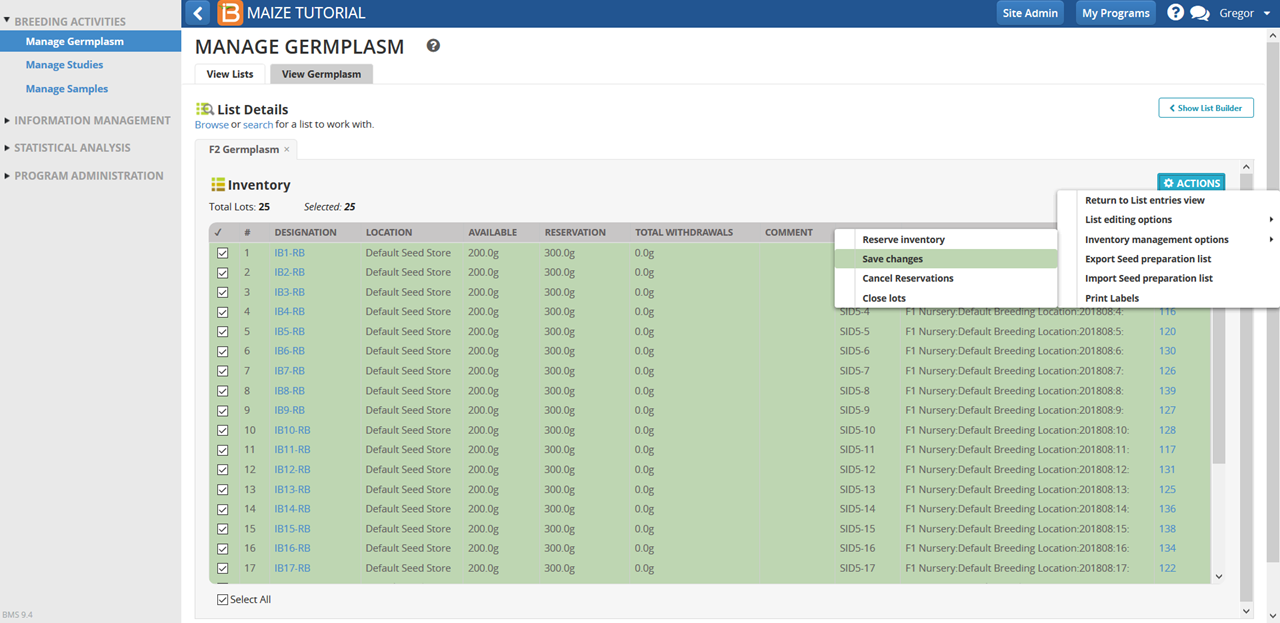
Reserved seed amount is now indicated in the Reservation column. F2 inventory reservations are now ready for planting the F2 nursery.
